How to File Bulk Wage Reports and Bulk Payments in MyUI Employer+
TPAs who have been assigned the Submit Employment and Wage Detail role in their employer client accounts will be able to submit wages for their employer clients. Only TPAs who have been assigned the Edit Tax Payments Update and Submit role will be able to make payments on behalf of employer clients.
How to Submit Bulk Wage Reports
TPAs are able to submit bulk wage reports on behalf of all employer client accounts they are assigned to inside MyUI Employer+.
Wage reports must be submitted by the quarterly deadlines to prevent penalties:
- April 30: Quarter 1 reports are due for wages paid in January, February, March.
- July 31: Quarter 2 reports are due for wages paid in April, May, June.
- October 31: Quarter 3 reports are due for wages paid in July, August, September.
- January 31: Quarter 4 reports are due for wages paid in October, November, December.
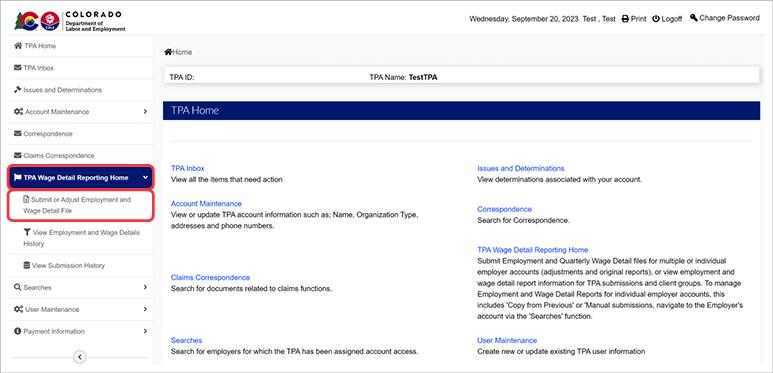
To file bulk wage reports, login to your TPA account and access the TPA Home page.
- Click the “TPA Wage Detail Reporting Home” tab in the left-hand navigation menu.
- Click the ‘Submit or Adjust Employment and Wage Detail File’ subtab.
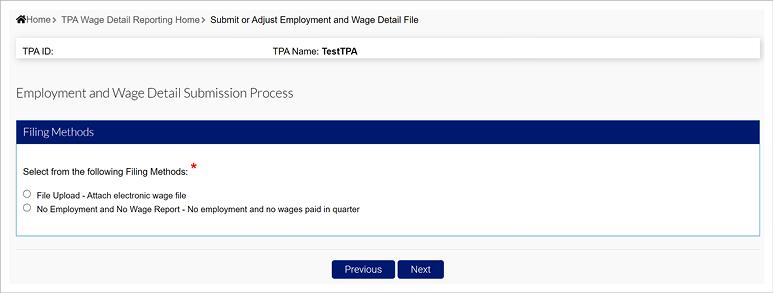
You can submit a bulk wage file or a zero wage report on behalf of all of your clients at once.
- Select “File Upload - Attach electronic wage file” to submit a file.
- Click “Next”.
- Select the file type of the wage report you will upload. There are four eligible file types:
- Delimited format - .txt or .csv file that can be exported from excel. The length of this file will vary and be accepted up to 20MB. Review the Delimited Specification sheet for more information.
- ICESA format - .txt file in the NASWA standard file format. This will be 277 characters long. Review the ICESA Specification sheet for more information.
- EFW2 format - .txt file formally known as MMREF-SSA. This will be 512 characters long. Review the EFW2 Specification sheet for more information.
- XML format - .xml file that will vary in length and be accepted up to 20MB. Review the XML Specification sheet for more information.
The tooltip over each file type includes an editable PDF of the selected file format, as well as a downloadable and editable file template.
The file specifications for bulk and individual submissions are the same. When uploading in bulk, be sure to include the EAN for the proper employer. NOTE: All file types should use the EAN format found on Employer accounts in MyUI Employer+ (example: 01234567).
- Click “Next”.
Files uploaded in MyUI Employer+ will be available immediately after submission, though others may require overnight processing or batching. Any file errors will be immediately identified and reported in the system, prior to accepting the file. The error message displayed will specify the error(s) in the submitted file. Files must be submitted, with no errors, prior to 10 PM MST on the due date.
Note: TPAs reporting files larger than 20mb will need to submit files using a file transfer protocol (FTP) process. If you need support with the FTP process, or nee to be onboarded, please submit a "Contact Us" request inside MyUI Employer+, or contact Employer Services at 303-318-9100.
After submitting the file with multiple EANs listed, you will see the individual employer and wage information you submitted.

You can also submit a zero wage report on behalf of all of your clients at once.
- Select “No Employment and No Wage Report” option to submit a bulk zero wage file.
- Click “Next”.
You will be asked to upload a Delimited file.
- Upload your file.
- Confirm your zero wage submission and click "Submit".
How to Submit a Payment in MyUI Employer+
TPAs assigned to the Edit Tax Payments Update and Submit role in an employer account will be eligible to make payments on behalf of the employer.
- Click the “Payment Information” tab in the left-hand navigation menu.
- Click the “Payment Options” subtab.
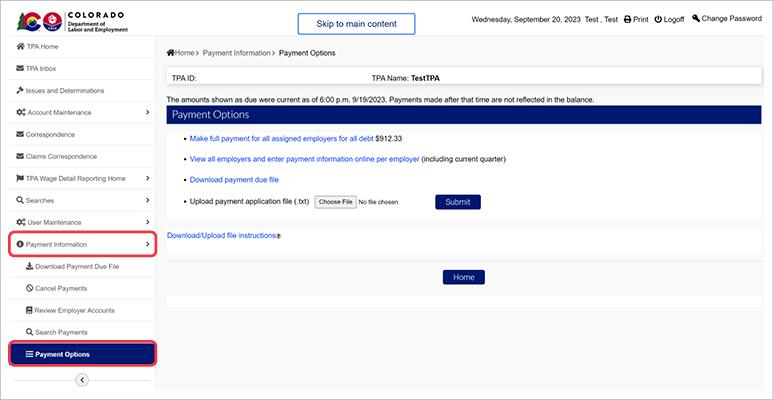
Make a Full Payment
- Select the Make full payment option to make a bulk payment for all assigned employers.
- Click “Next” to continue.
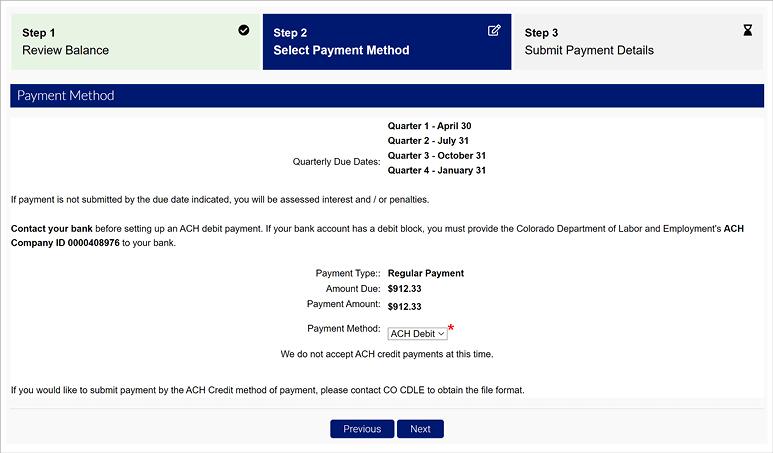
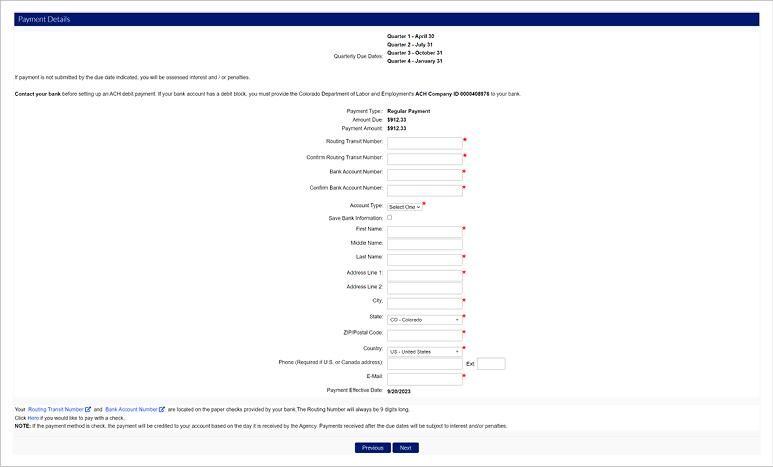
- Select your payment method and click “Next”.
- Note: You cannot enter a payment amount that is more than the amount owed.
- Enter the bank information to make a payment.
- Select “Save Bank Information” to save the entered bank information to your TPA account.
Note that paper check payments will require a paper check voucher. Click the link at the bottom of the screen to access the payment voucher screen, print the voucher and submit the voucher with your payment.
Make Specified Payments
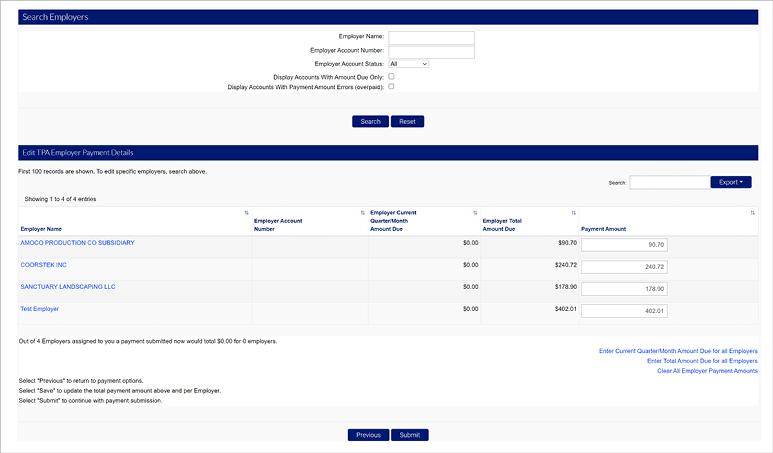
- To edit specific payment amounts per employer, click the View all employers and enter payment information online per employer link on the Payment Options page.
- Enter the payment information per employer and click “Submit”.
- Note: You cannot enter a payment amount that is more than the amount owed.
Download a Payment Due File
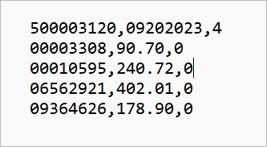
- To download a payment due file, click the Payment due file link on the Payment Options page. Information provided in the payment due file includes:
- TPA ID
- Download Date
- Record Count
- Employer Account Number
- Total Amount Due
- Current Quarter Due
- Update the second value for each record with the correct payment amount to be applied to the associated employer account.
- Change the value to 0 for employers that will not include a payment amount.
- Update the 3rd value in the first line to accurately reflect the record count, if employer records are removed.
Upload and submit the file to enter the payment information and process the employer payments.