How to Register a New UI Employer Account in MyUI Employer+
Colorado employers who do not have an active Unemployment Insurance (UI) employer account will need to register in the new MyUI Employer+ system in order to file wage reports and pay premiums.
To ensure your employer account information is secure, all users are required to register for individual accounts. Employer account administrators will register the UI employer account, then invite users to register, access, and manage the employer account inside MyUI Employer+. This is an added layer of security designed to protect the data submitted and displayed in the online system.
Registering for a MyUI Employer+ employer account requires multiple steps in order to verify the person initiating the registration is the owner/administrator of the employer account. The person registering the UI employer account must be the primary account administrator and trusted to handle sensitive and confidential information.
Account administrators can view all available information in the account, make changes, complete transactions, and enable access to third party administrators and other users of the account.
NOTE: If your business has an active UI employer account you do not need to register a new account. See Activating My Employer Account in MyUI Employer+ to activate your existing account.
Step 1. Create a User Login
To create a new UI employer account in MyUI Employer+, you will need to create a user login.
- Navigate to the ‘Create an Employer User Account’ page.
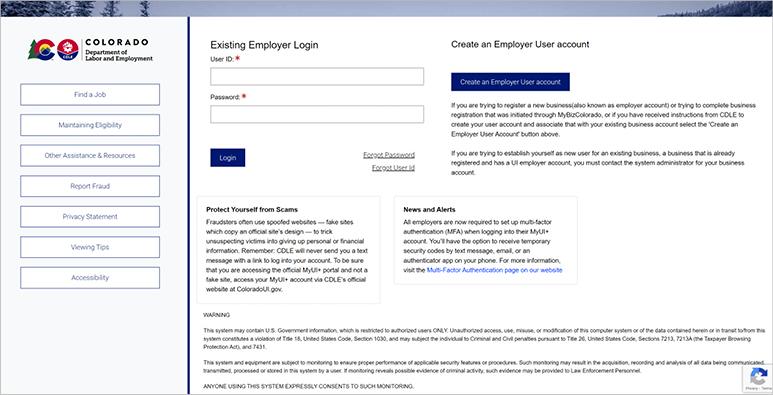
- Enter the required information in the provided fields.
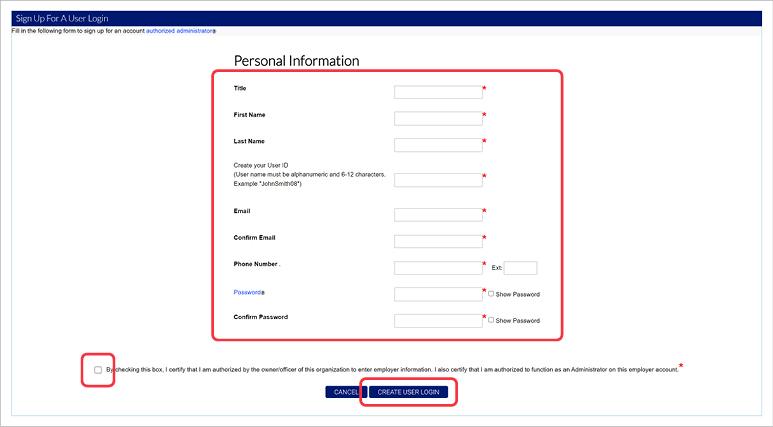
- Select the check box to authorize the information you provided, and click ‘CREATE USER LOGIN’.
An email containing a verification link will be sent to the email address you provided.
NOTE: The email verification link will expire after 72 hours.
- Click the verification link in your email to return to MyUI Employer+.
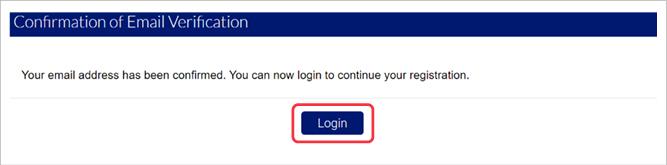
- Enter the User ID and Password you created and click ‘Login’ to continue.
Step 2. Set Up Multi-Factor Authentication
You will be required to set up Multi-Factor Authentication (MFA) to access your MyUI Employer+ account. MFA adds an extra layer of security when signing into your account. Each time you login to your account you will receive a temporary security code via text message, email, or authenticator app to access your account. This extra step enhances the security of your personal data and prevents unauthorized access to your account.
- Select your preferred method (authenticator app, text, or email) to receive temporary codes and click ‘Start Setup’.

NOTE: If you select the authenticator app as your preferred method you will be instructed to install an authenticator app on your mobile device, add your MyUI Employer+ account to the app, and then enter the verification code you receive into the required field. If you select to receive codes via text or email, you will skip this step.
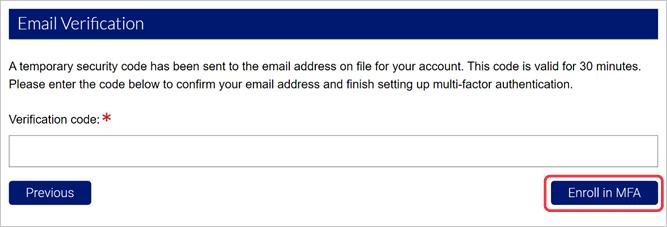
- Enter the verification code you receive in the field provided and click ‘Enroll in MFA’ to continue.
Step 3. Register Your Account
3.1. Introduction
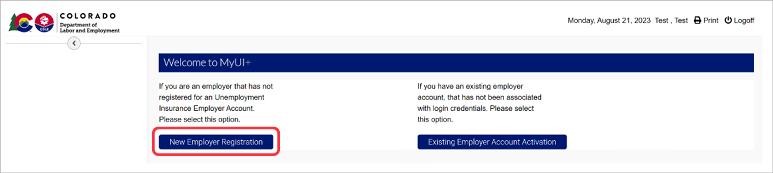
- Click ‘New Employer Registration’ on the welcome page.
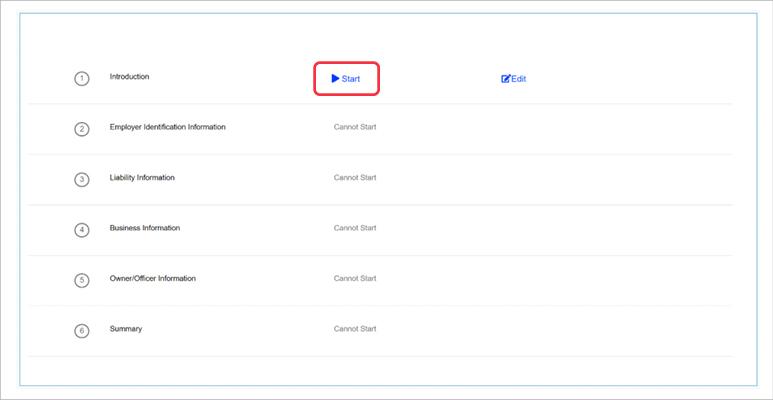
- From the Registration Status page, click ‘Start’ next to the Introduction section.
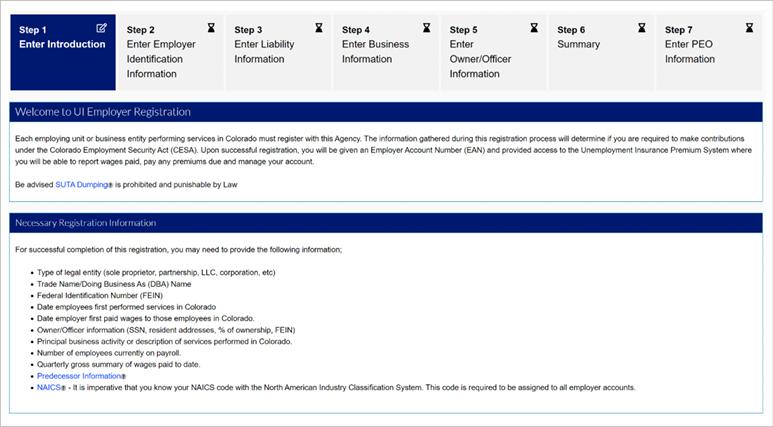
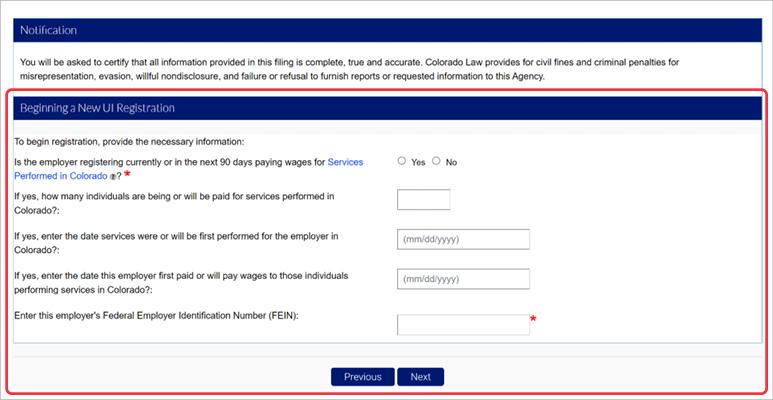
The Introduction screen provides information related to registration requirements and Colorado Law, and a list of the required information you will need to submit in order to register your UI employer account.
- Complete the Beginning New UI Registration section by entering the required information in the provided fields and click ‘Next’ to return to the status screen.
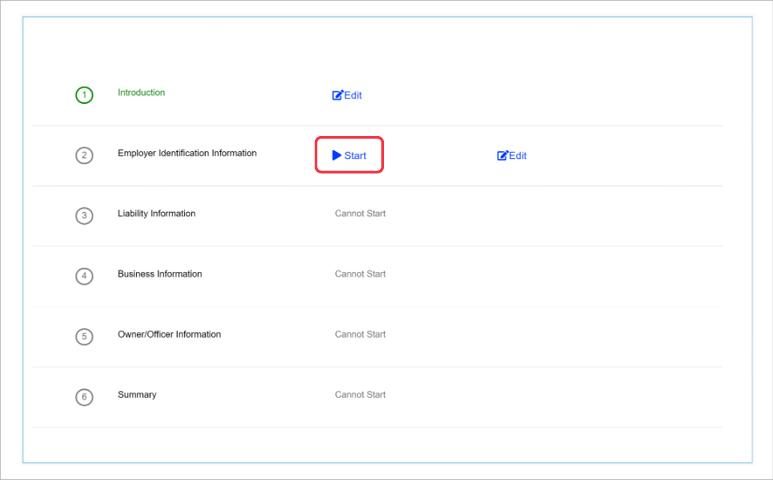
3.2. Employer Identification Information
- Click ‘Start’ next to the Employer Identification Information section.
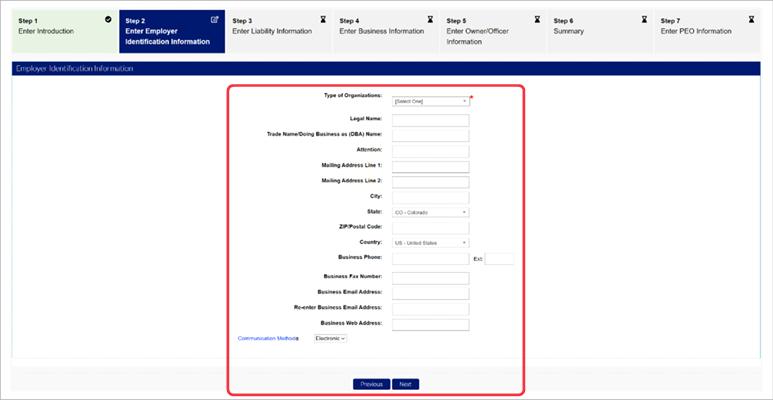
- Complete the required fields in the Employer Identification Information section.
- NOTE: Additional information may be required depending on the information you provide.
- Select your preferred method of communication.
- NOTE: In order to submit paper filings by mail, employers must apply for a non-electronic communications waiver.
- Click ‘Next’ to return to the status screen.
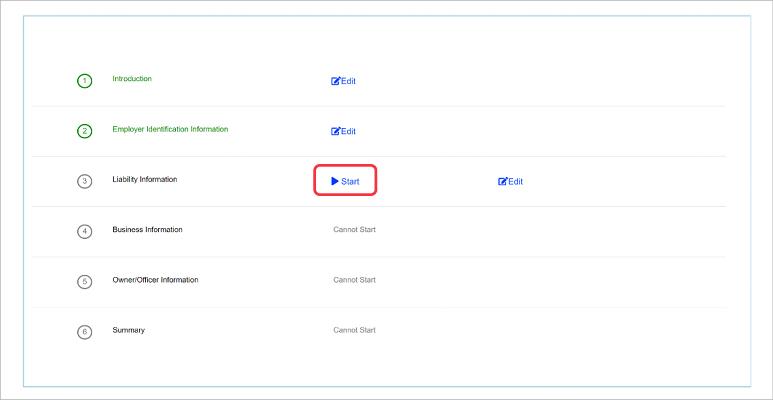
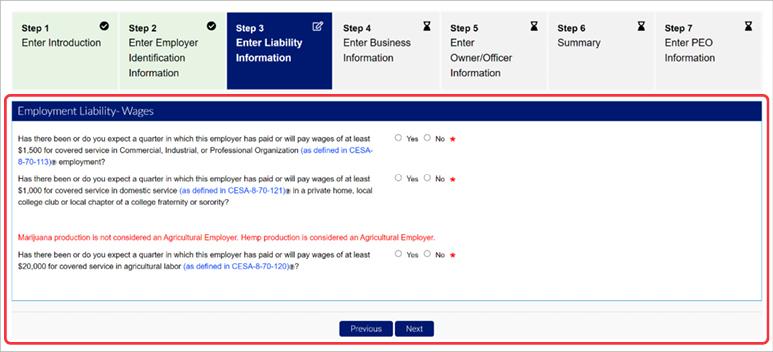
3.3. Liability Information
- Click ‘Start’ next to the Liability Information section.
- Enter the required employment liability wages information in the fields provided.
- Click ‘Next’ to return to the status screen.
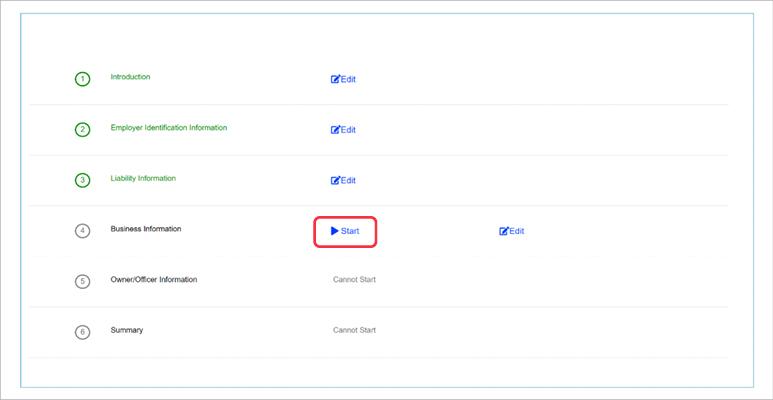
3.4. Business Information
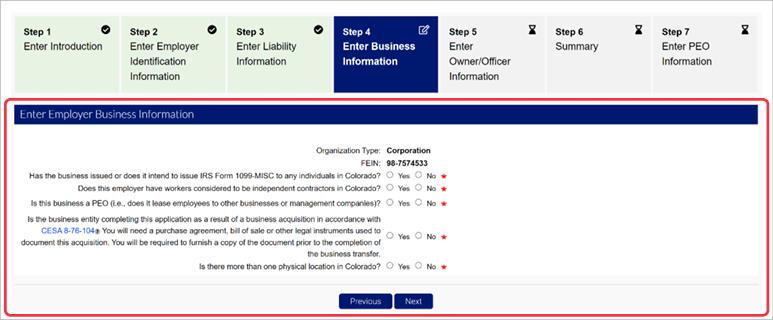
- Click ‘Start’ next to the Business Information section.
- Answer the required questions.
- NOTE: Depending on the answers you provide, you may be redirected to additional screens within the system to provide additional information. For Example, if the business is a professional employer organization (PEO), you will be required to provide additional information.
- Click ‘Next’ to continue.
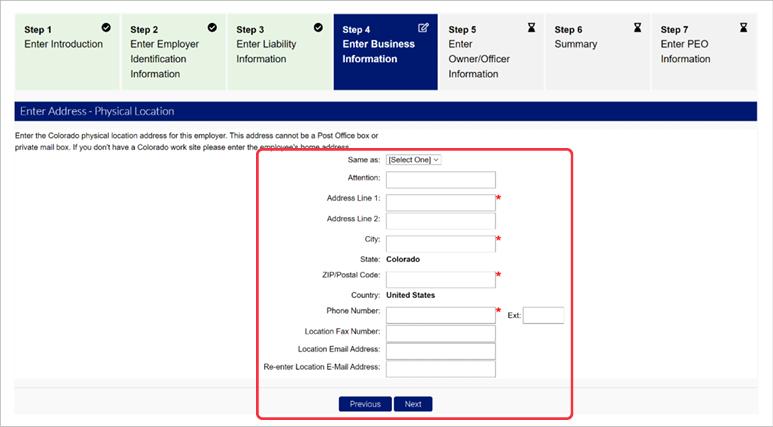
- Enter the physical address for the business.
- Physical addresses cannot be a Post Office box or private residence.
- Click ‘Next’, and enter the business records address.
- NOTE: Physical address and business records address may be assigned “same as” and auto-populated.
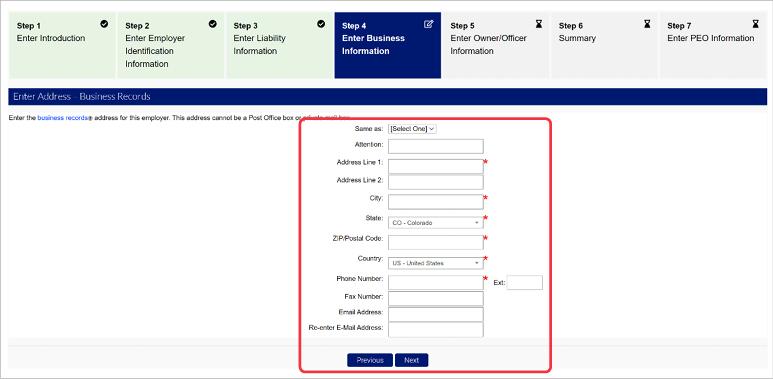
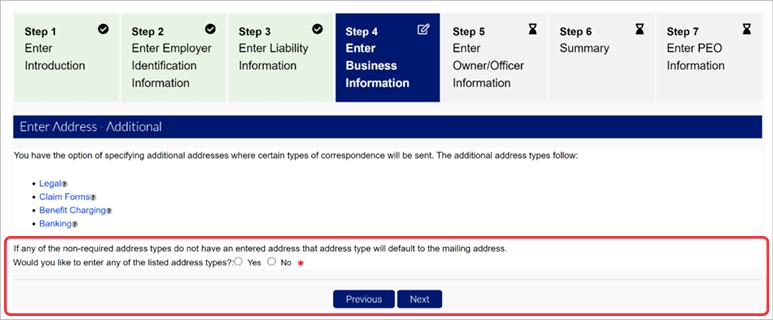
Employers also have the option to add additional addresses to the account. Click the tooltip for each address type to view more specific information.
- Click ‘Next’ to continue.
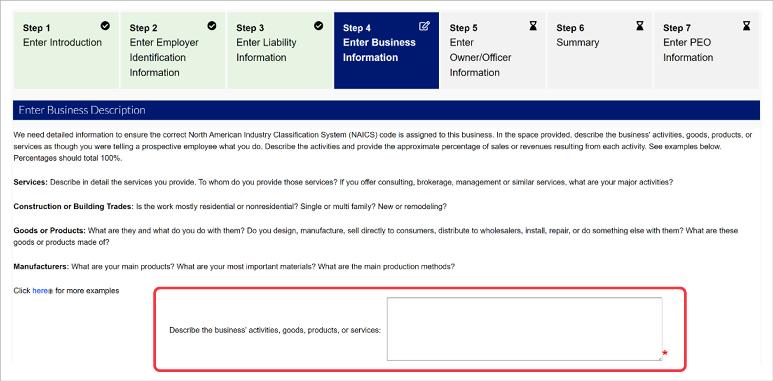
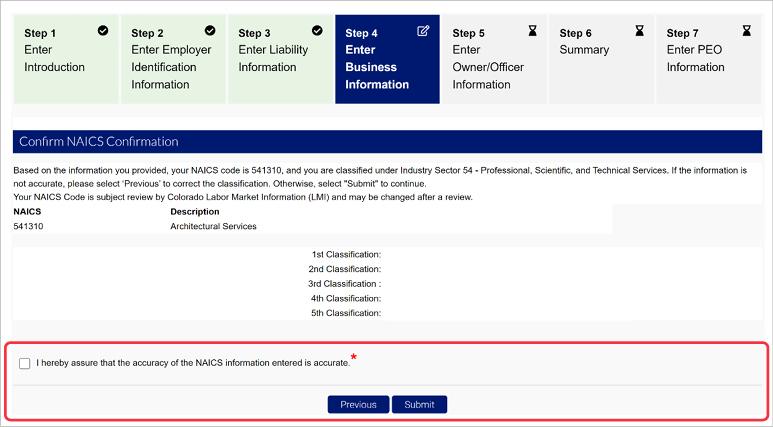
- Enter a business description.
- Select the North American Industry Classification System (NAICS) classification.
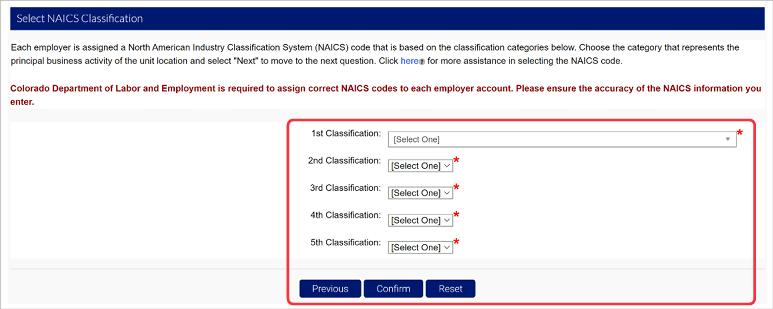
- Select the checkbox to verify the NAICS information provided is accurate.
- Click ‘Submit’ to return to the status screen.
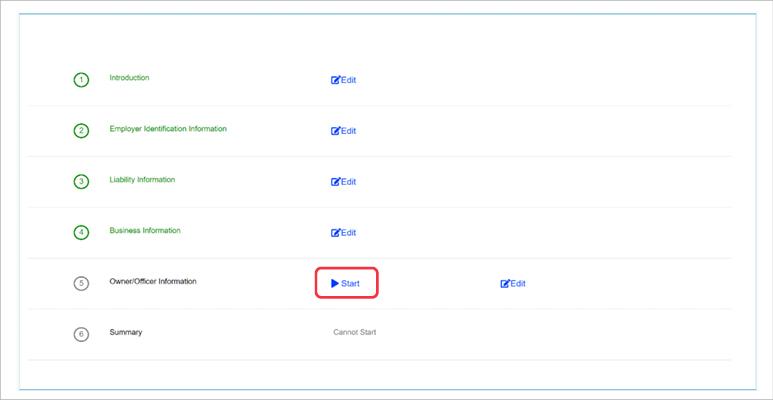
3.5. Owner/Officer Information
- Click ‘Start’ next to the Owner/Officer Information section.
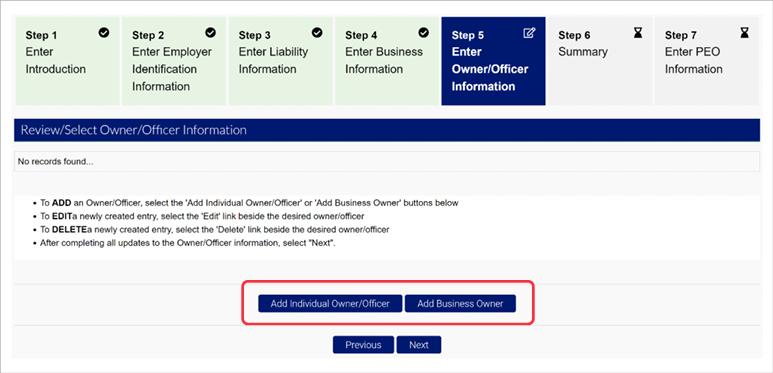
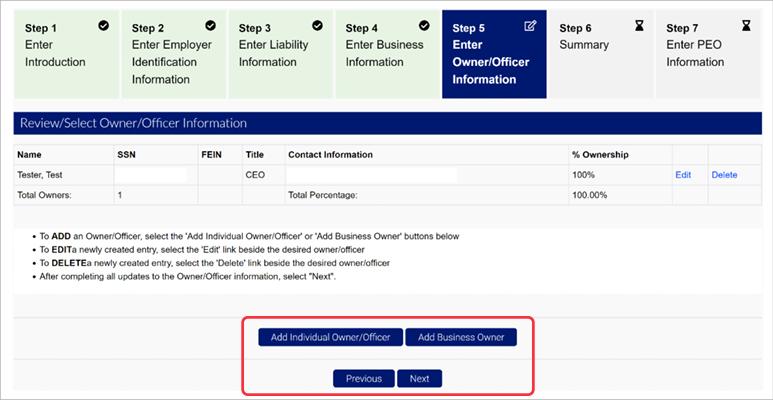
You will be required to add an Individual Owner/Officer to proceed with the registration process. The total ownership must equal 100% to close out the Owner/Officer information section. Multiple Owner/Officers or Business Owners can be added.
- Click ‘Add Individual Owner/Officer’ to add an individual owner. Click ‘Add Business Owner’ to add a legal entity owner.
- Enter the required information in the fields provided.
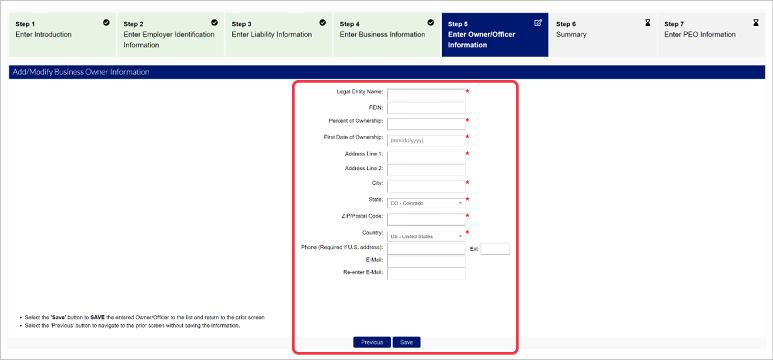
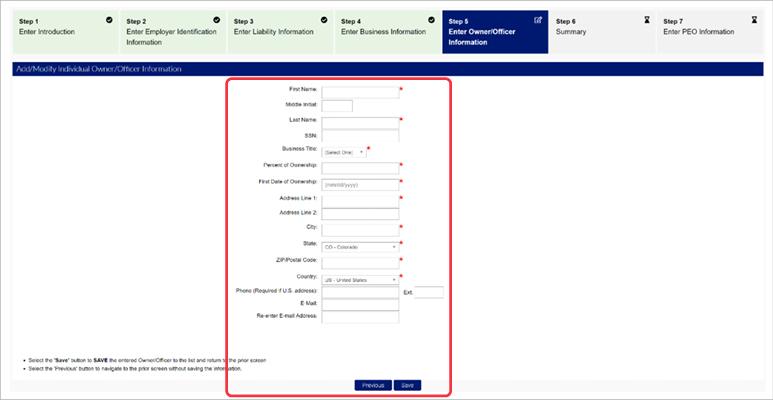
- Click ‘Save’.
If the total ownership percentage is less than 100%, add an additional Owner/Officer or Business Owner.
- Click ‘Next’ to return to the registration status screen.
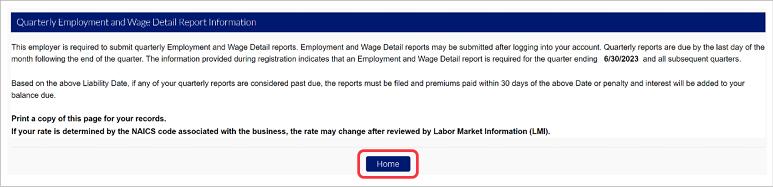
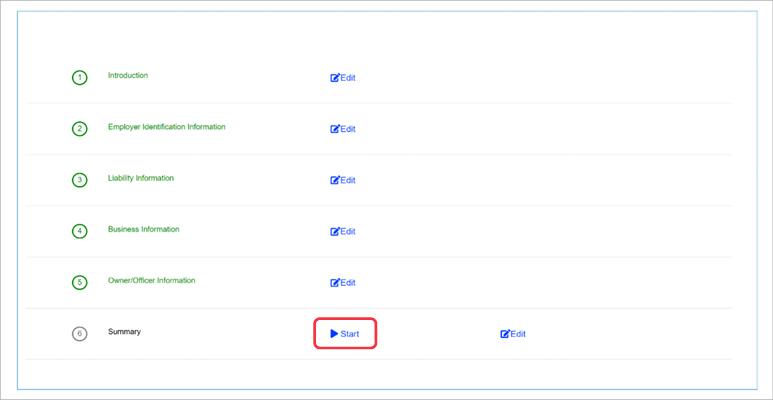
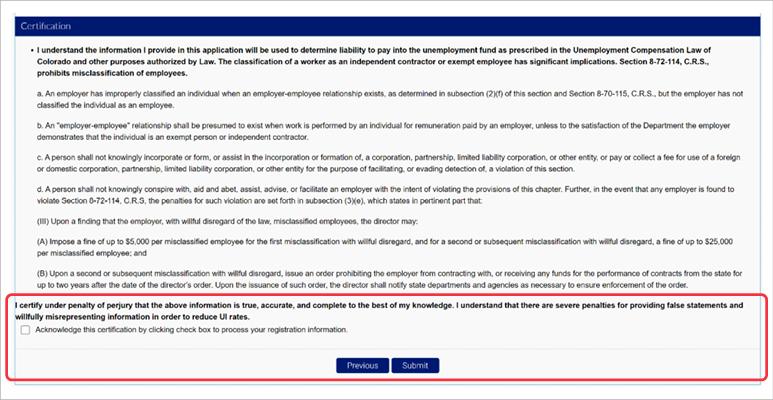
3.6. Summary
- Click ‘Start’ next to the Summary section.
The Summary screen contains all the information you provided during the registration process. Review the information provided. If you wish to edit your information, click ‘Previous’ to return to the registration status screen, and click the edit link next to the section you wish to edit.
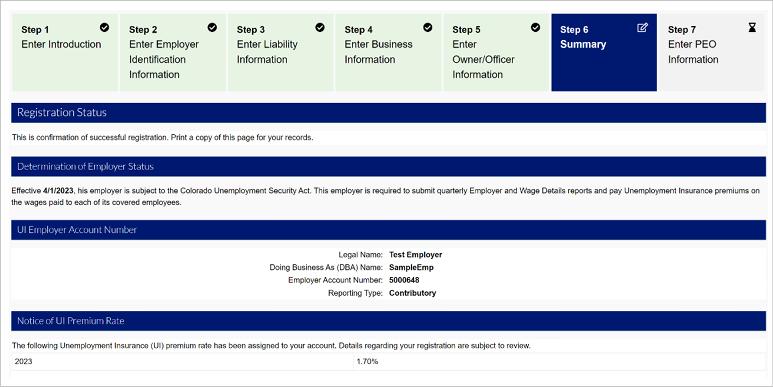
- Select the acknowledgment checkbox and click ‘Submit’ to complete your registration.
Step 4. Access Your New Employer Account
Once your account registration is submitted, you may access your MyUI Employer+ account, or you will be notified that your application is pending staff review.
- Click ‘Home’ to enter the Employer Homepage and manage your new UI employer account inside MyUI Employer+.