Applying for the Work-Share Program
The Work-Share Program (CESA 8-75-201 through 8-75-208) offers employers an alternative to laying off employees. The program allows employees to keep working for employers, though with fewer hours. While employees are working fewer hours, they are eligible to collect part of their regular unemployment benefits.
Employers determine how many hours the employer can continue to pay, and employees share those hours as part of the work-share plan. All employees can be in the Work-Share Program, or employees from a certain unit can be in the program.
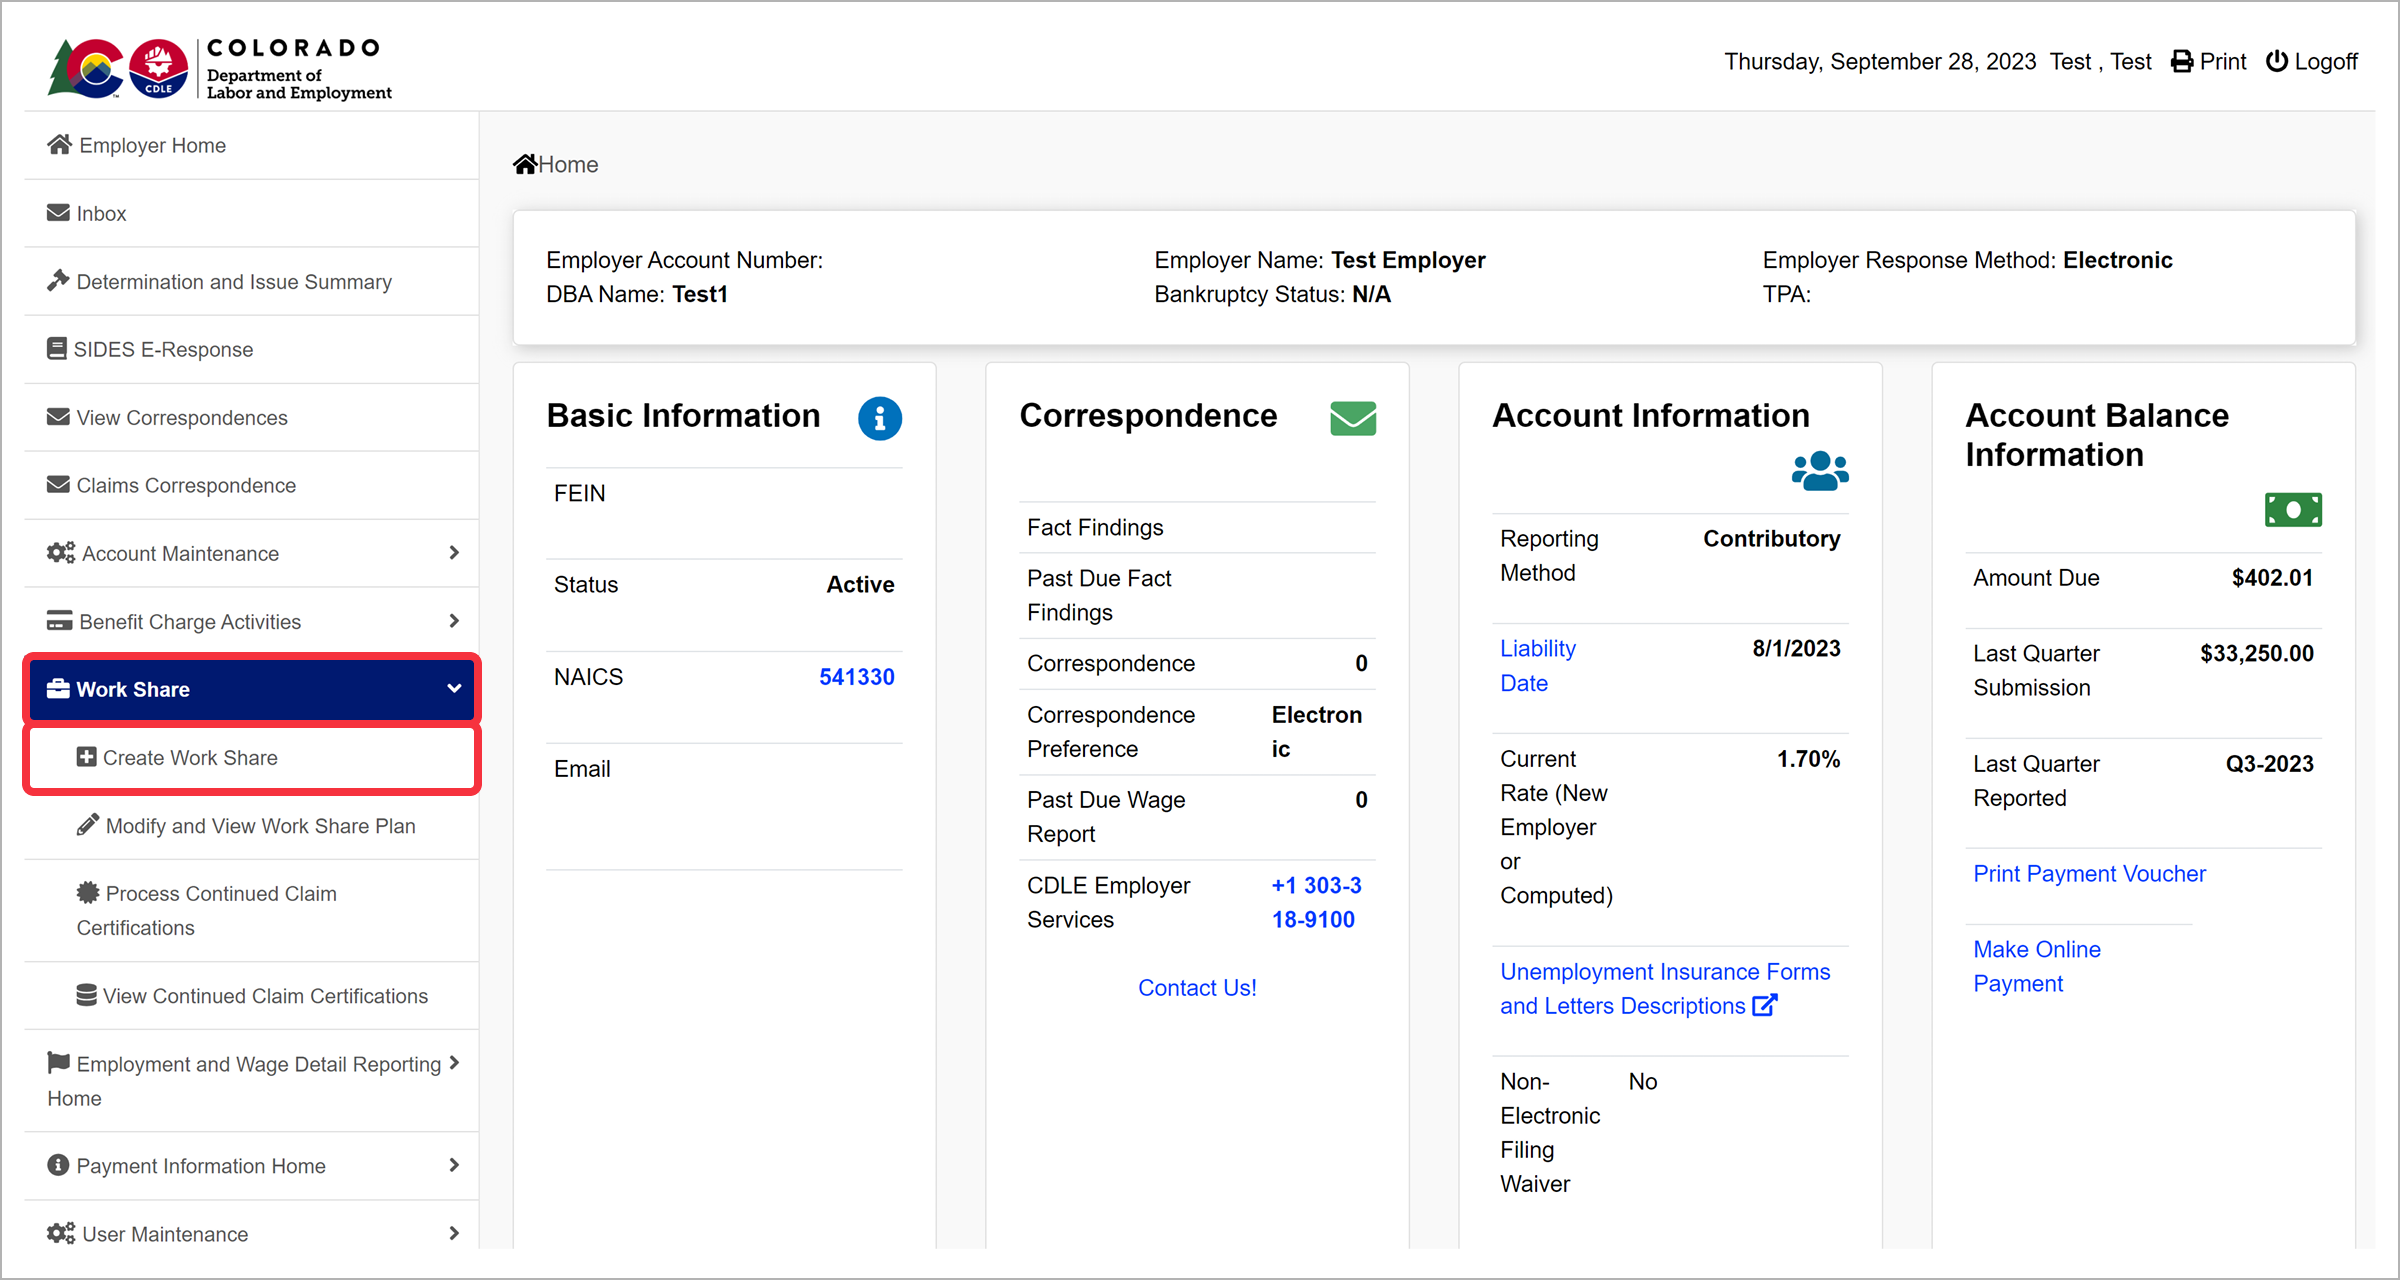
To apply for the Work-Share program, login to your MyUI Employer+ account.
Click the “Work Share” tab in the left-hand navigation menu. Click the “Create Work Share” subtab.
Read the Work Share Plan Information to learn more about the program. The link to the Additional information about Work Share Plans will take you to the Layoff Alternatives page on CDLE’s website.
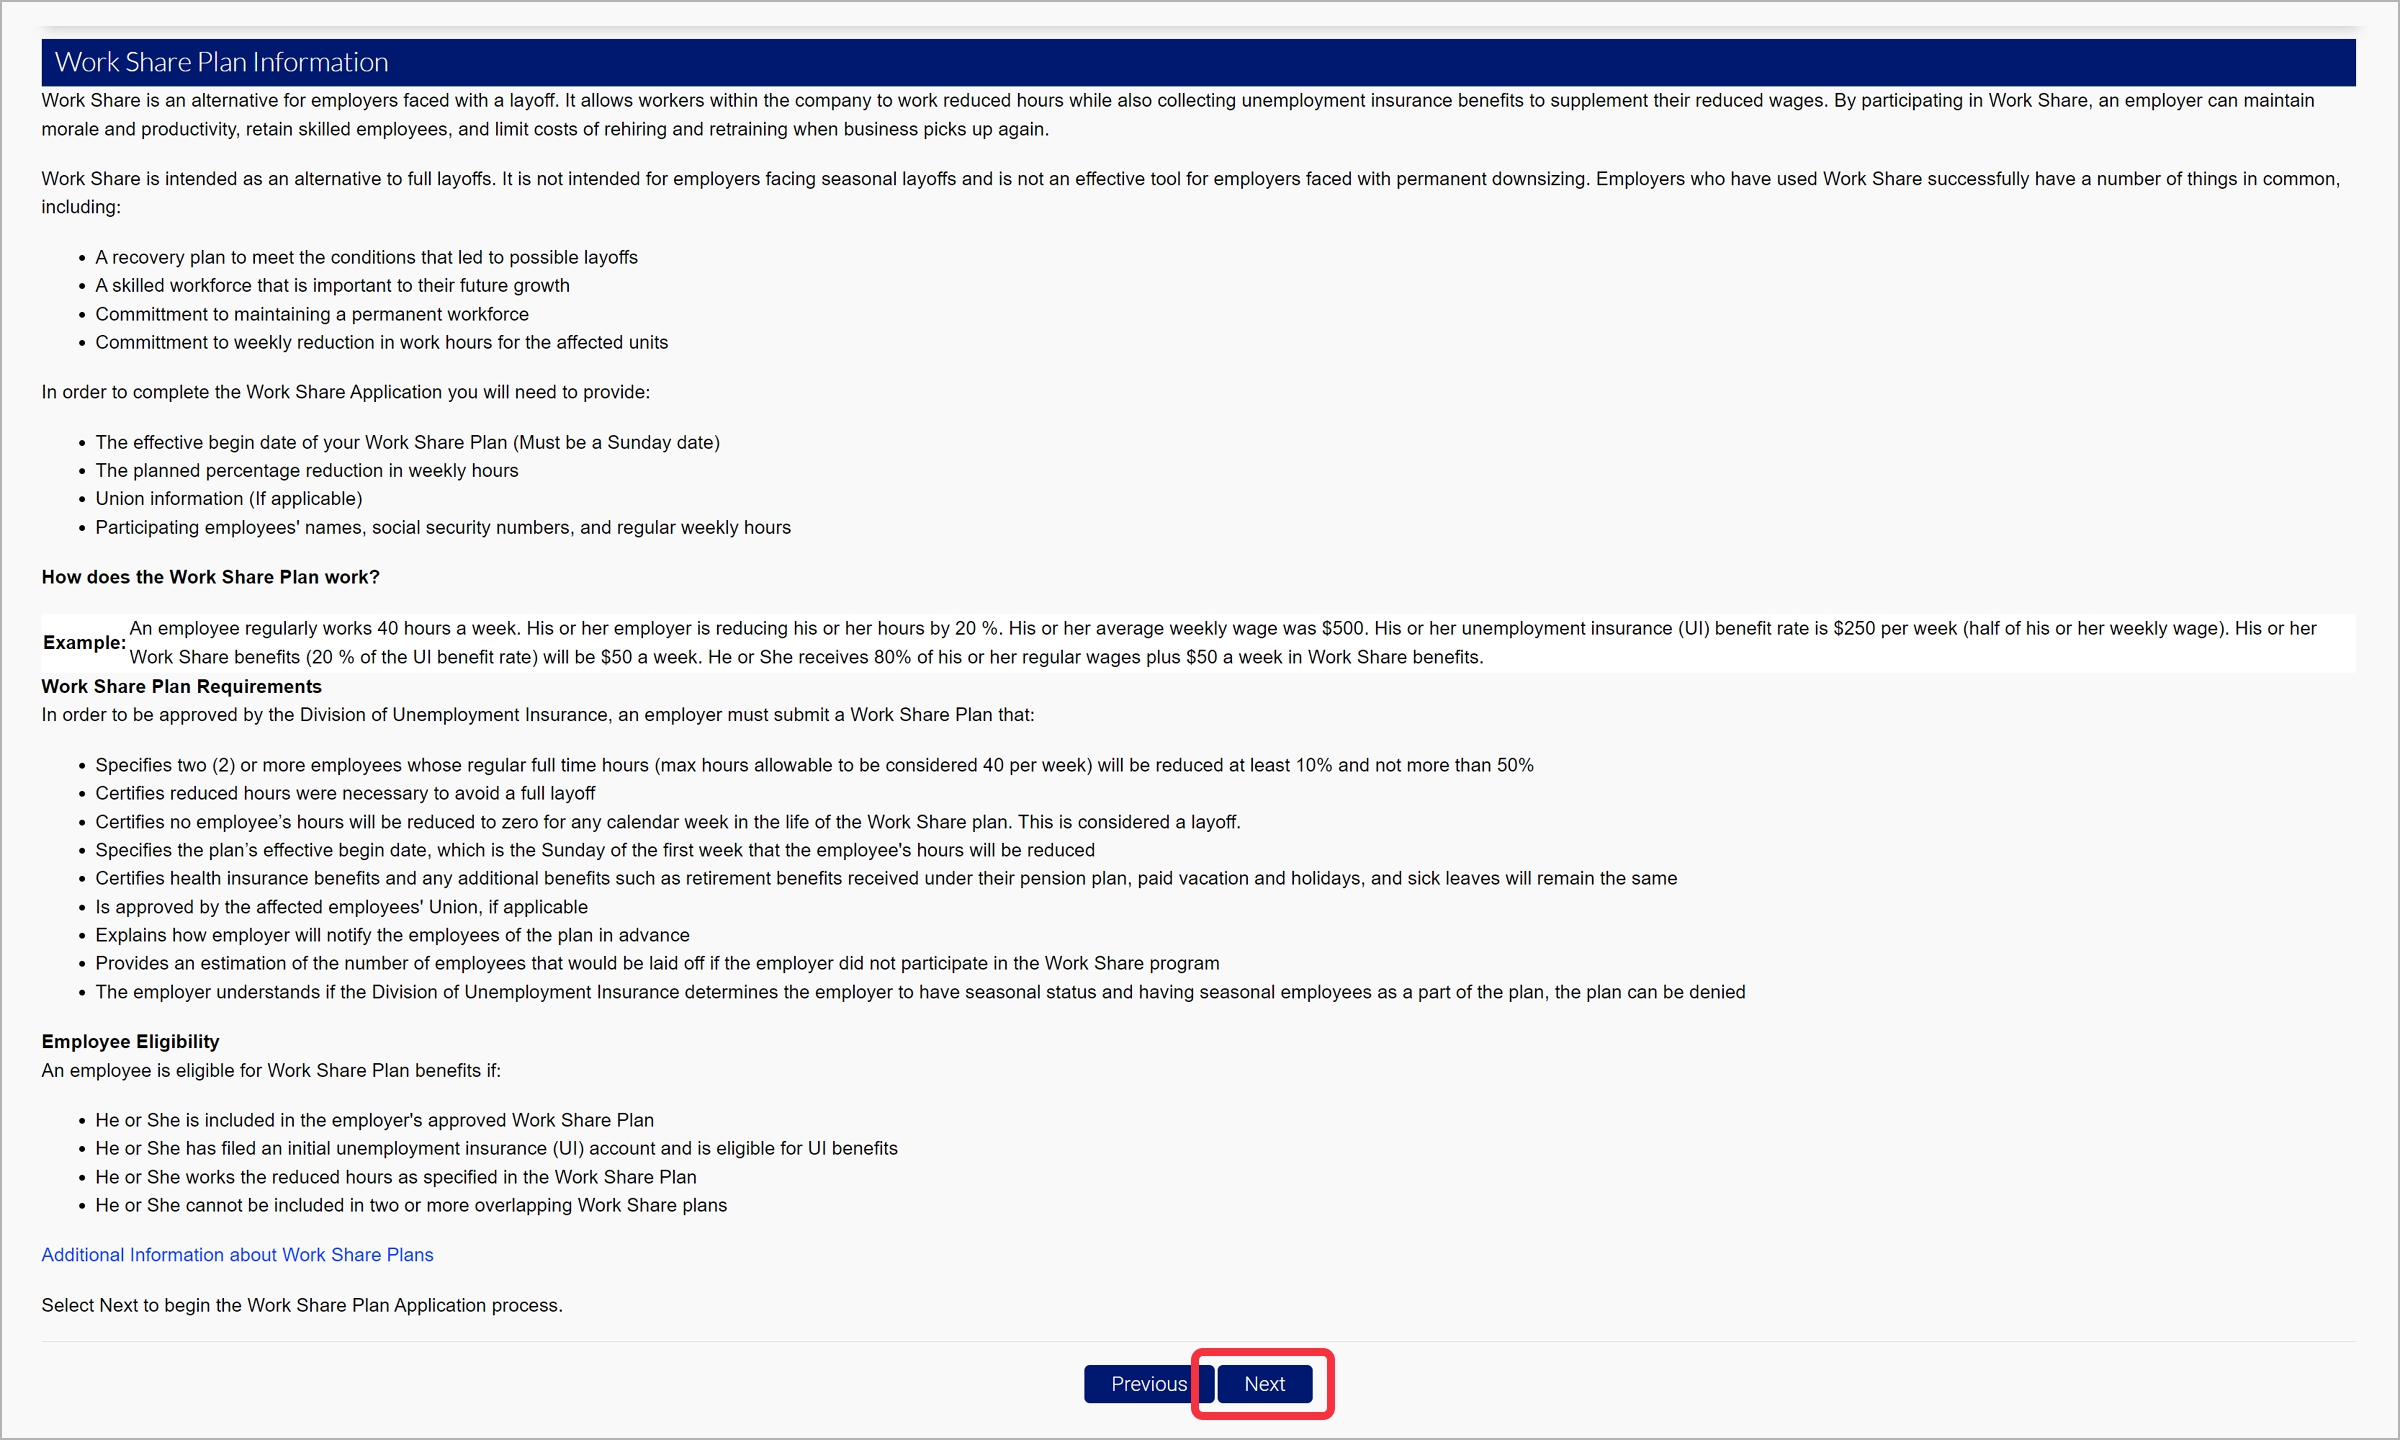
Click “Next” to continue.
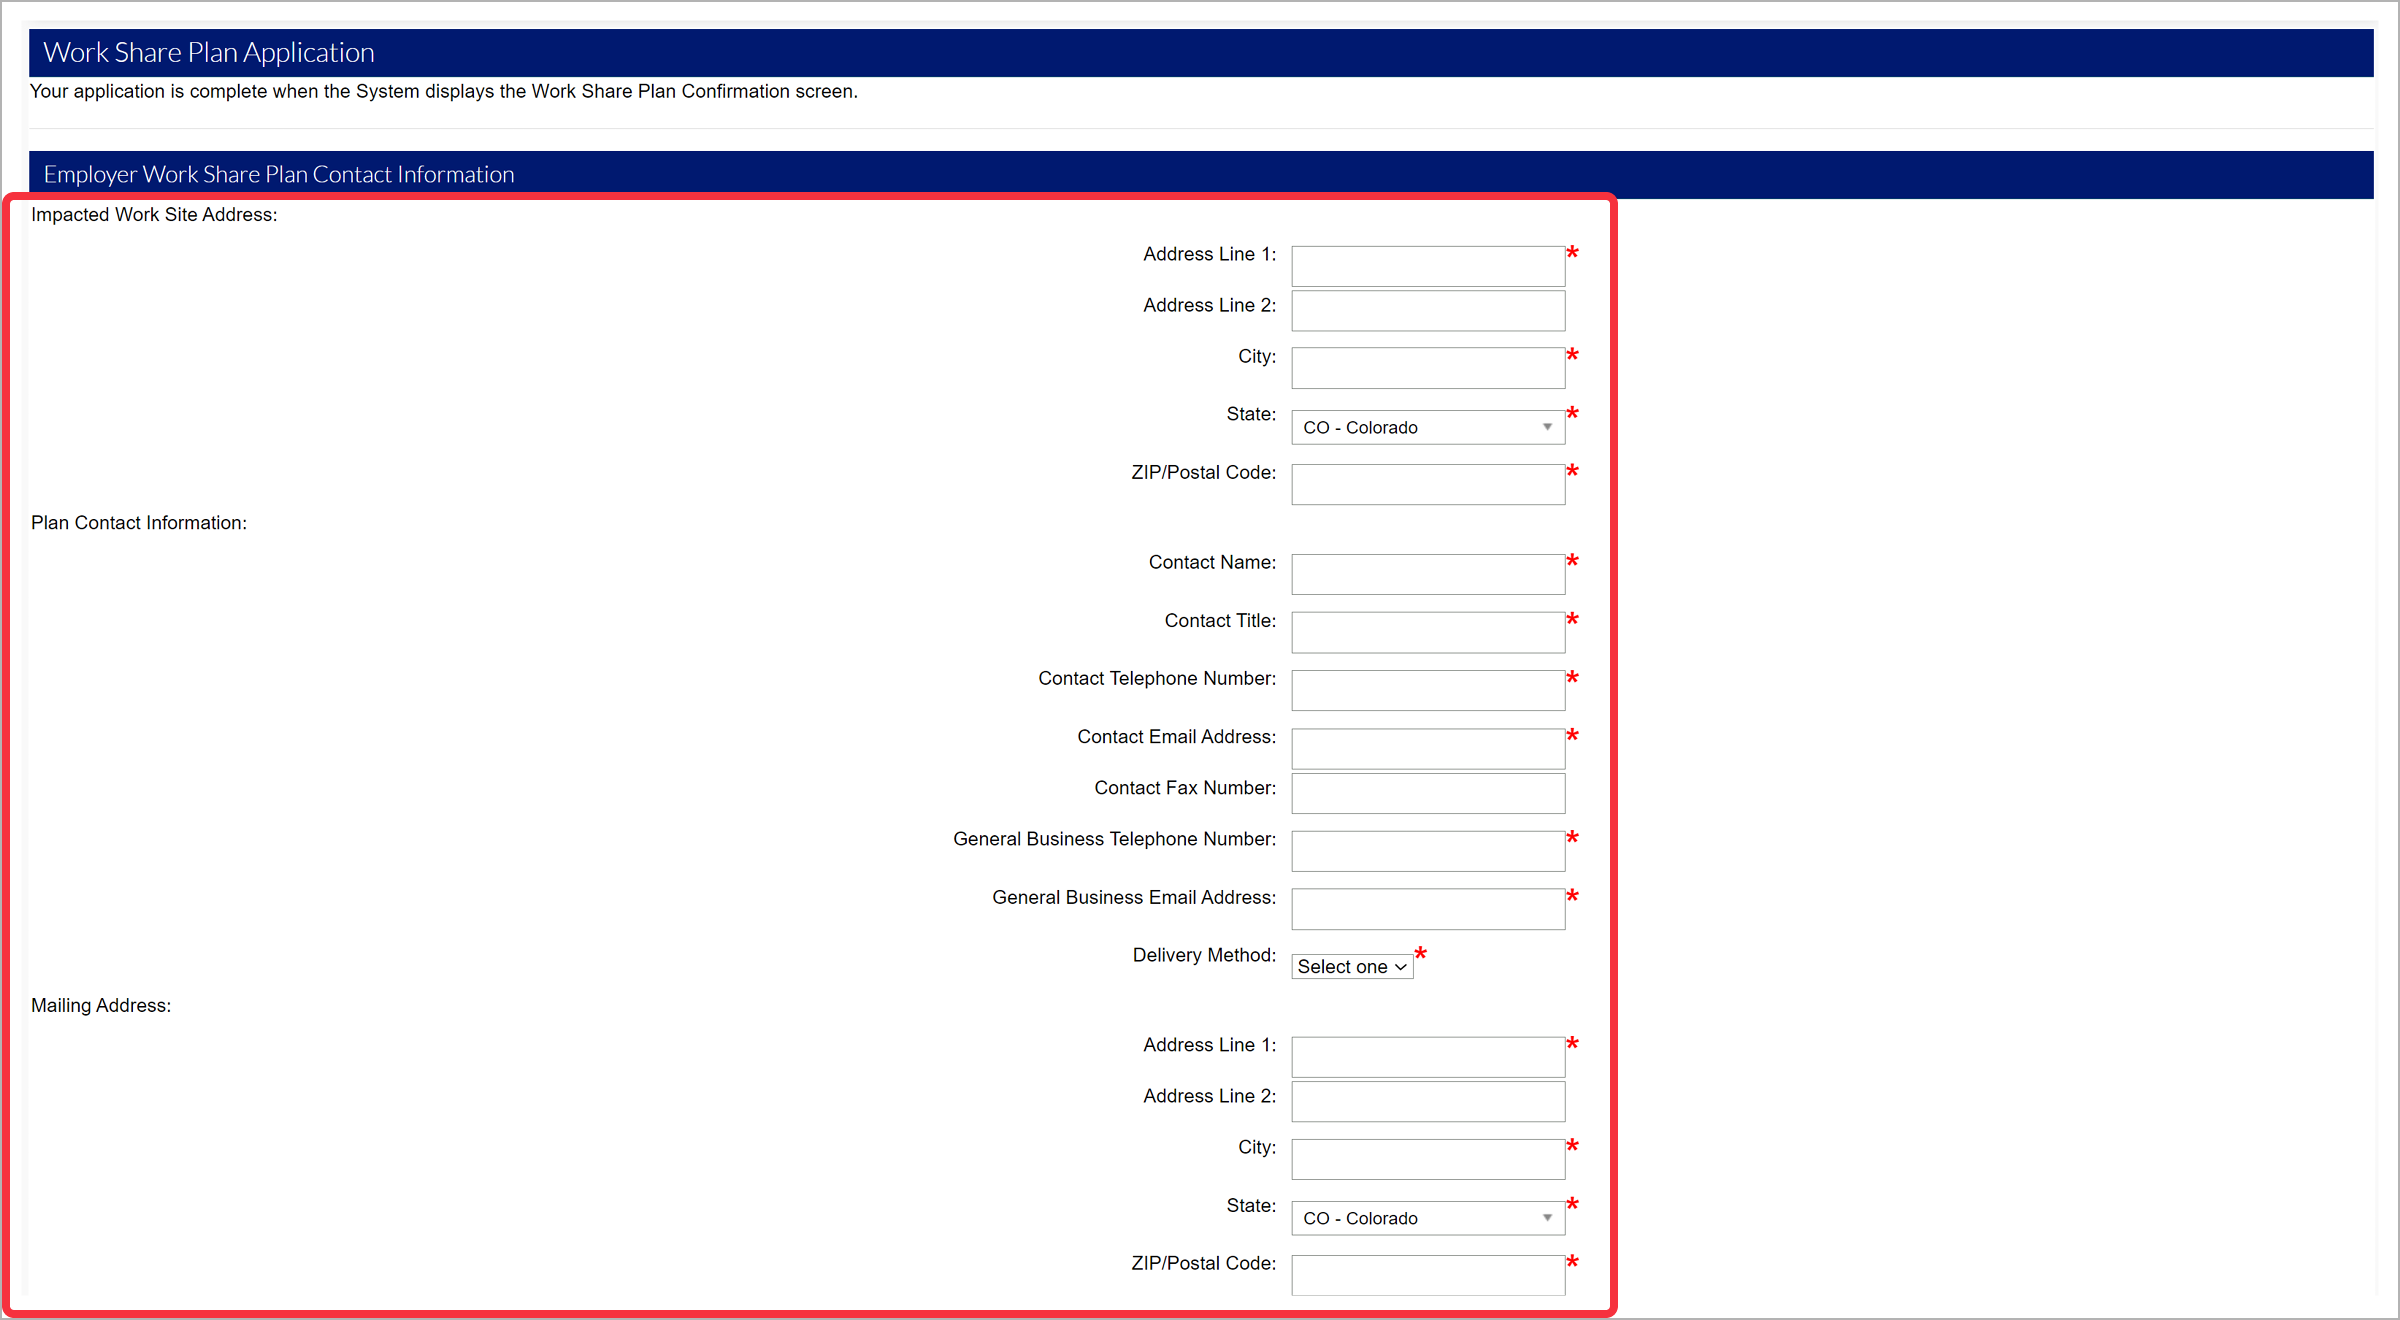
You will be brought to the Work Share Plan Application. Enter the required information, including the Impacted Work Site Address, Plan Contact Information, and Mailing Address.
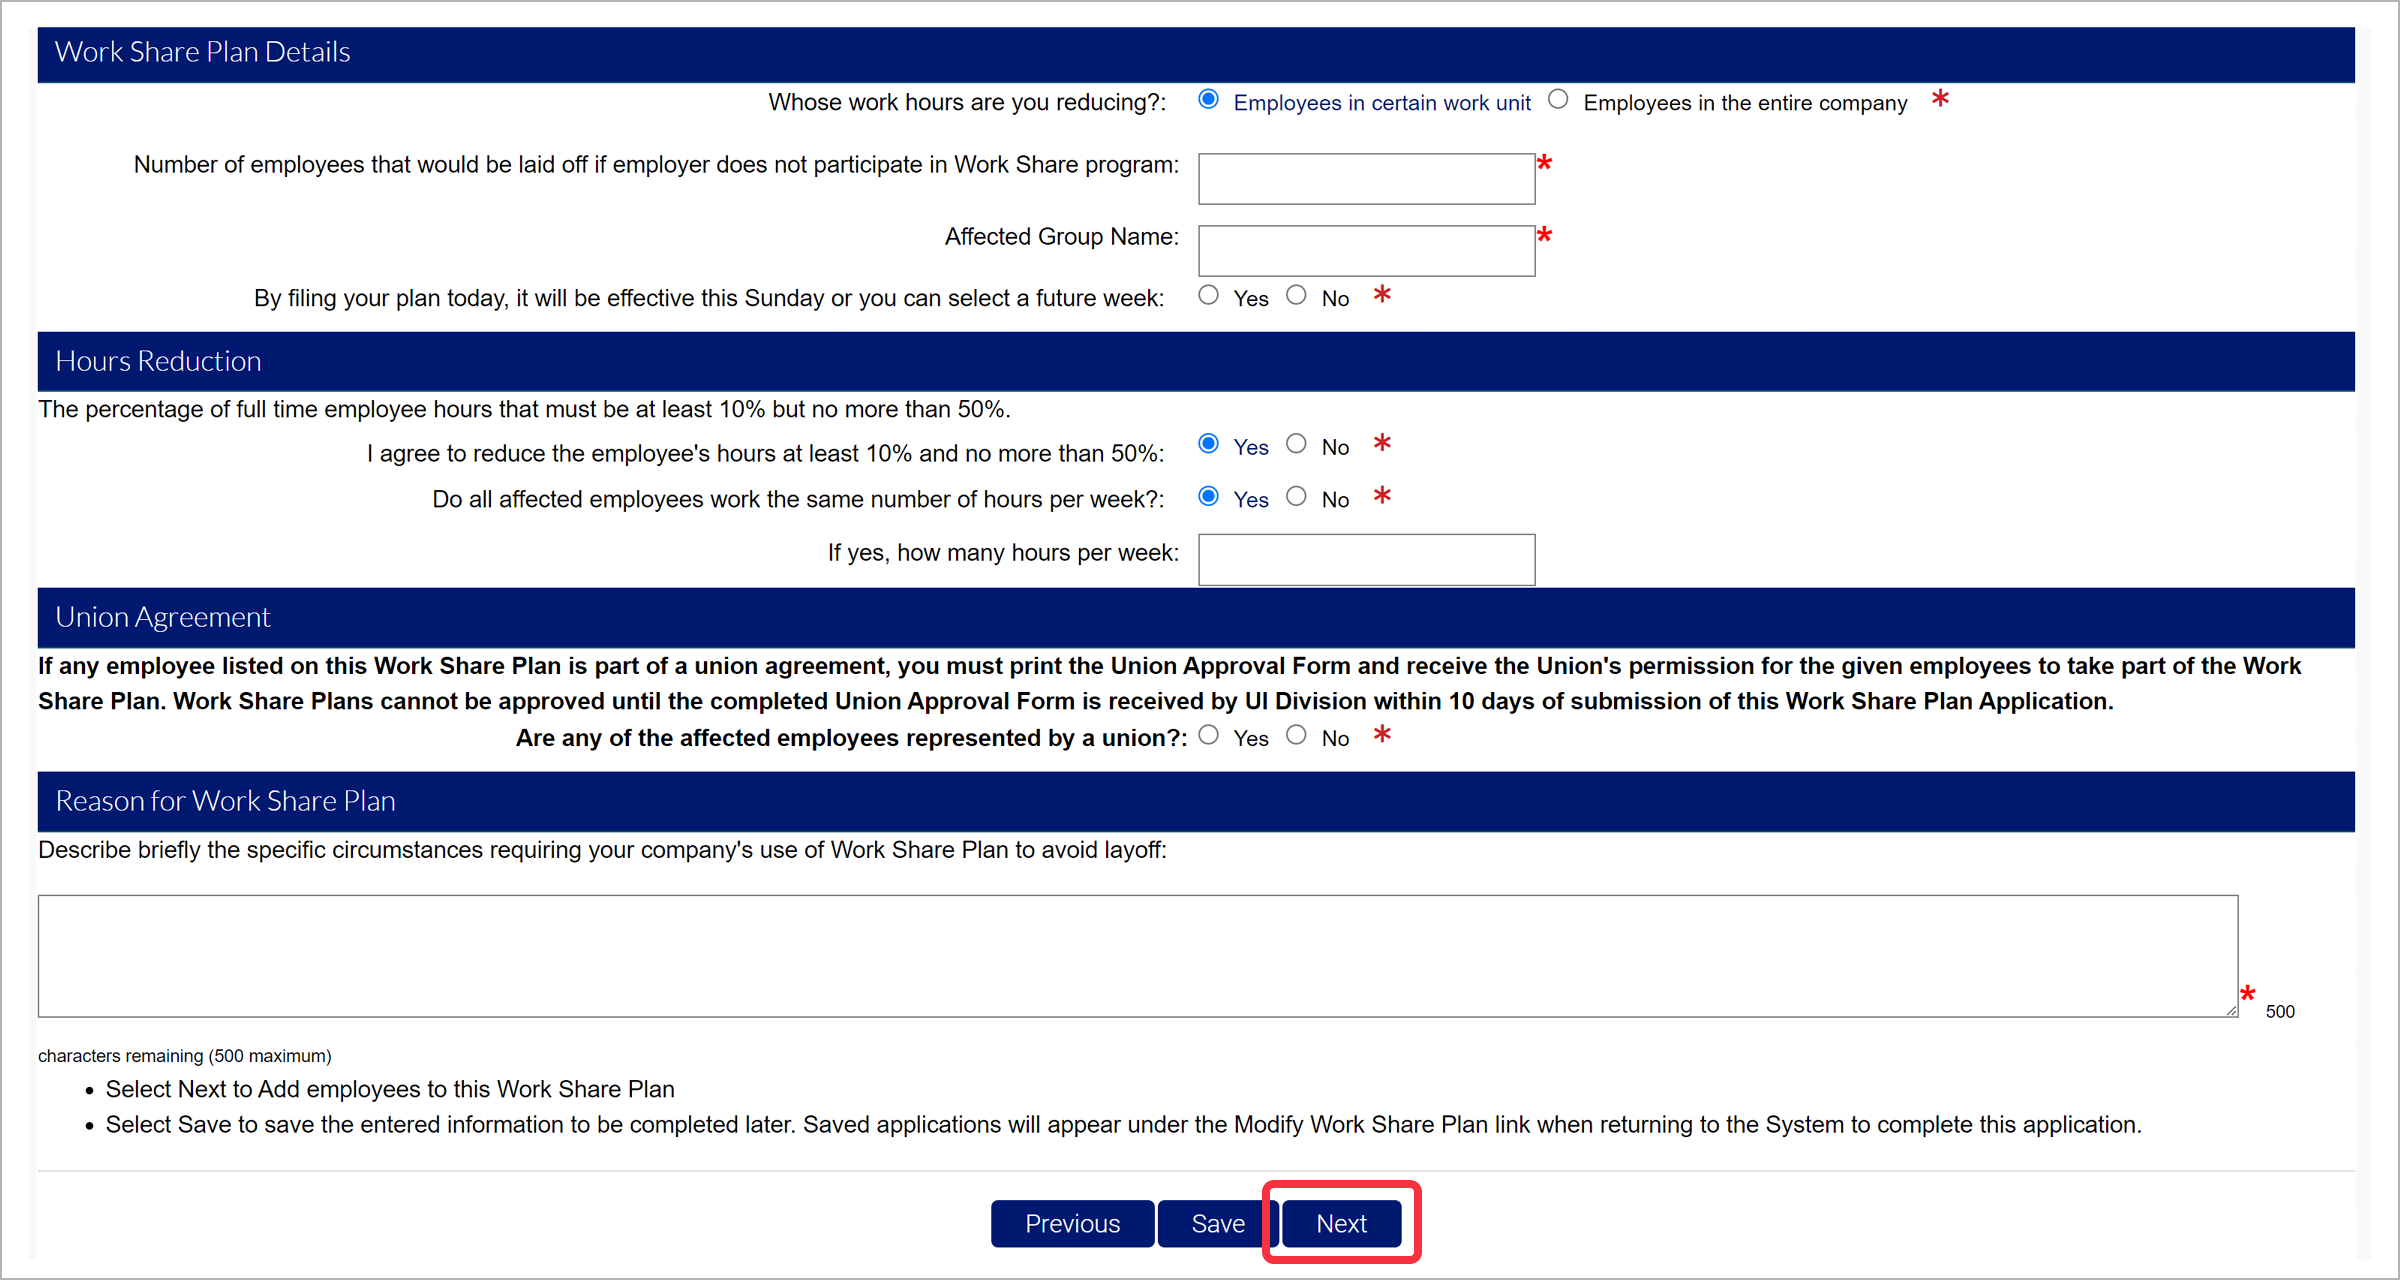
Enter the plan details and click “Next”.
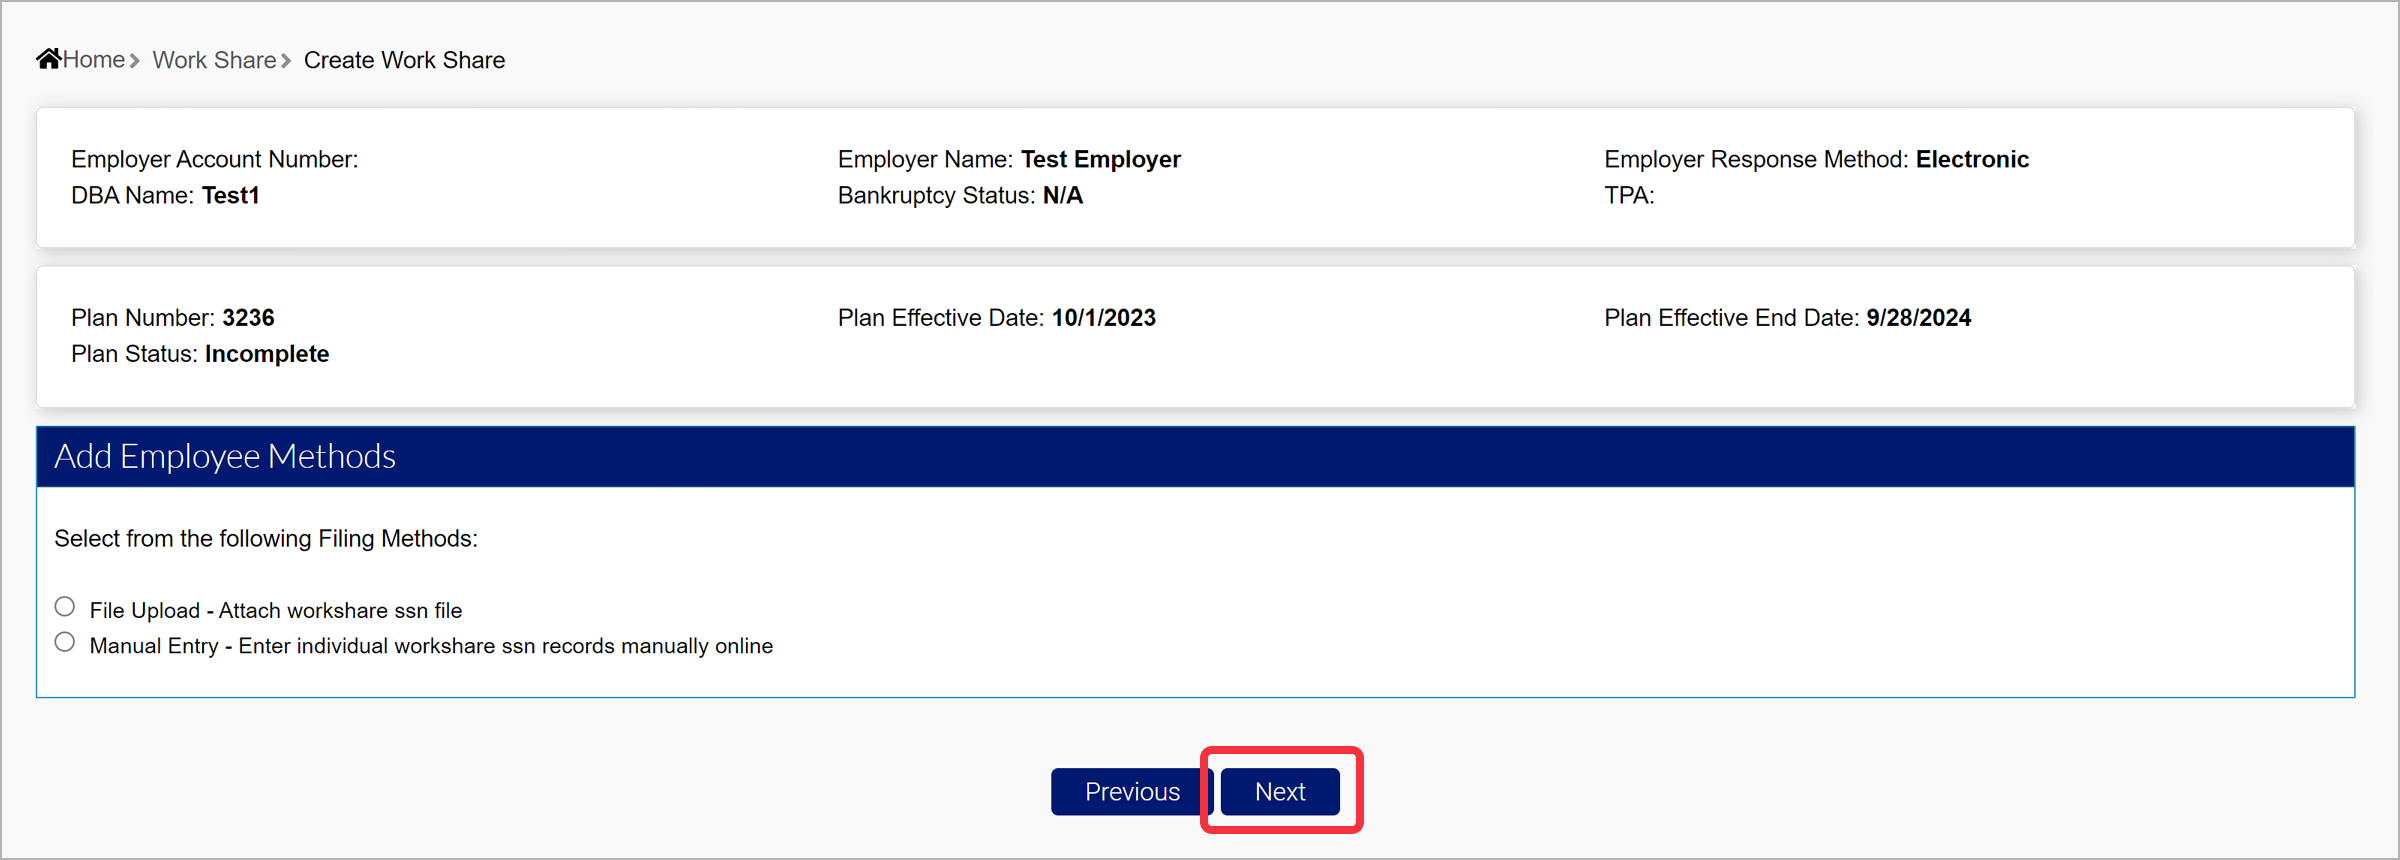
Add the employees that will be enrolled in the program by attaching a file or manually entering the information.
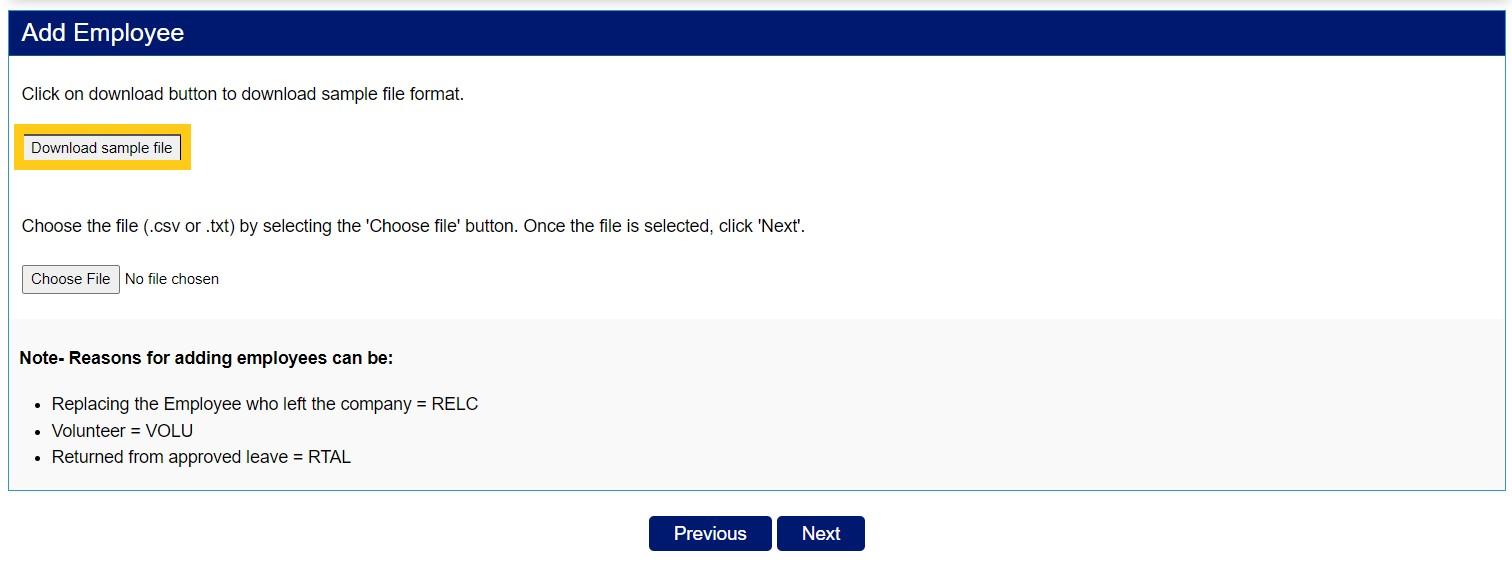
If the File Upload option is selected, you will be brought to the Add Employee screen.
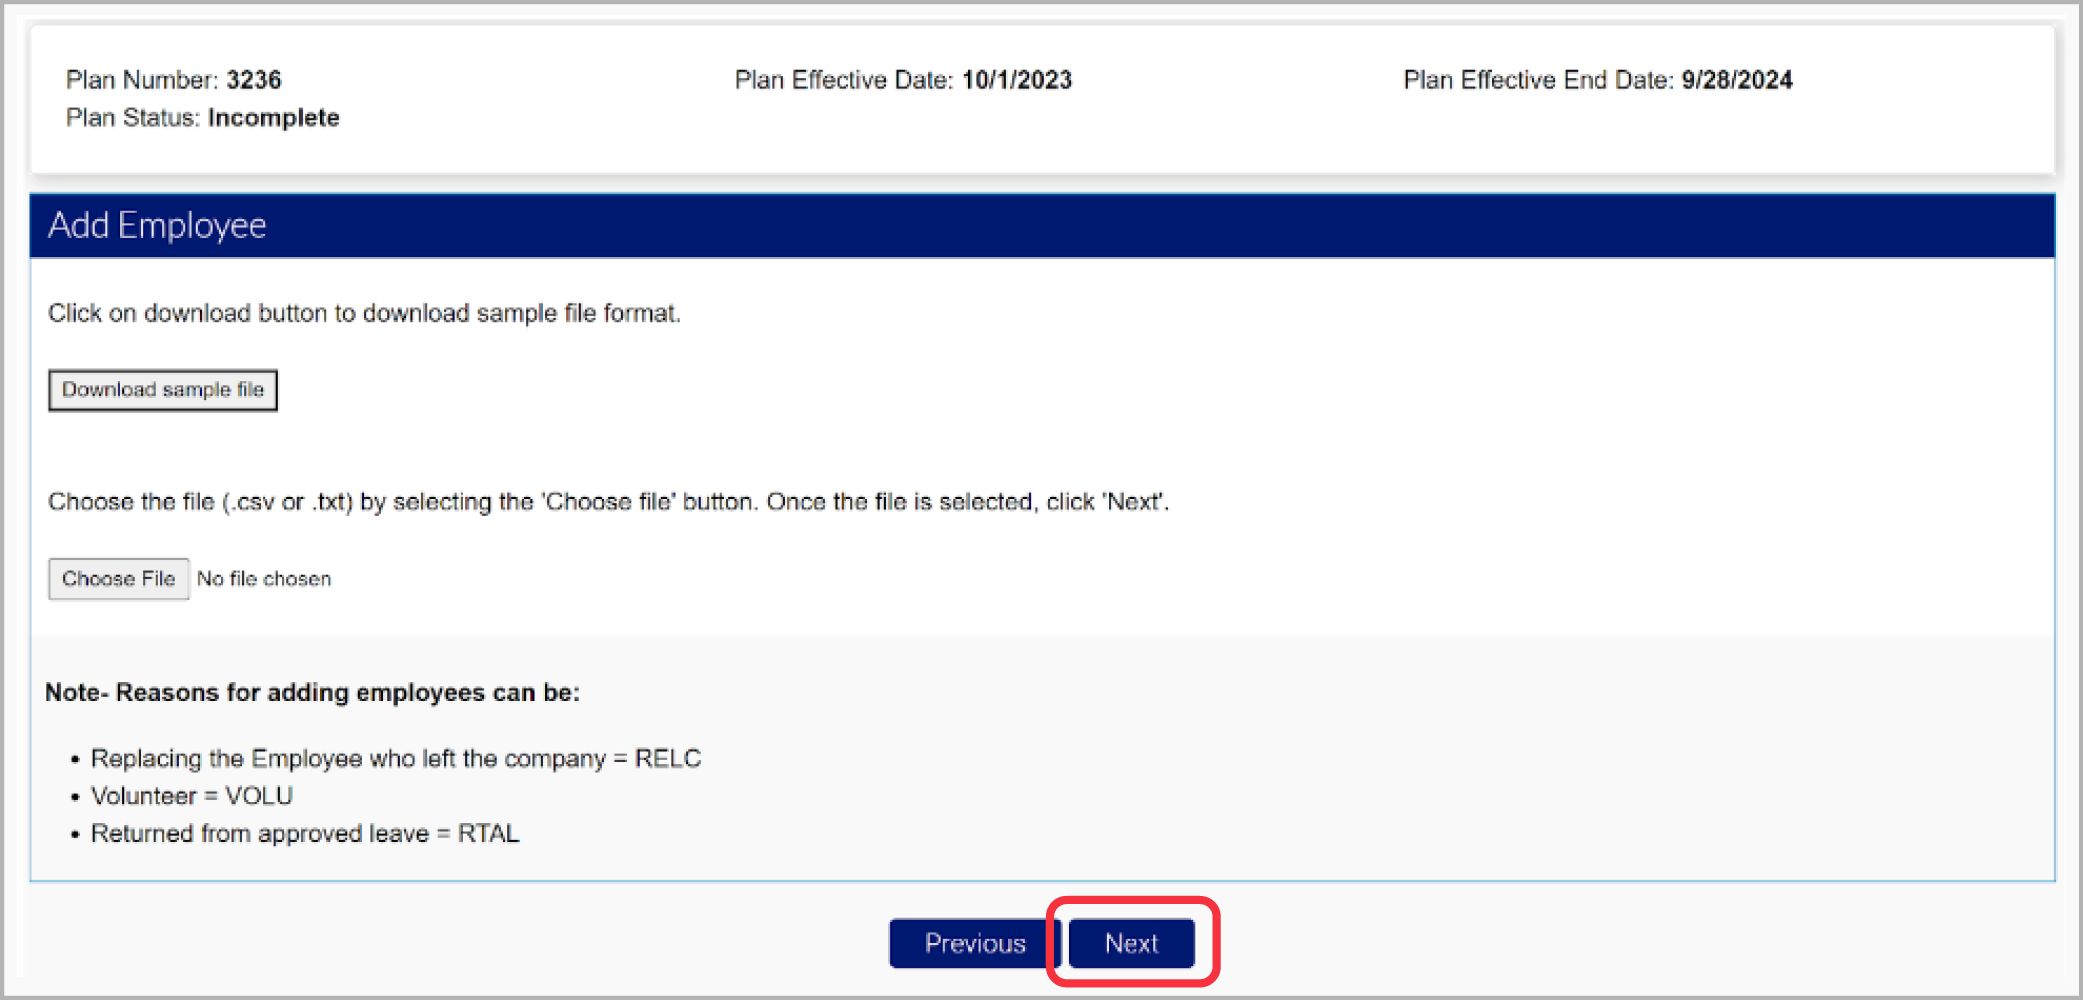
Click the “Download sample file” button to download a sample file and see the guidelines for the file. Click the “Choose File” button to upload a file from your computer. The file format includes the SSN, LASTNAME, FIRSTNAME, REASON, and EFFDATE.

If the Manual Entry option is selected, you have several options to add employees. Select the employee(s) and click “Save”.
Click “Next” to continue.
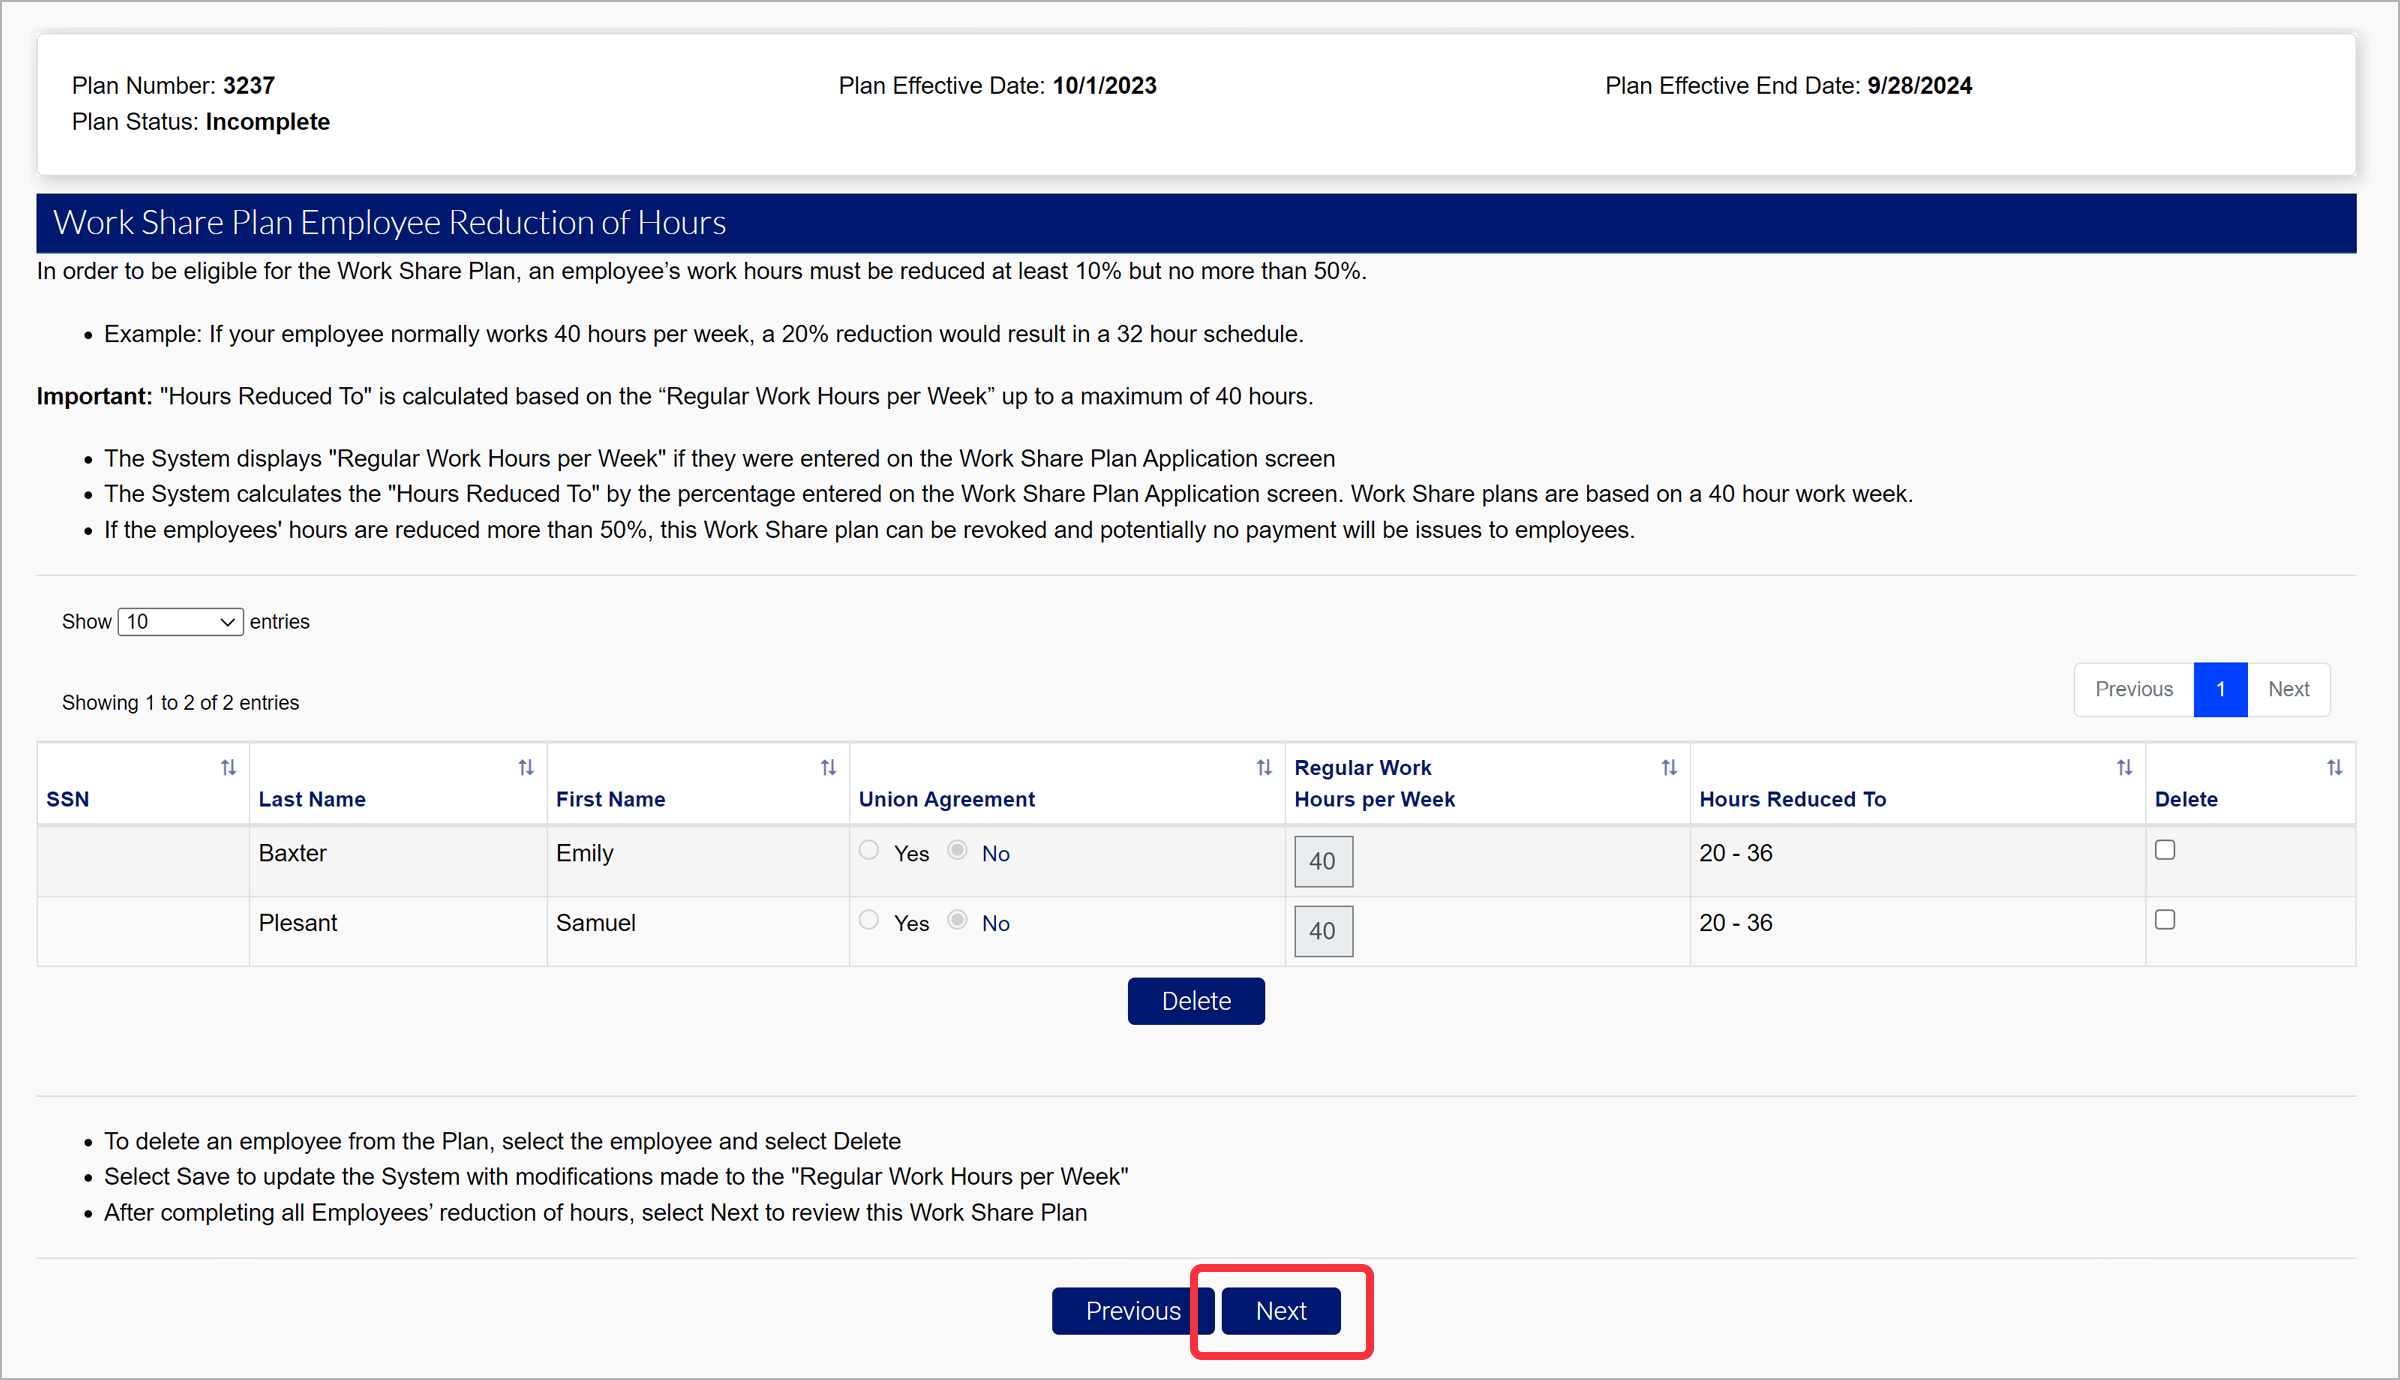
Review the Employee Reduction of Hours and click “Next” to continue.
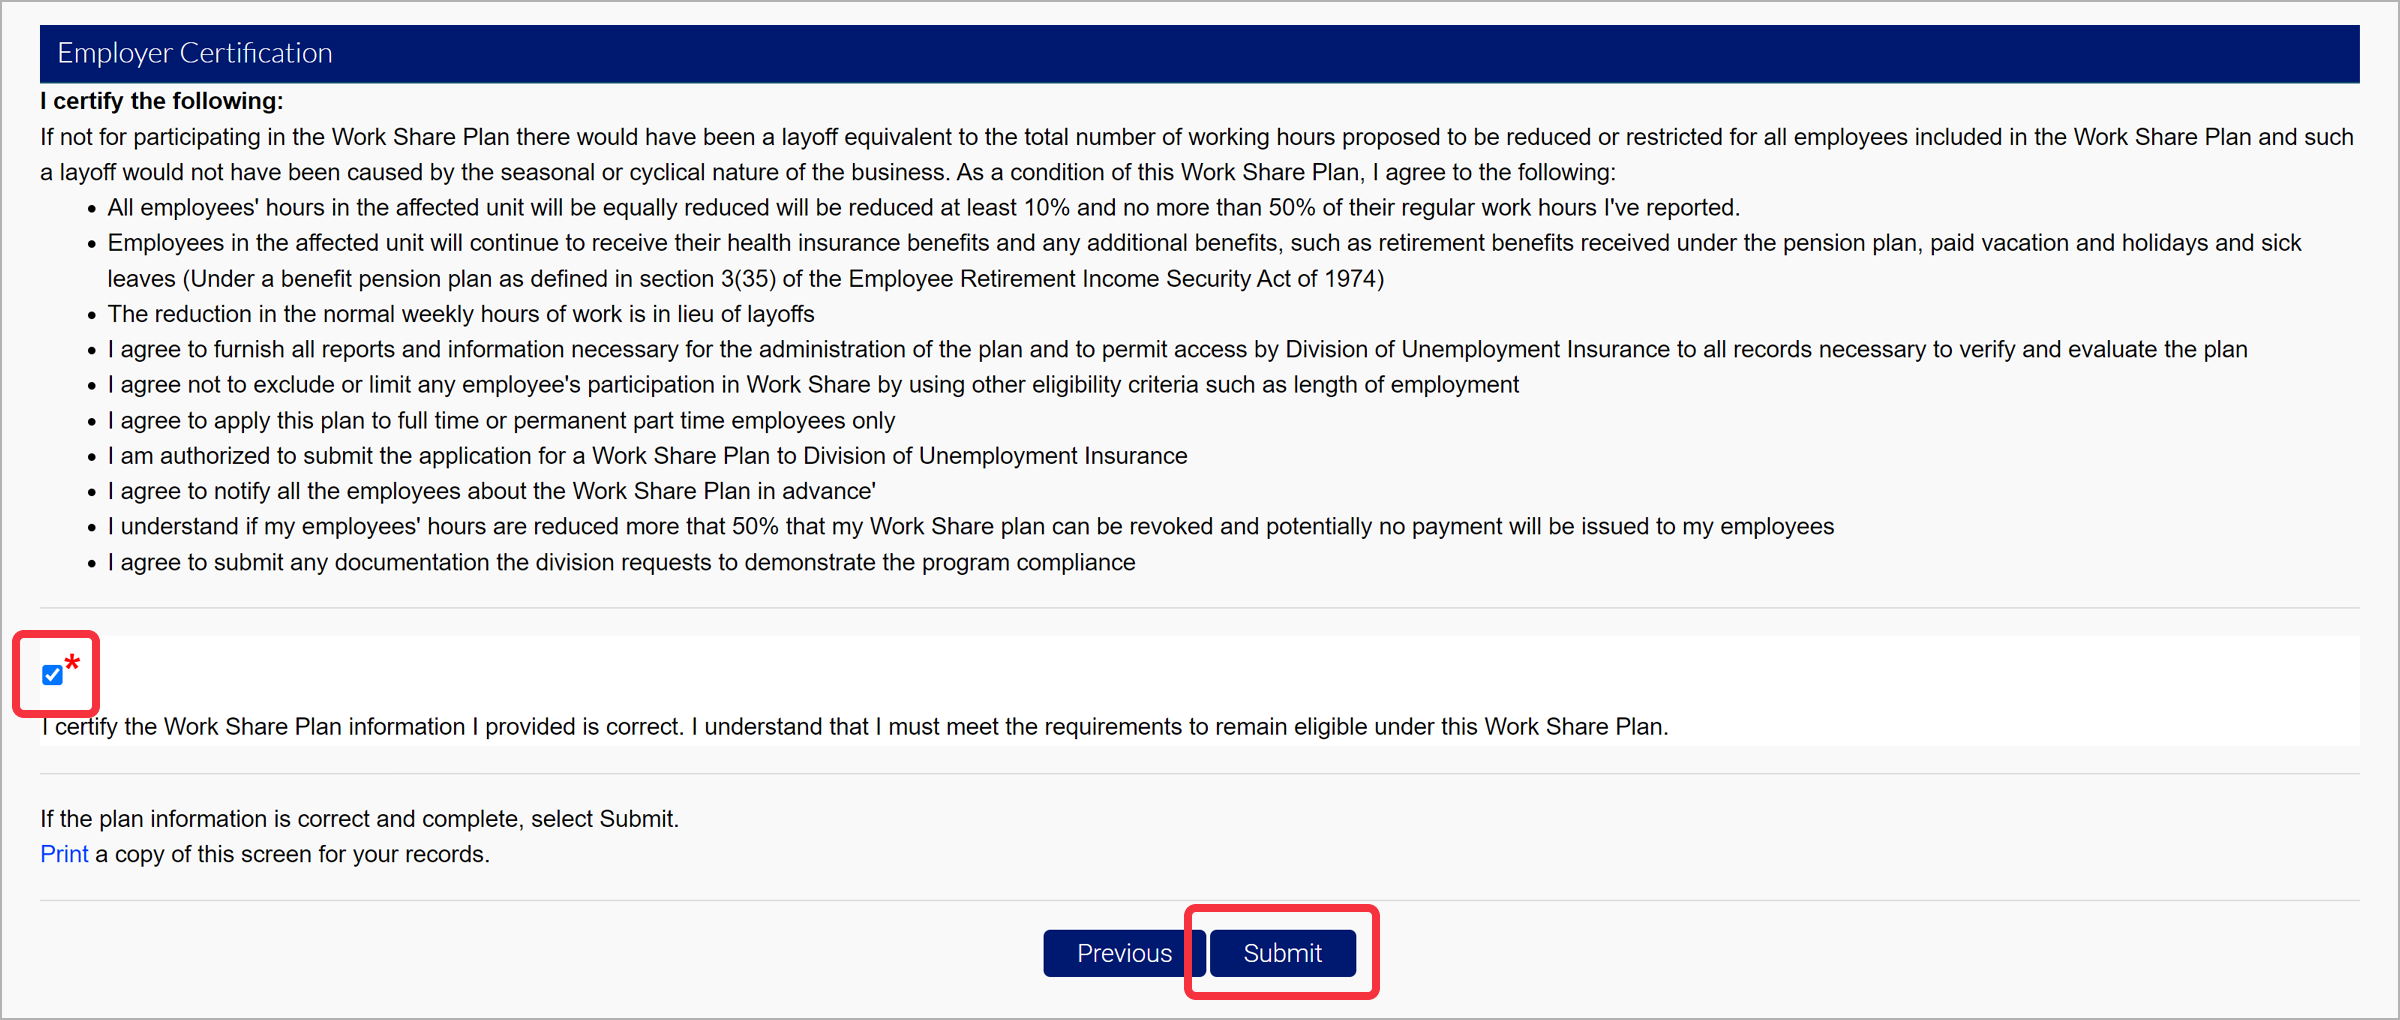
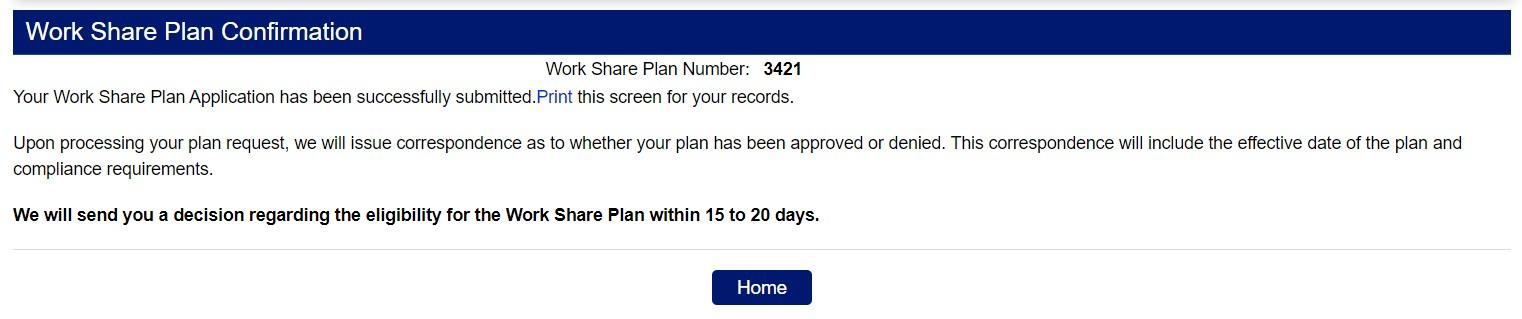
Review the plan information and select the certification checkbox. Click “Submit” to submit your plan.
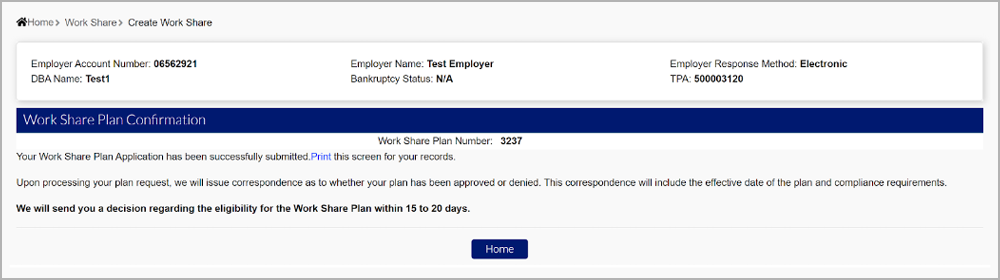
Your workshare plan will be reviewed by CDLE. You will receive a correspondence stating the approval or denial of your plan within 15-20 days.
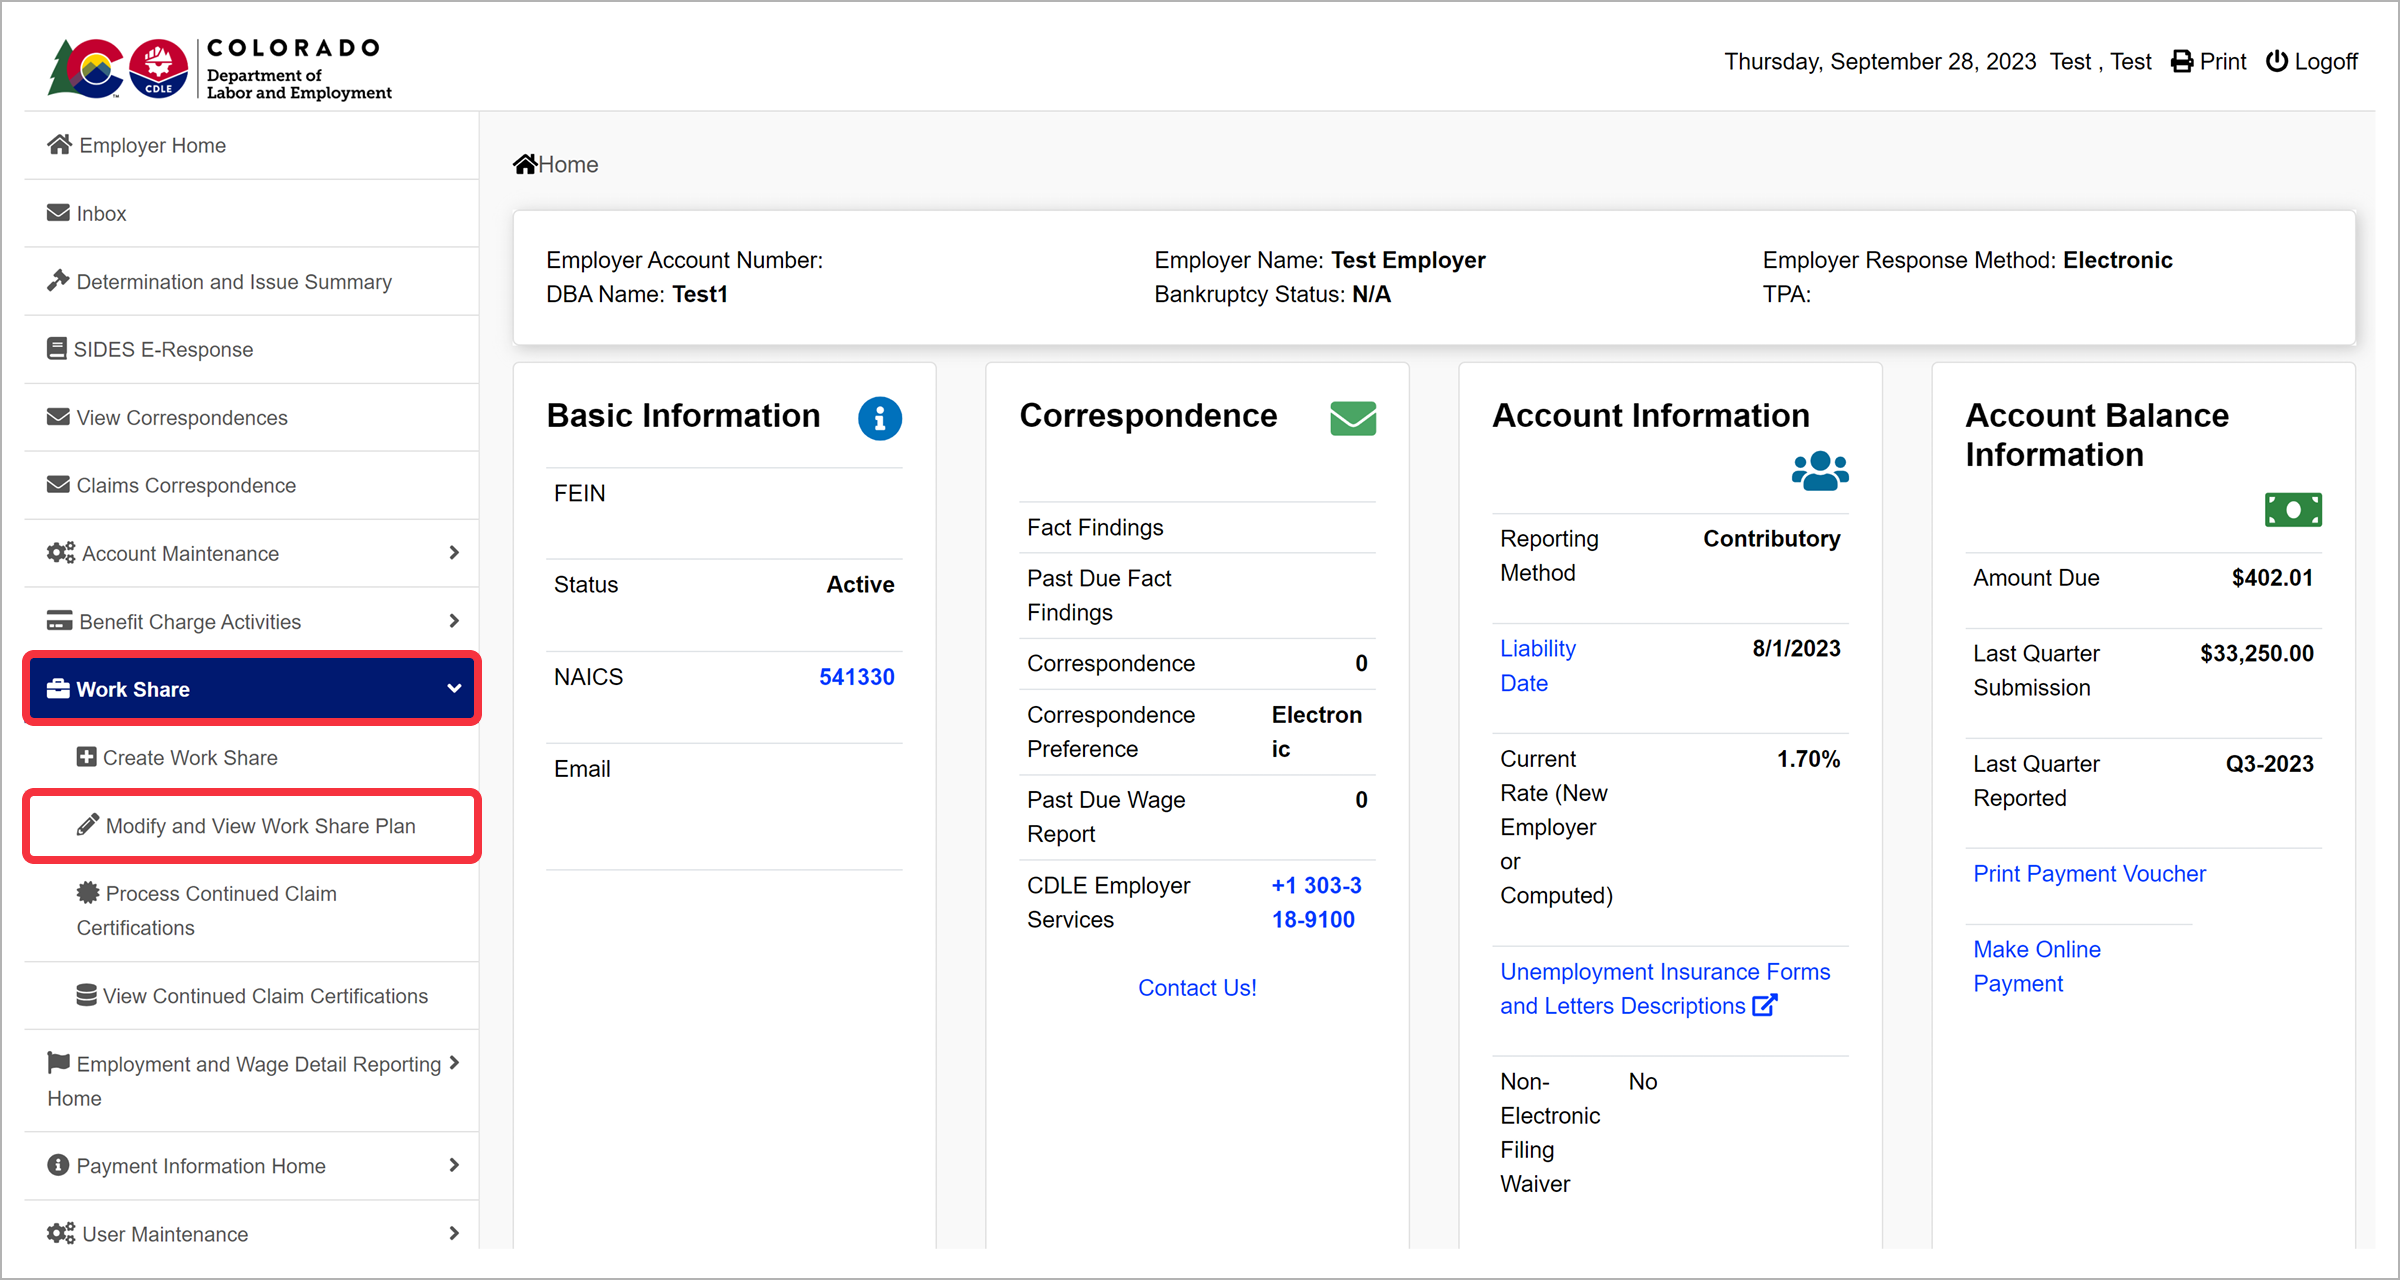
Modify and View Work Share Plan
To maintain your Work-Share plan, click the “Work Share” tab in the left-hand navigation menu. Click the “Modify and View Work Share Plan” subtab.
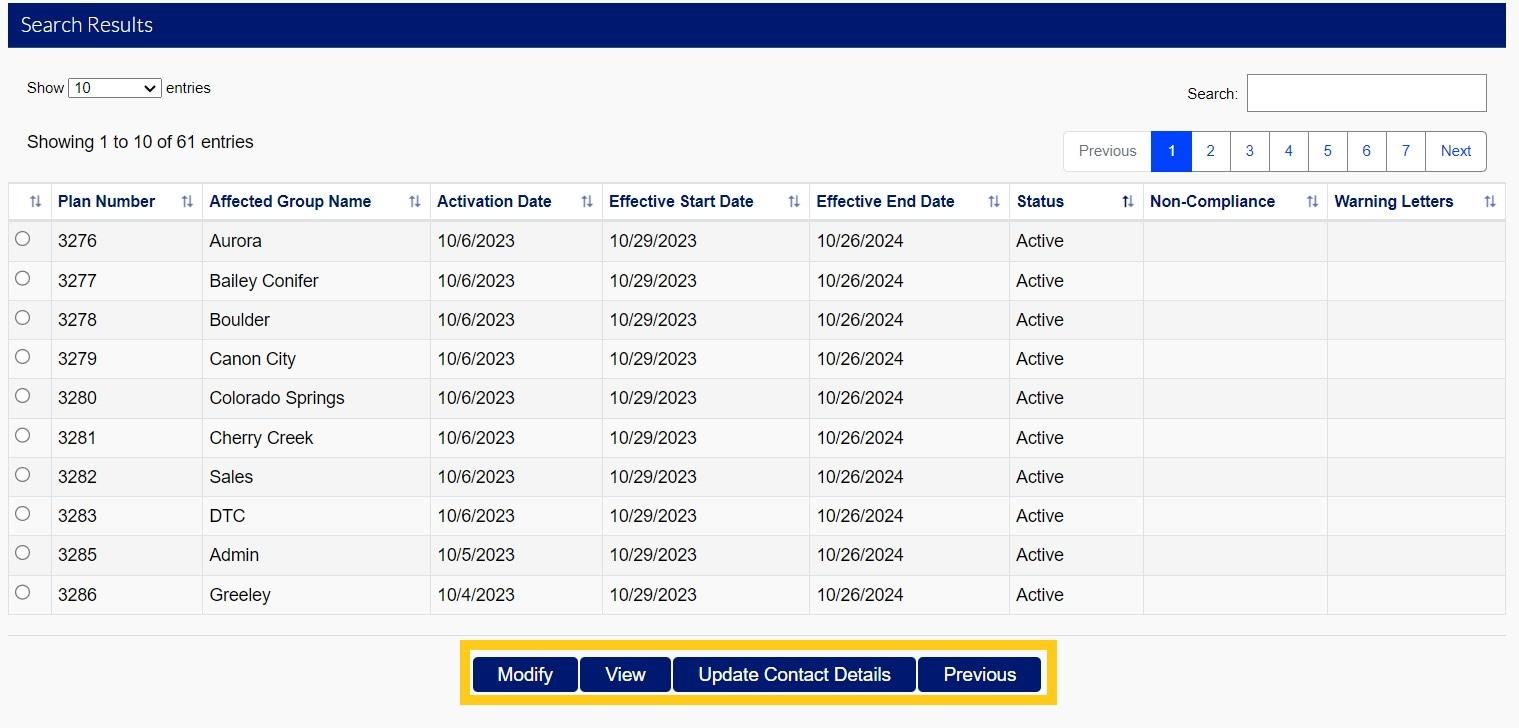
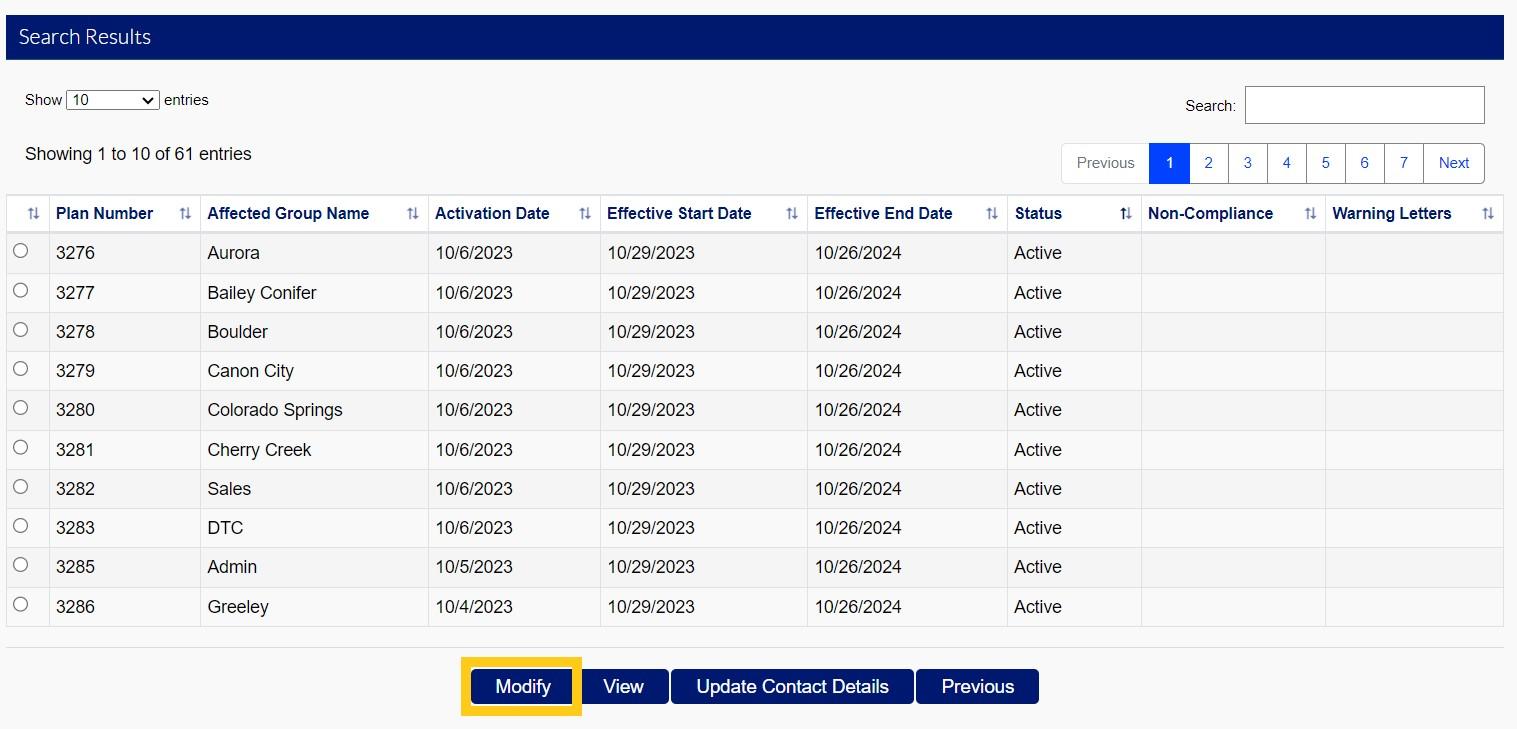
You will be able to view and select from a list of your Work-Share plan(s). Select the radio button next to the plan you want to view or modify. Click "View" to view the selected plan. Click "Modify" to modify information including mailing address, employee list, phone number, point of contact, etc. Click "Update Contact Details" to update the plan contact information.
Removing Employees from A Plan
To remove an employee from your Work Share plan, click the "Work Share" tab in the left-hand navigation menu, click the “Modify and View Work Share Plan” subtab. Select the plan from which you want to remove the employee(s) and click "Modify".
Enter the Sunday date you would like for your modification to take place. The system does not allow dates further back than the Sunday of the current week. Note: Applying future modifications may impact the intervening weeks and cause claimants to be denied payments.

Make additional changes, if necessary, to your Work Share profile. Click "Modify Employees" to modify plan employees for the selected date. Click "Add Employees" to add employees to the plan for the selected date.

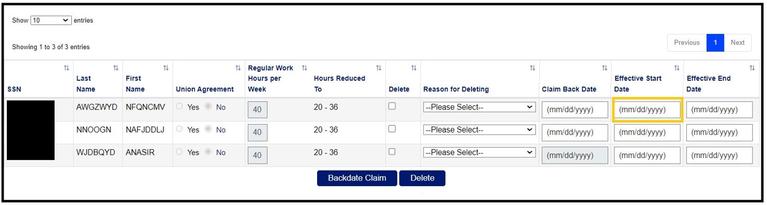
View the list of employees included in the plan. Select the employees to be removed from the plan by selecting "delete". Include the reason you want to remove the employee(s) from the plan using the provided dropdown menu, and enter the effective date when the employee(s) should be removed from the plan.
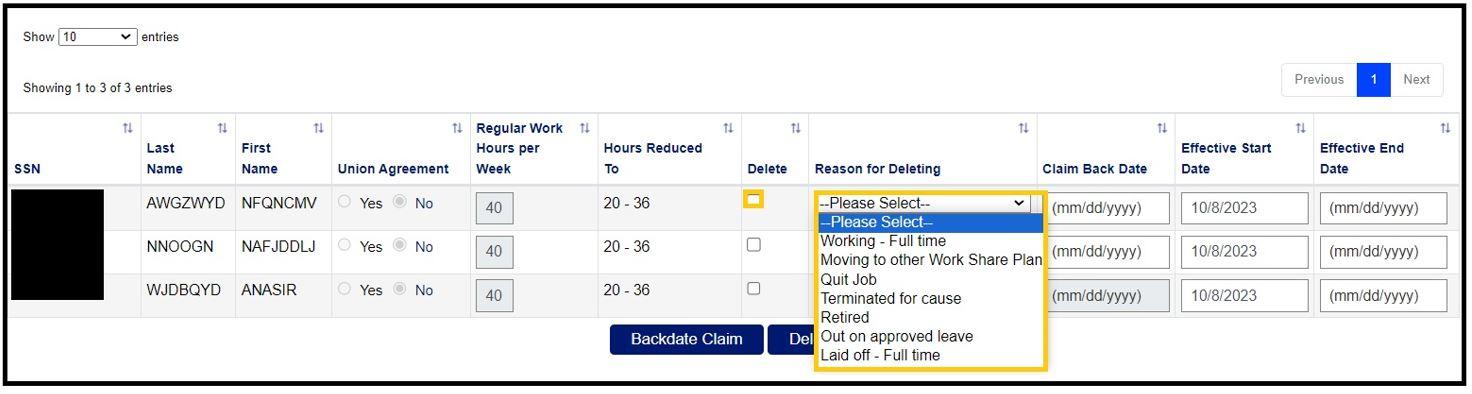
Note: When removing an employee from a Work Share plan, the Effective End Date must be a Saturday in the future.
Click "Next" to remove the selected employee(s) from the Work Share plan.
Review the changes to your plan. Select the certification box and click "Save".
Click "Submit" to submit your request. A confirmation page will indicate you will receive a decision in 15 to 20 days.
Adding Employees to a Plan
To add employee(s) to a Work Share plan, click the "Work Share" tab in the left-hand navigation menu, click the “Modify and View Work Share Plan” subtab. Select the plan you want to add the employee(s) to and click "Modify".
Enter the effective date of the plan modification. The system does not allow effective dates that occur before the Sunday of the current week.
Click "Add Employees".

Select the method you would like to use to modify the Work Share plan. Employees can be added manually or via file upload. Click "Next".

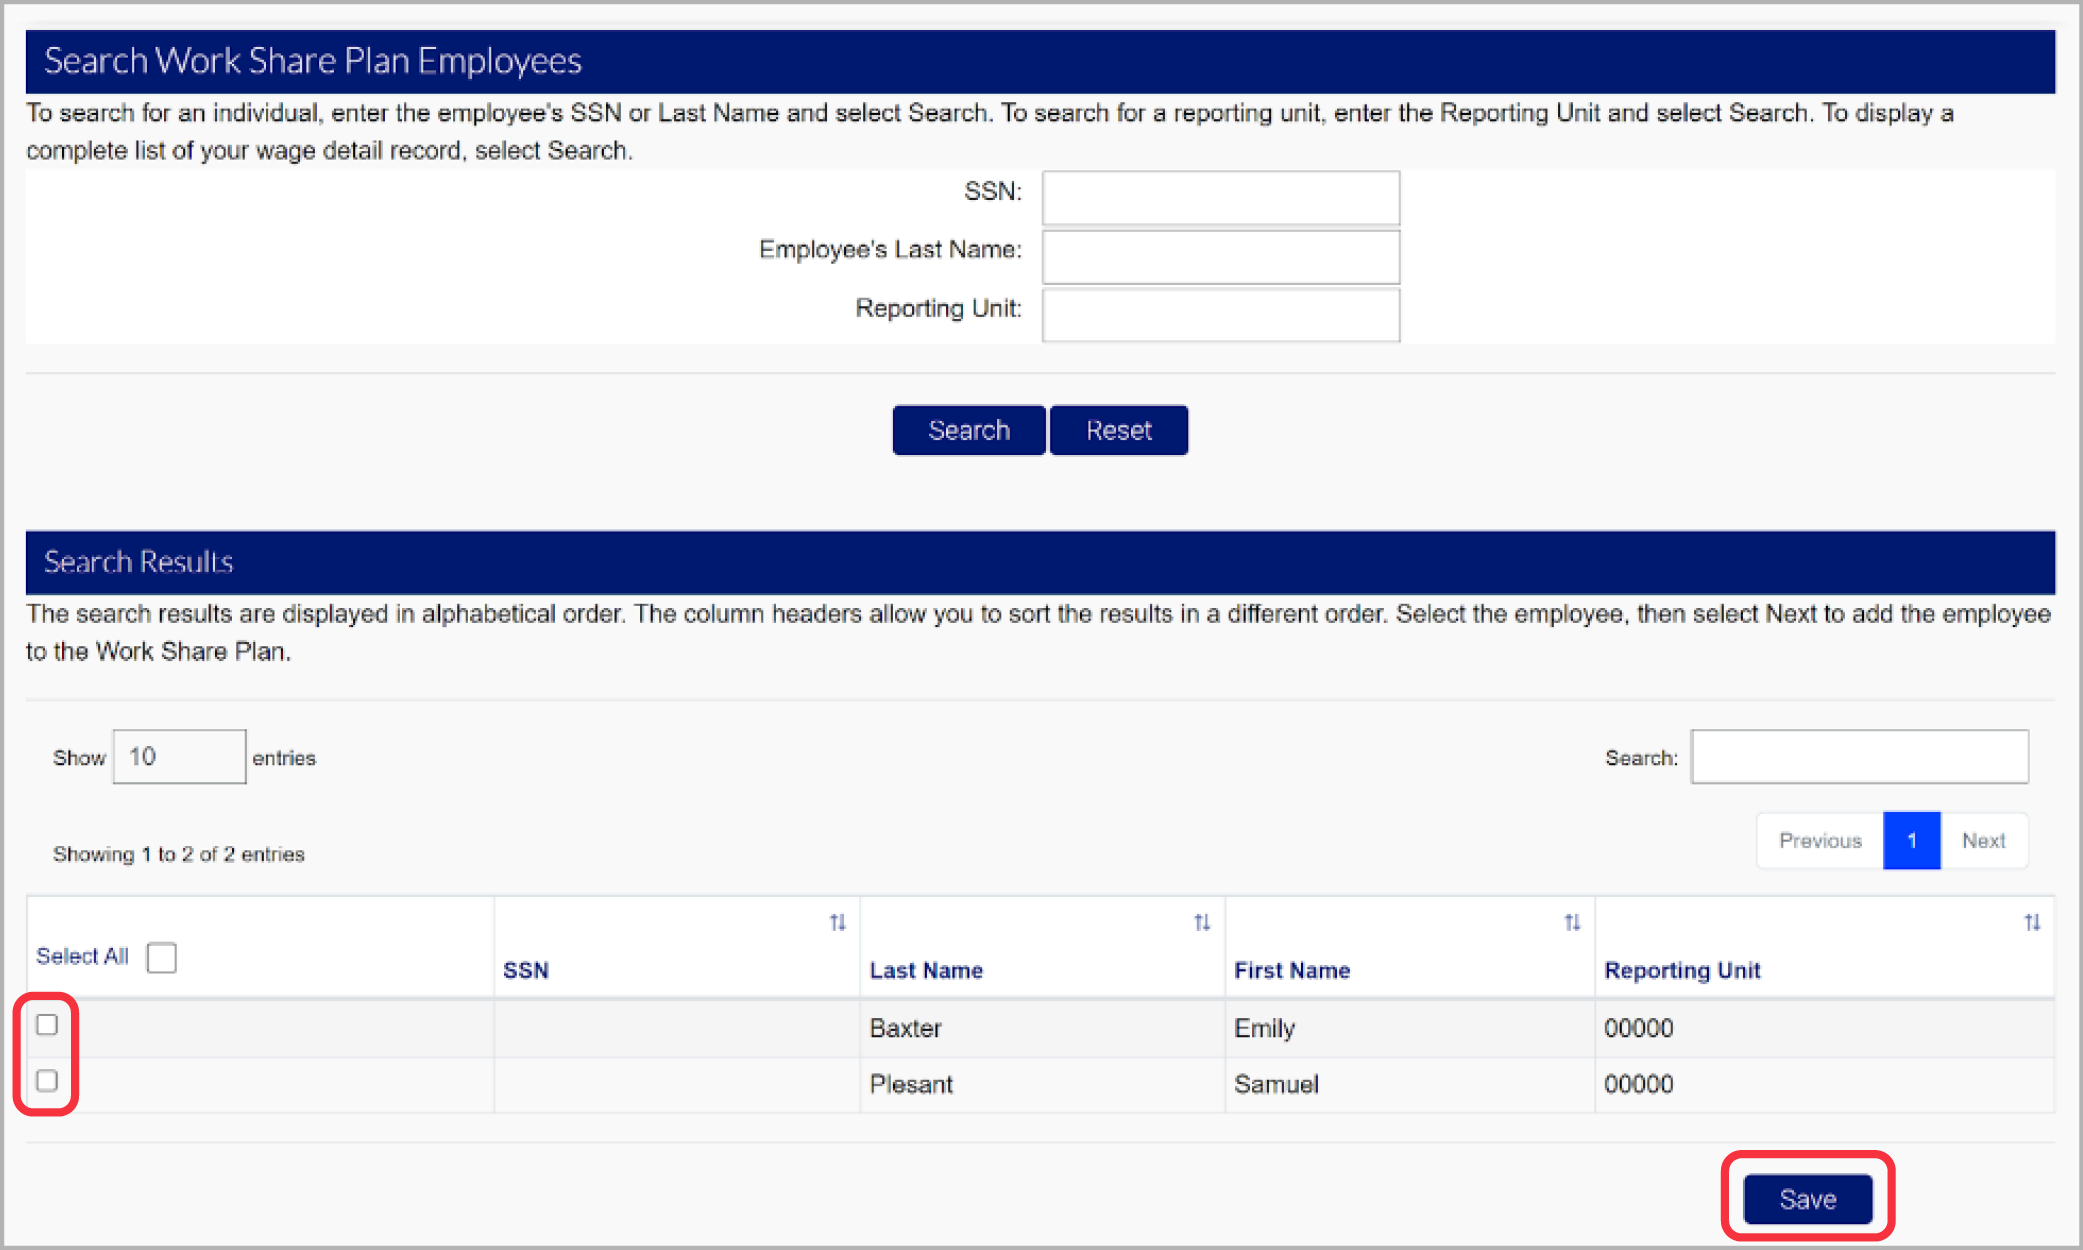
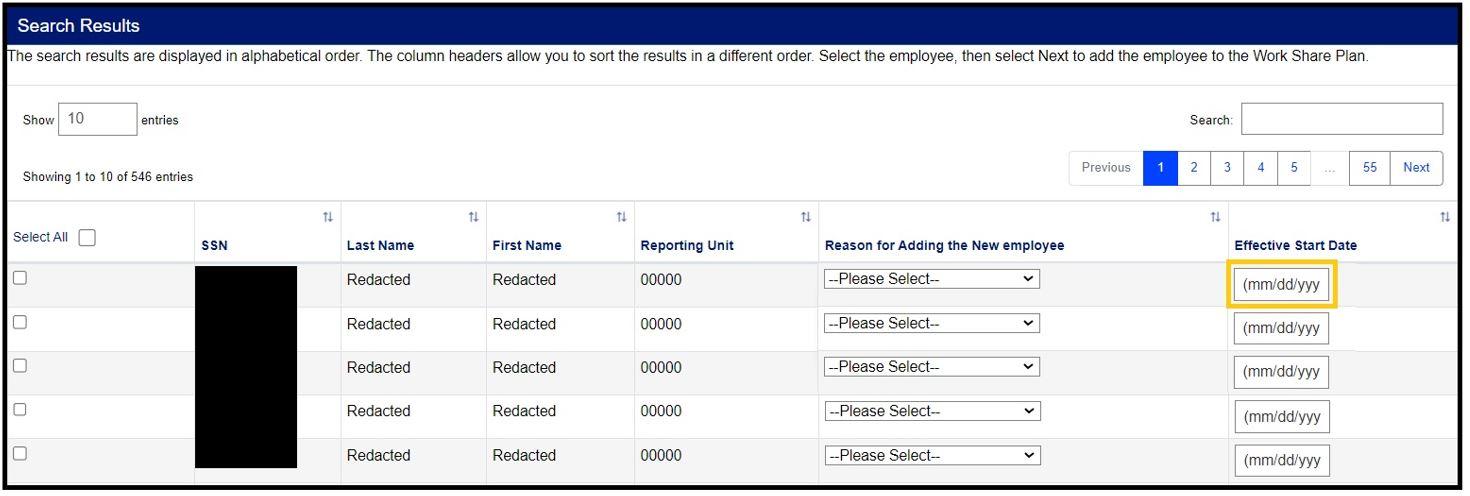
To add employees manually, select the radio button next to the employee(s) you want to add to the plan from the list of employees displayed, Provide a reason they are being added to the plan using the provided dropdown, and the effective start date. Note: The effective start date must be a Sunday and no earlier than the Sunday of the week you are currently in.
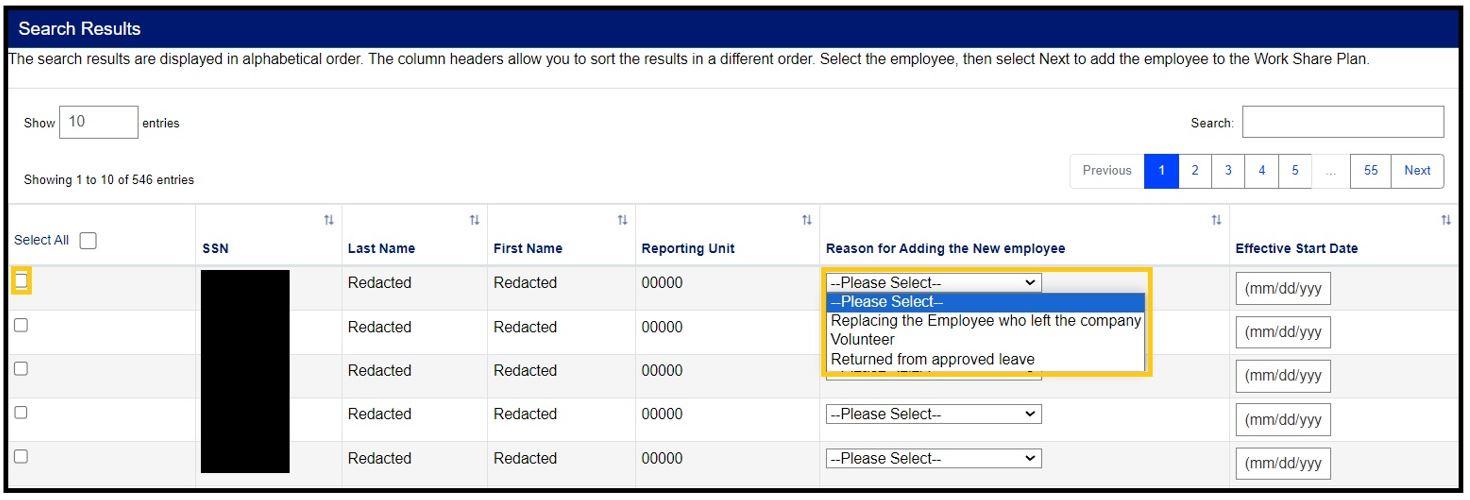
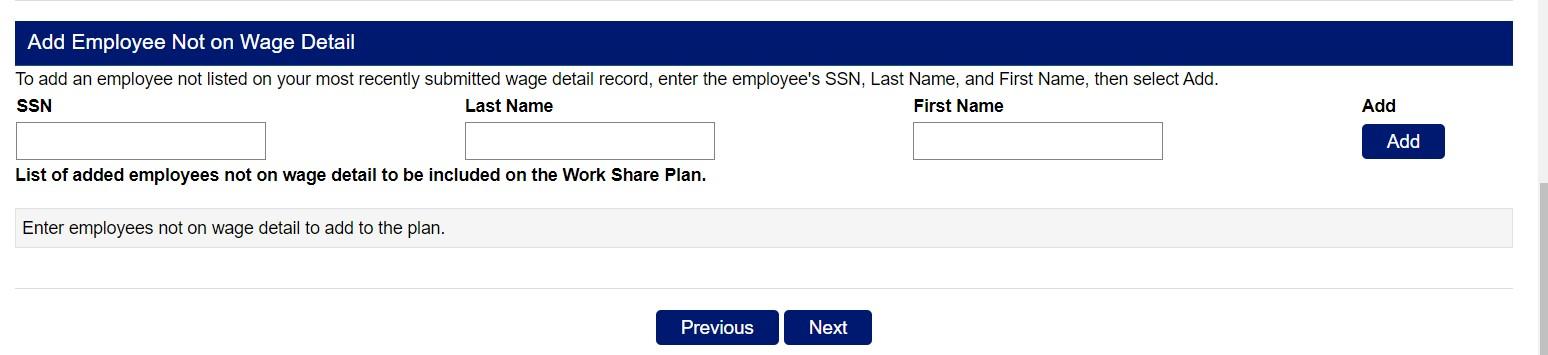
You may also search for employees by SSN, Last Name or Reporting Unit in the "Search Work Share plan Employees" section of the screen.
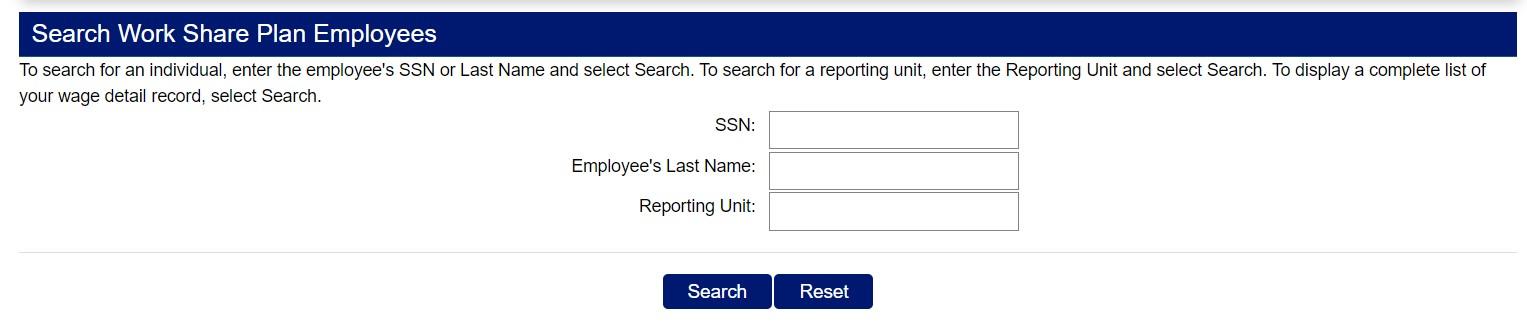
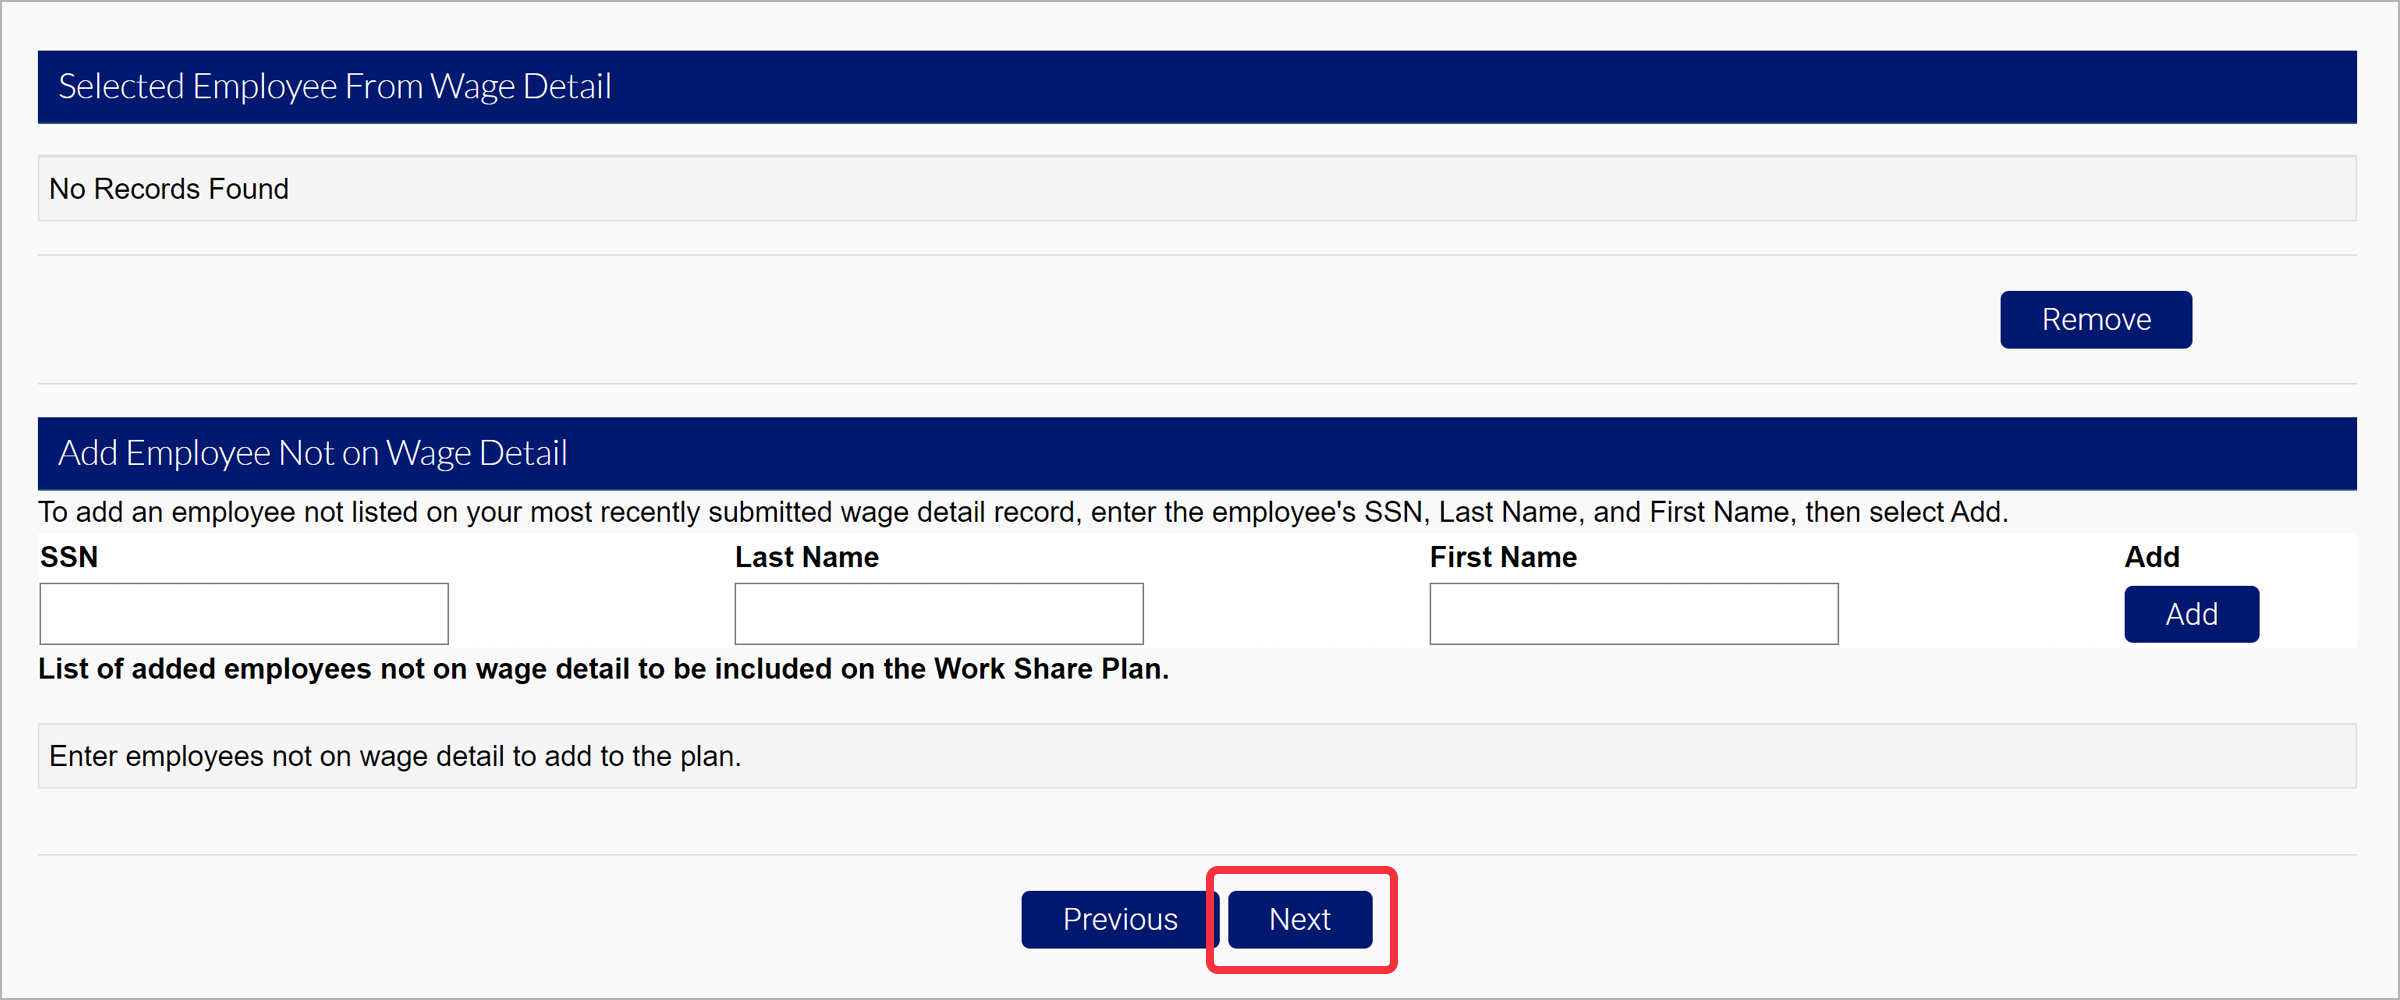
If the employee you are searching for is not found, use the "Add Employee Not on Wage Detail" section to add the employee to the plan.
If you select to add employees via file upload, download the sample file and follow the format provided in the excel file.
Once you have selected or uploaded all the employees you are adding to the plan, click "Next".
A list of all the employees you are adding to your plan will be displayed. Input the employees' usual working hours in the "Regular Work Hours per Week" column. For example, if an employee regularly works 40 hours per week you will input 40 in the Regular Work Hours per Week column.
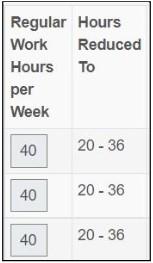
Note: If you indicated that all employees on the plan work the same number of hours you will not be able to edit the Regular Work Hours per Week column.
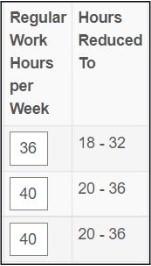
The "Hours Reduced" column will automatically populate based on the number of hours in the Regular Work Hours per Week column.
Click "Next" to preview your plan. Select the checkbox to certify your plan request, click "Save", then click "Submit".
Discontinuing a Plan
To discontinue a Work Share plan, click the "Work Share" tab in the left-hand navigation menu. Click the "Modify and View Work Share Plan" subtab.
Select the radio button next to the plan you wish to discontinue from the list provided. Click "Modify". Note: Employers may also withdraw a Work Share plan if no monies have been paid and the plan is no longer needed.

Enter the effective date of the plan modification. Note: The effective date must be the Sunday you wish to discontinue your plan. Select the "Yes" radio button next to "Discontinue this Work Share Plan", and select a reason for the discontinuation in the provided dropdown. Enter a written explanation of why you would like to discontinue the plan.
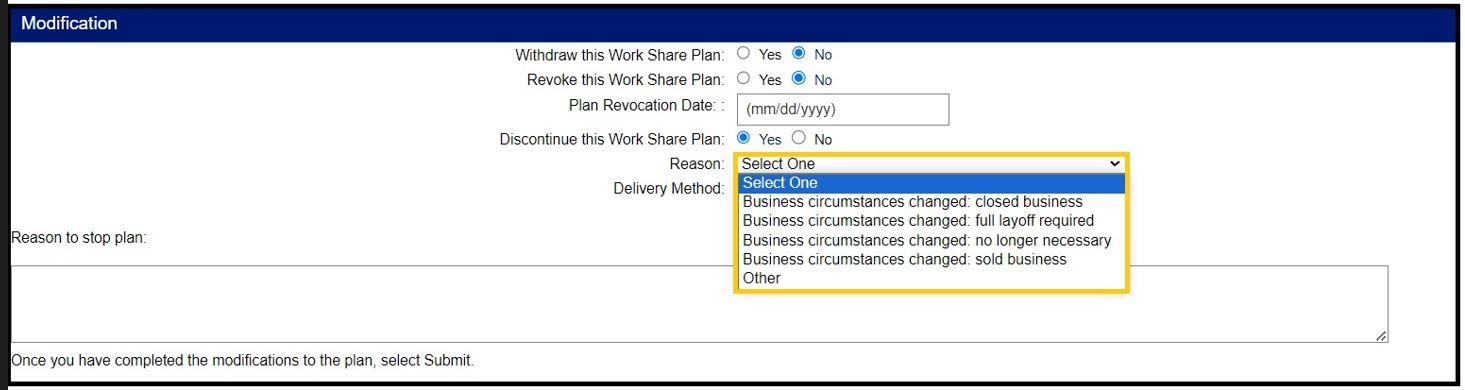
Select the certification checkbox and click "Save". Click "Submit" to submit your request. A confirmation page will display indicating that you will receive a decision in 15-20 days of your request.
Requesting Payment
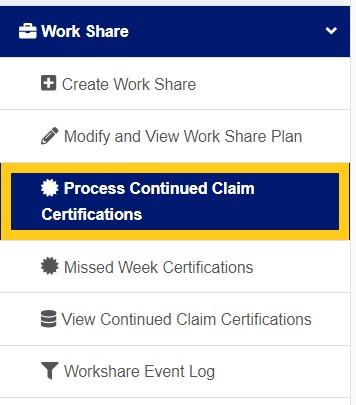
To request a payment, click the "Work Share" tab in the left-hand navigation menu. Click the "Process Continued Claim Certifications" subtab.
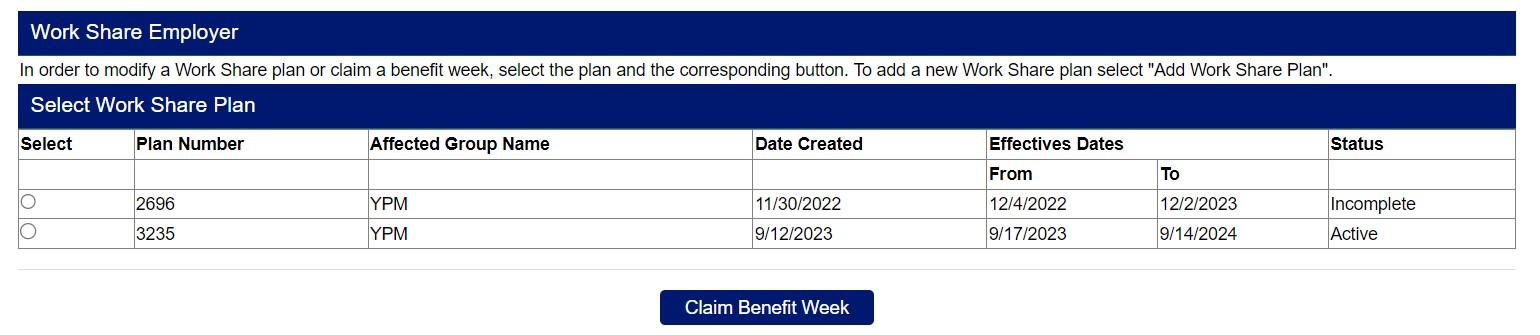
Select the radio button next to the plan you wish to complete the weekly certification for. Click "Claim Benefit Week".
Click the blue hyperlink of the listed week to request payment. If there are multiple weeks available to certify they will be listed in chronological order. Note: You will be required to complete the certification process in order beginning with the oldest available week.

Enter the "Work Share Hours Worked" and the "PTO/Holiday" hours for each employee in the fields provided. Note: Work Share Hours Worked are the hours the employee physically worked. PTO/Holiday hours should be any hours the employee requested time off, include PTO, holiday hours, sick leave, etc.

Click "Save", then click "Submit" to submit your payment request.