How to Adjust a Wage Report
After a wage report has been submitted, employers and third party administrators (TPAs) can make adjustments, search, view and download reports inside MyUI Employer+. Adjustments can include adding/removing employee(s) Social Security Numbers (SSNs), updating reported wages, and more.
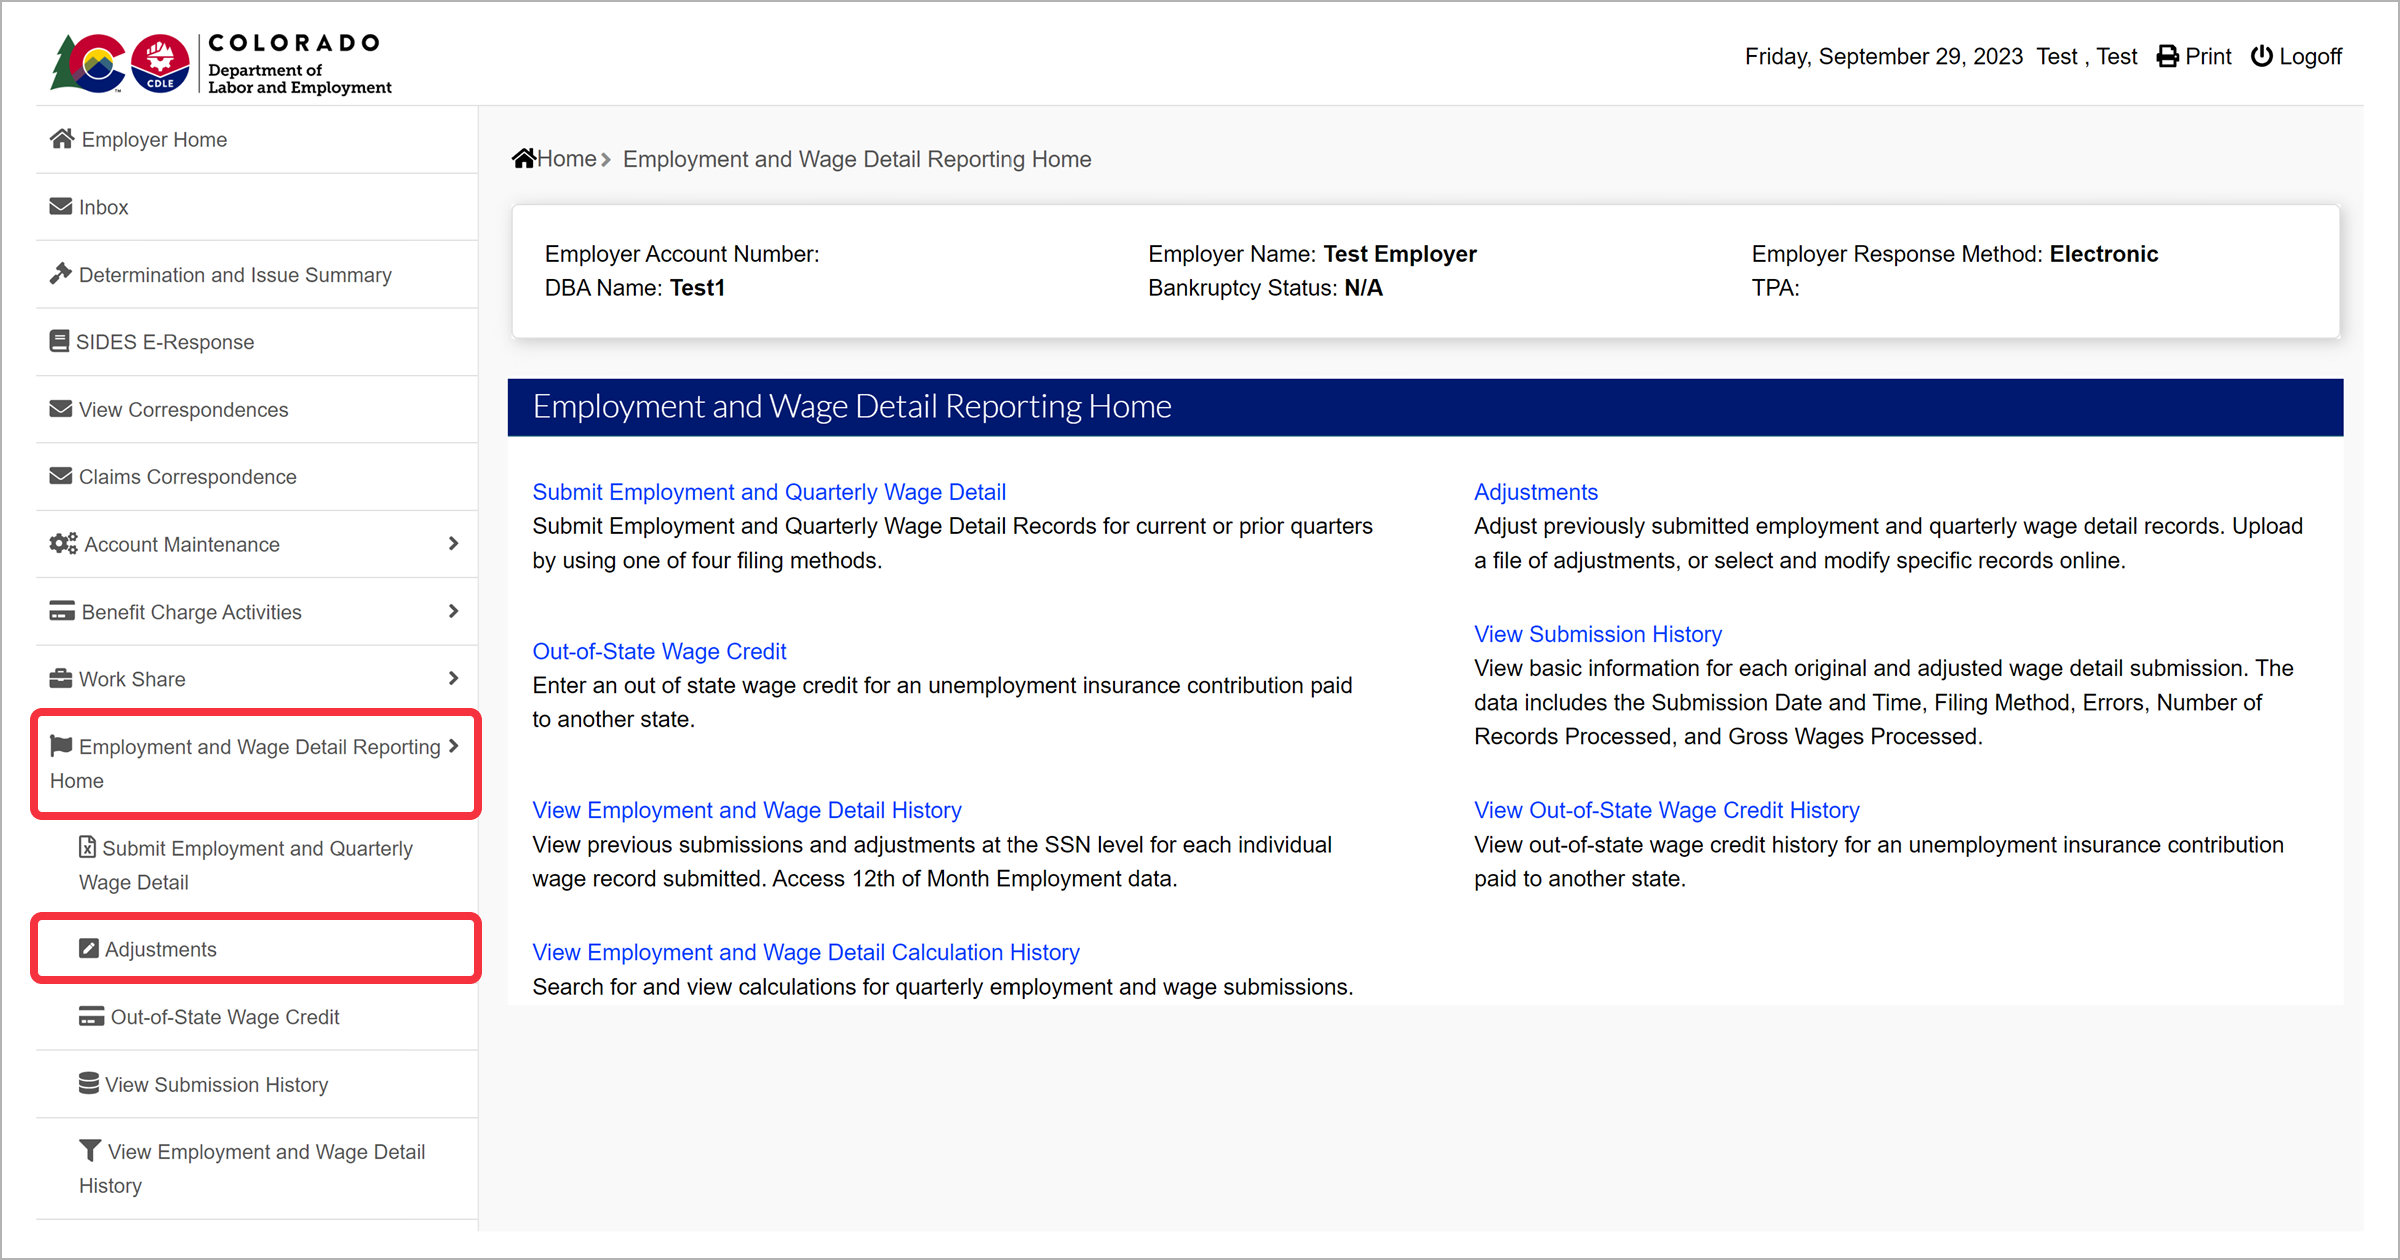
Step 1. Access Employment and Wage Detail Information
- Login to MyUI Employer+ and access your Employer Home page.
- Click the “Employment and Wage Detail Reporting Home” tab in the left-hand navigation menu.
- Click the “Adjustments” subtab.
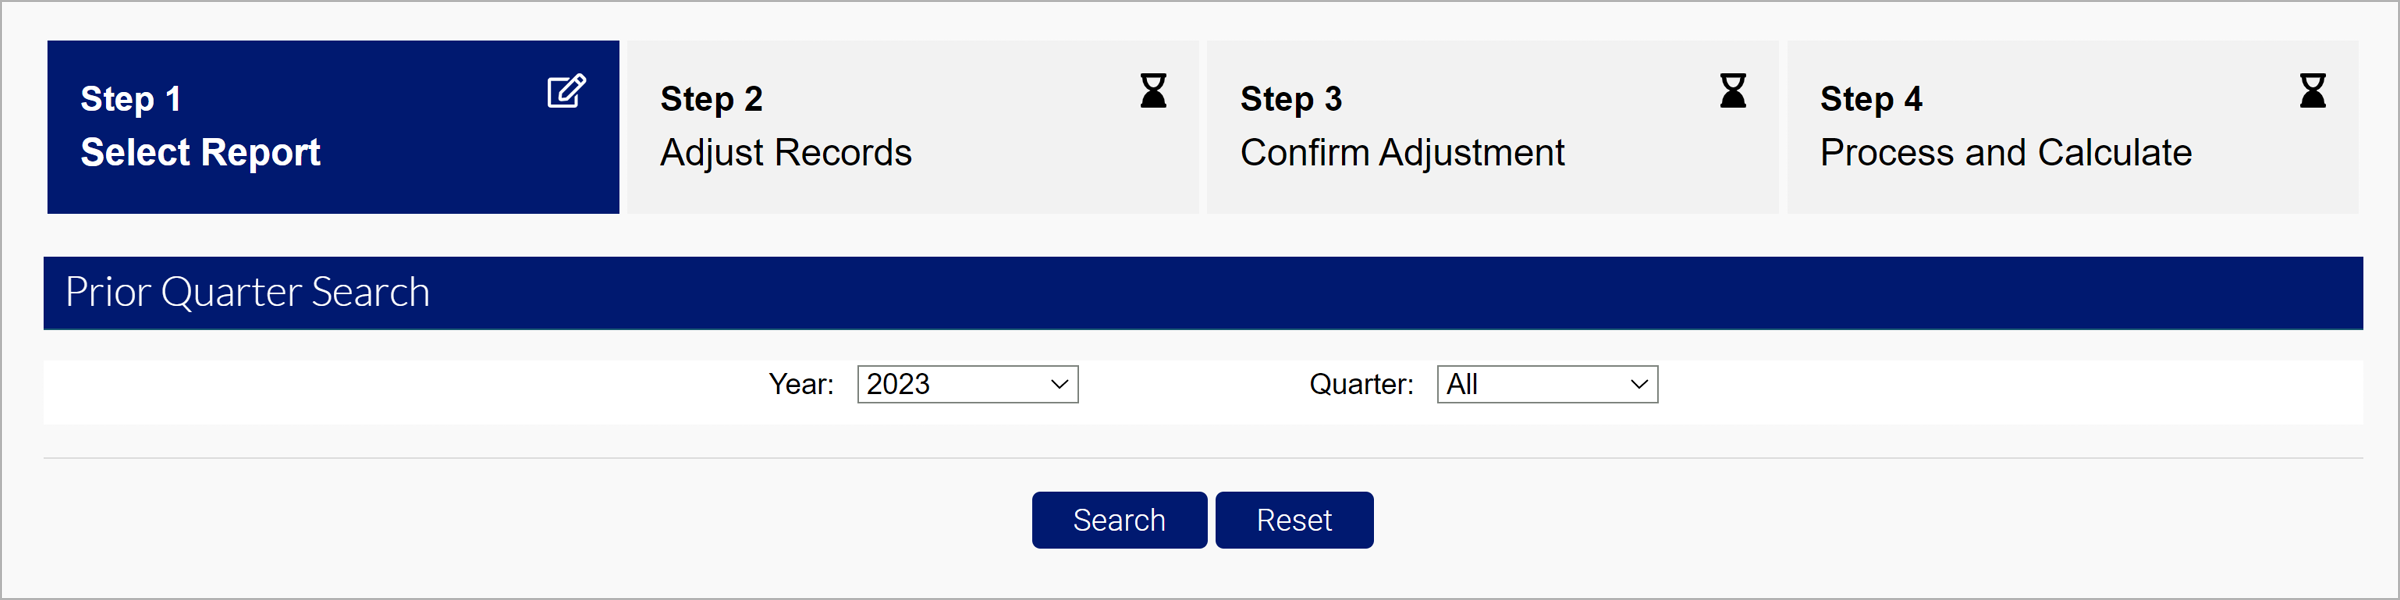
Step 2. Select the Report to Adjust
- Select the Year and Quarter of the report you would like to adjust.
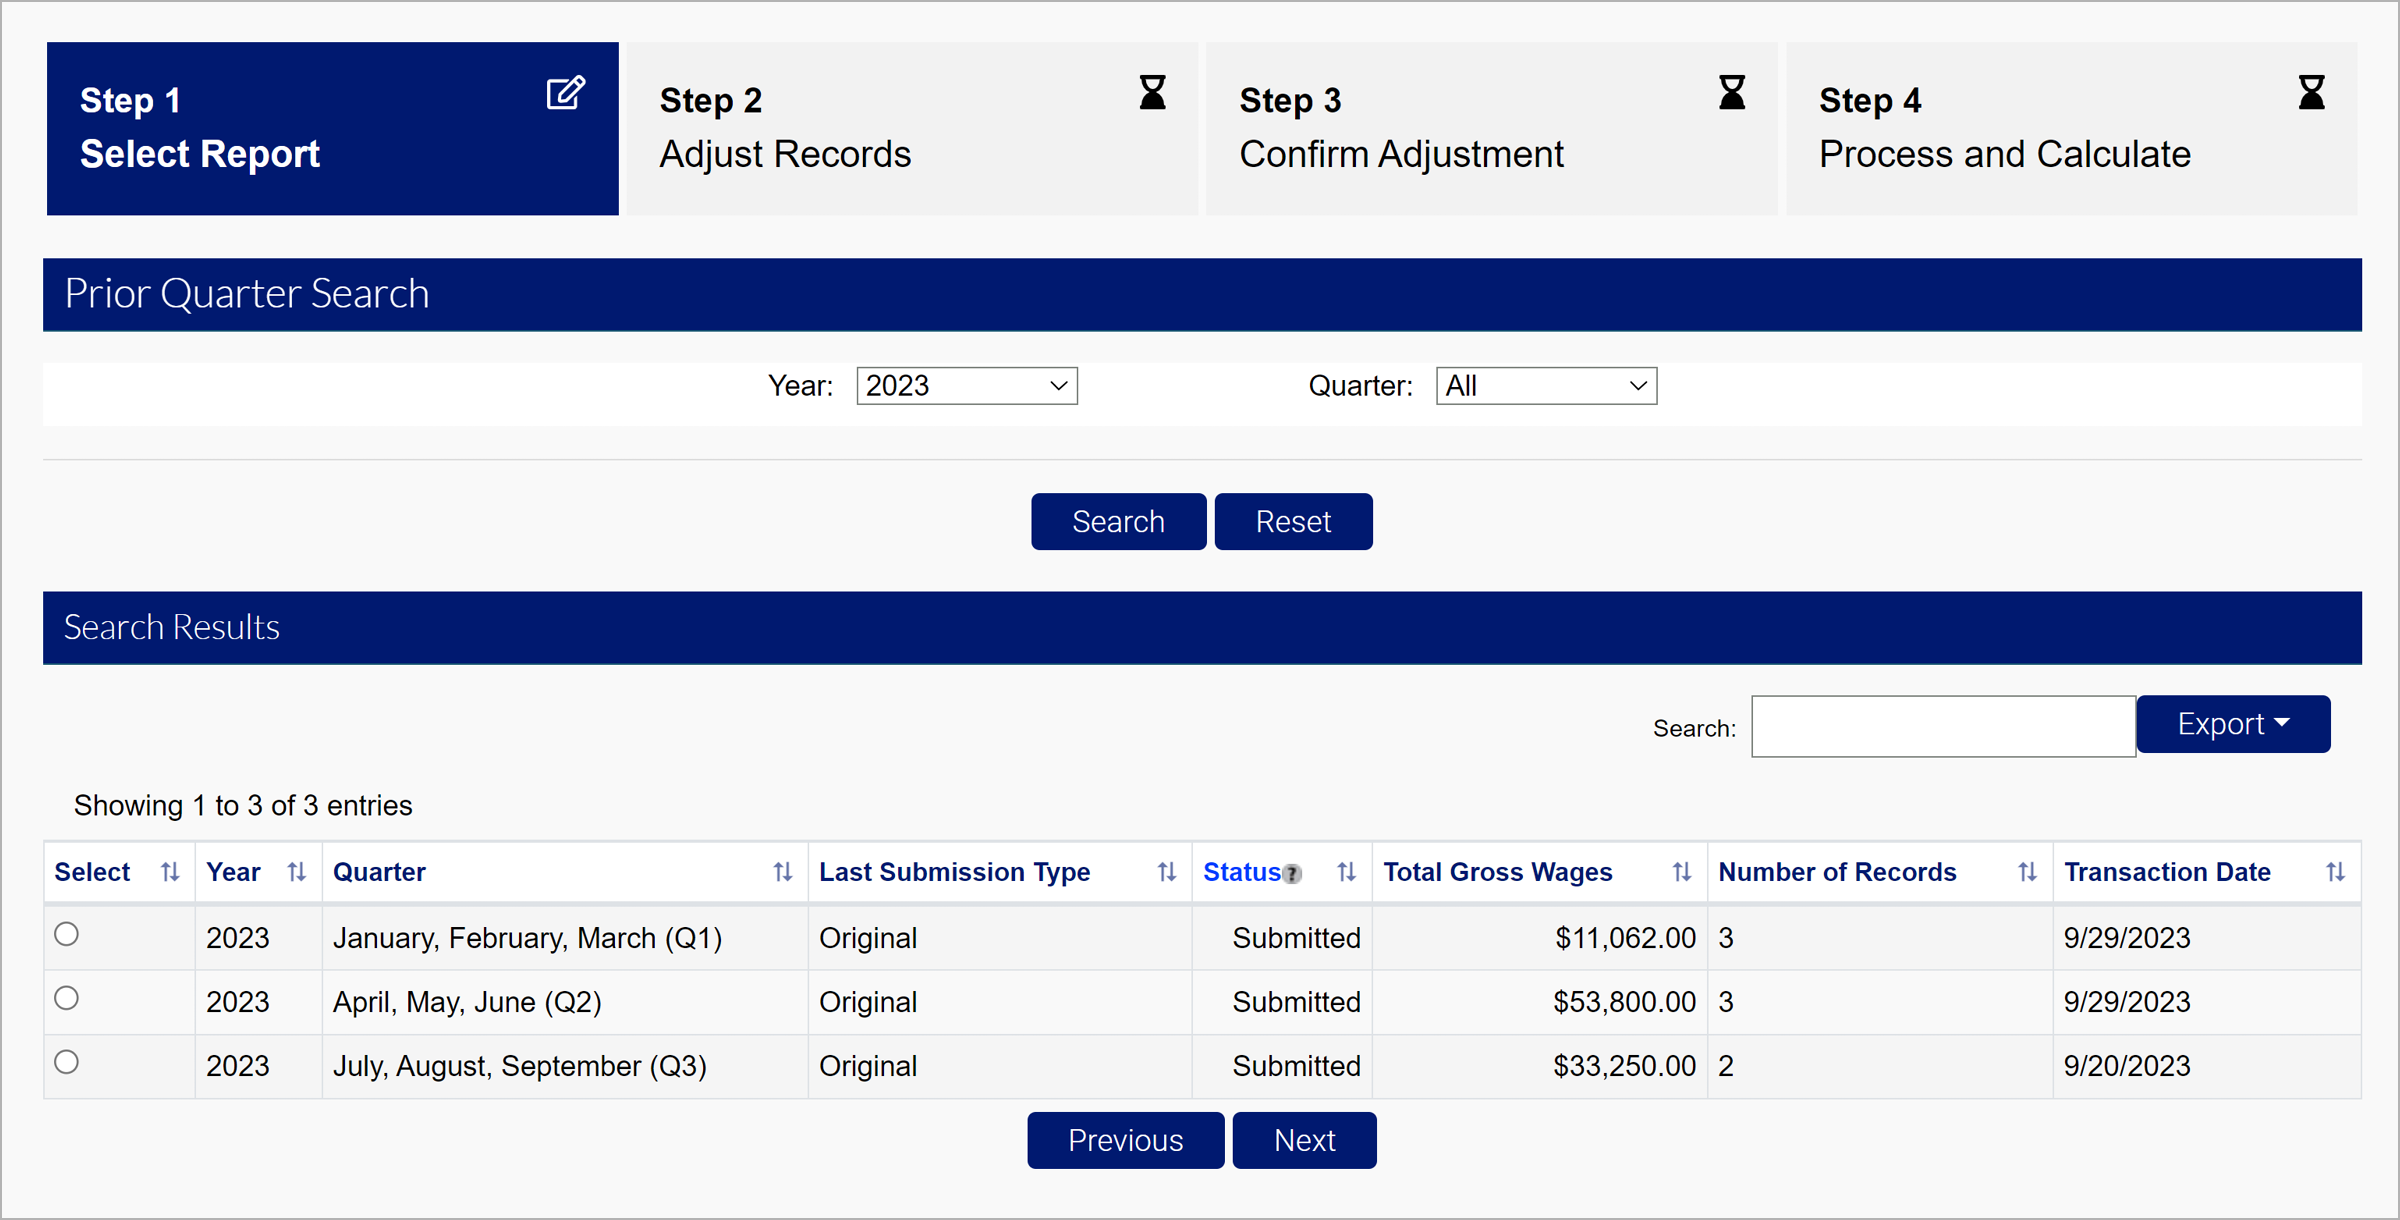
- Click “Search”.
- Select the report you wish to adjust.
- Click “Next”.
There are three options for your wage adjustment:
- File Upload - Attach electronic wage file
- Manual Entry - Adjust individual wage records manually online
- No Employment - No wage report

See How To Submit a Wage Report for more information on each of these filing options.
Step 3. Make Your Adjustments
File Upload Adjustments
- Select the file type you want to submit.
- Follow the same specifications as the initial report.
- You can resubmit wages, Include additional employees, or make adjustments you want to overwrite in the file.
- Click “Next”.
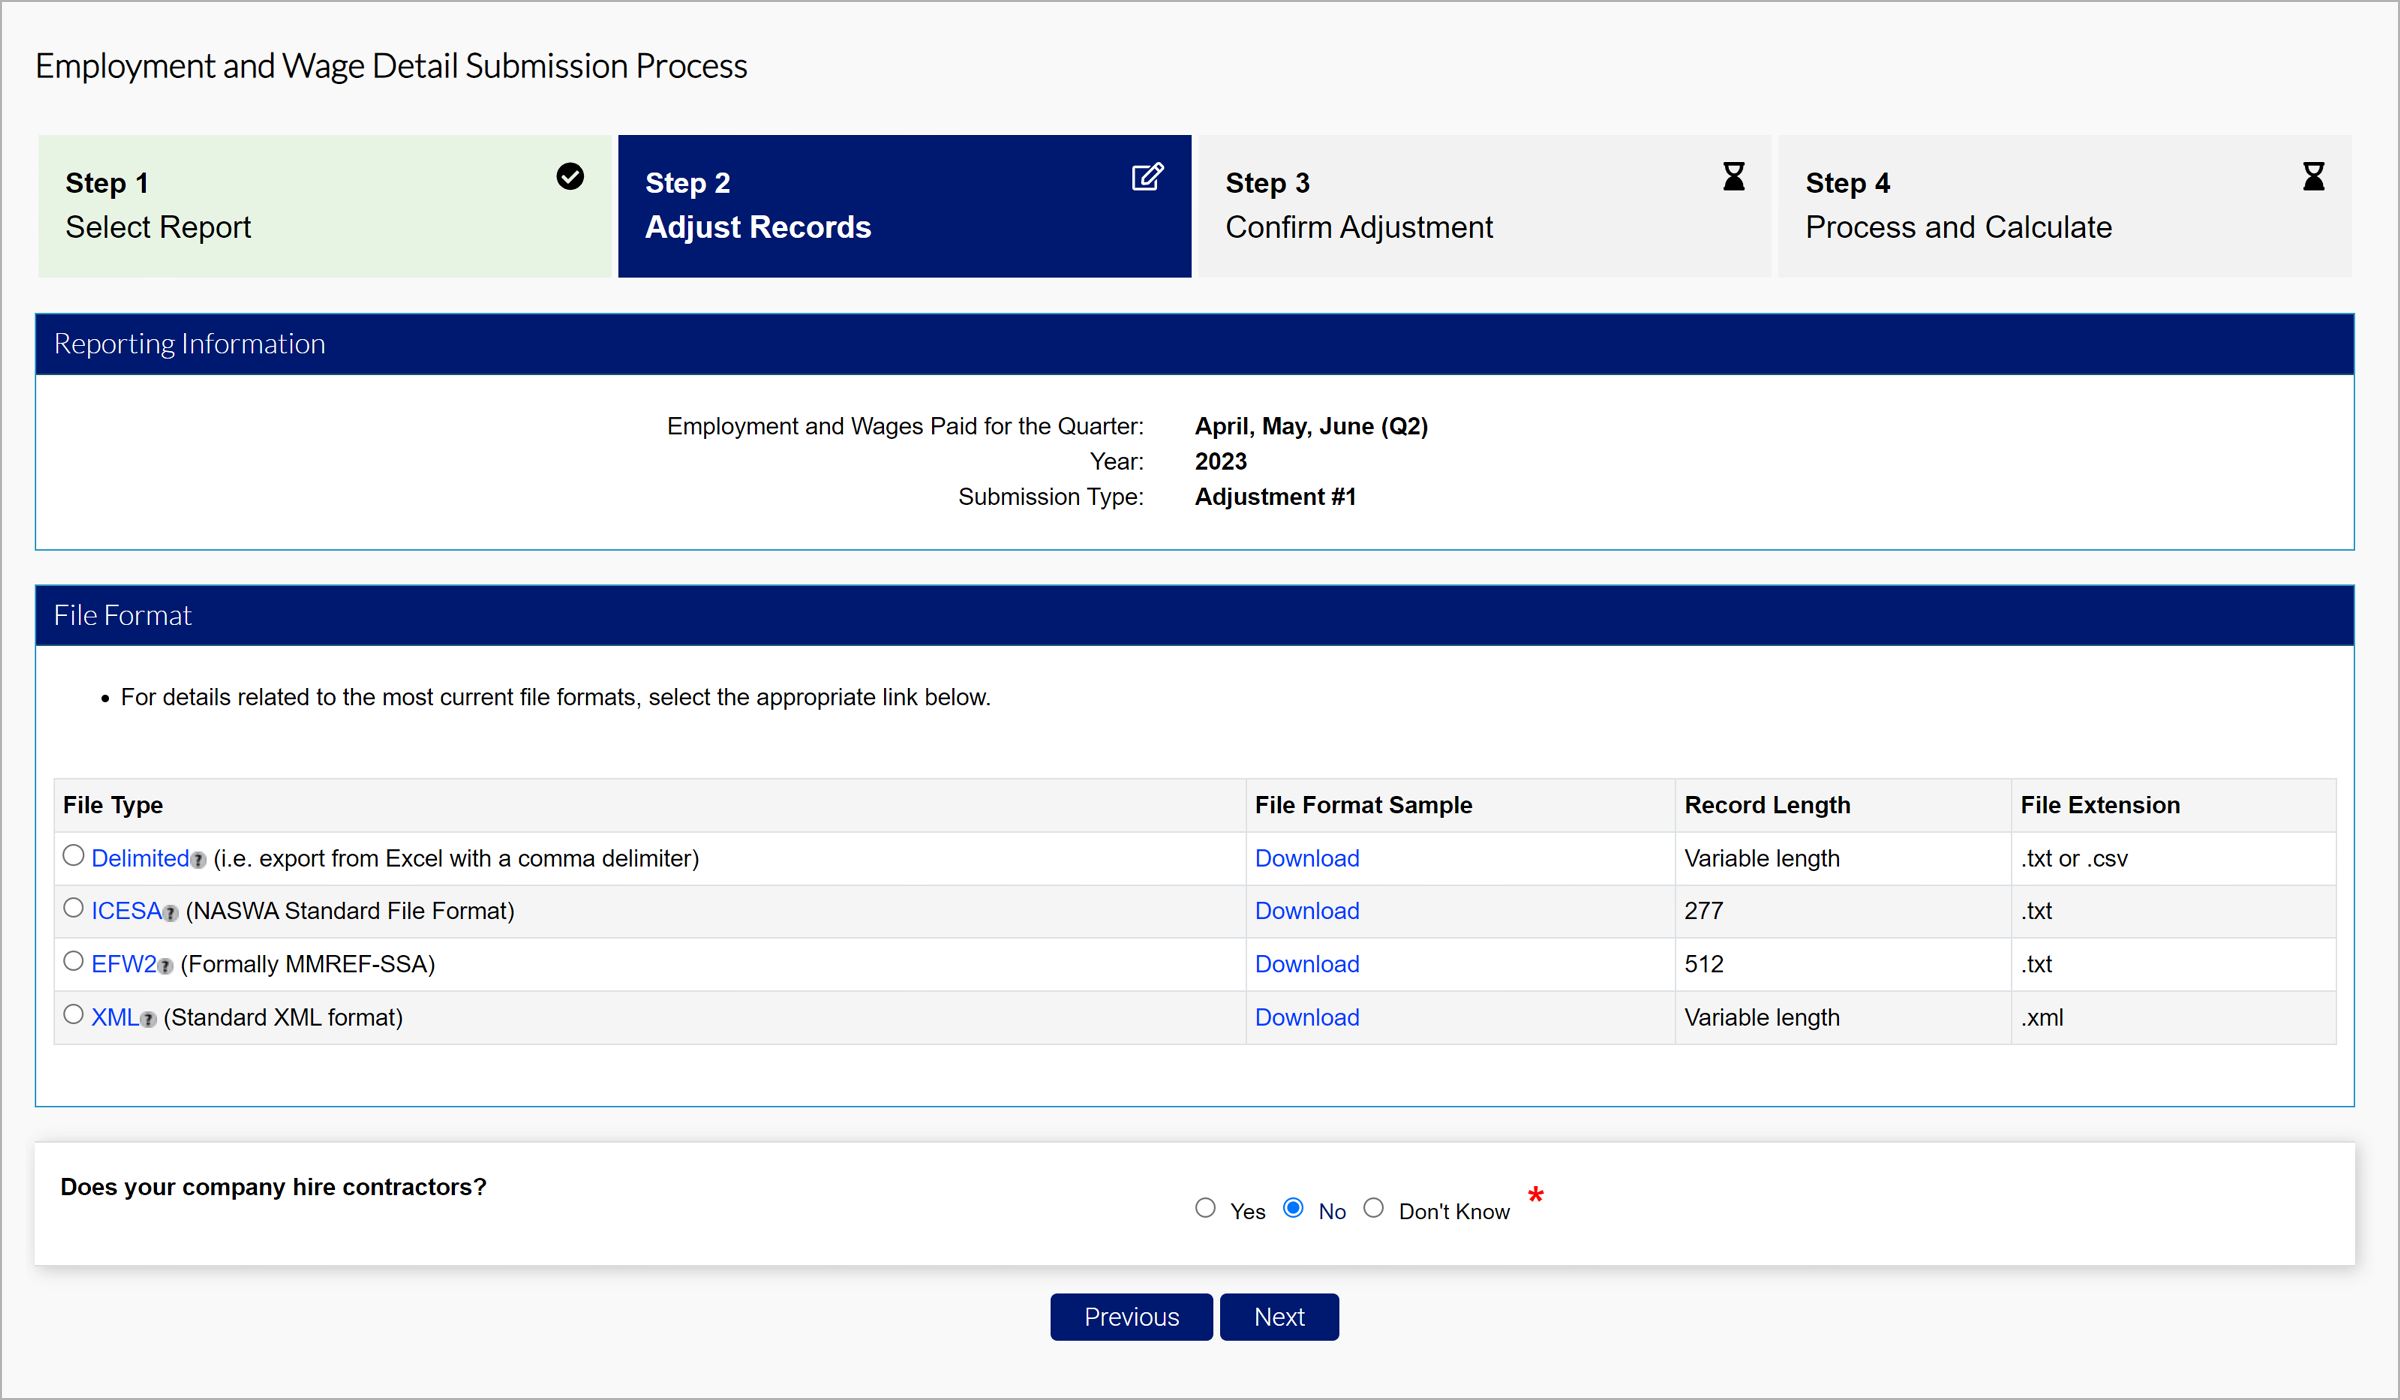
- Identify the reason for the adjustment. Reasons for adjustments include:
- Employment and Wages adjusted because of incorrectly reported wages.
- Wages adjusted because worker(s)were mistakenly included/excluded.
- Employment and Wages adjusted to correct computer system, data entry or accounting errors.
- Employment and Wages adjusted because they were reported to the wrong state.
- Employment and Wages adjusted because the workers performed services for a different business.
- Employment details adjusted to reflect correct 12th of the month employment information.
- Employment and Wages Adjusted as a result of an Audit
- SSN or name changed
- Other.
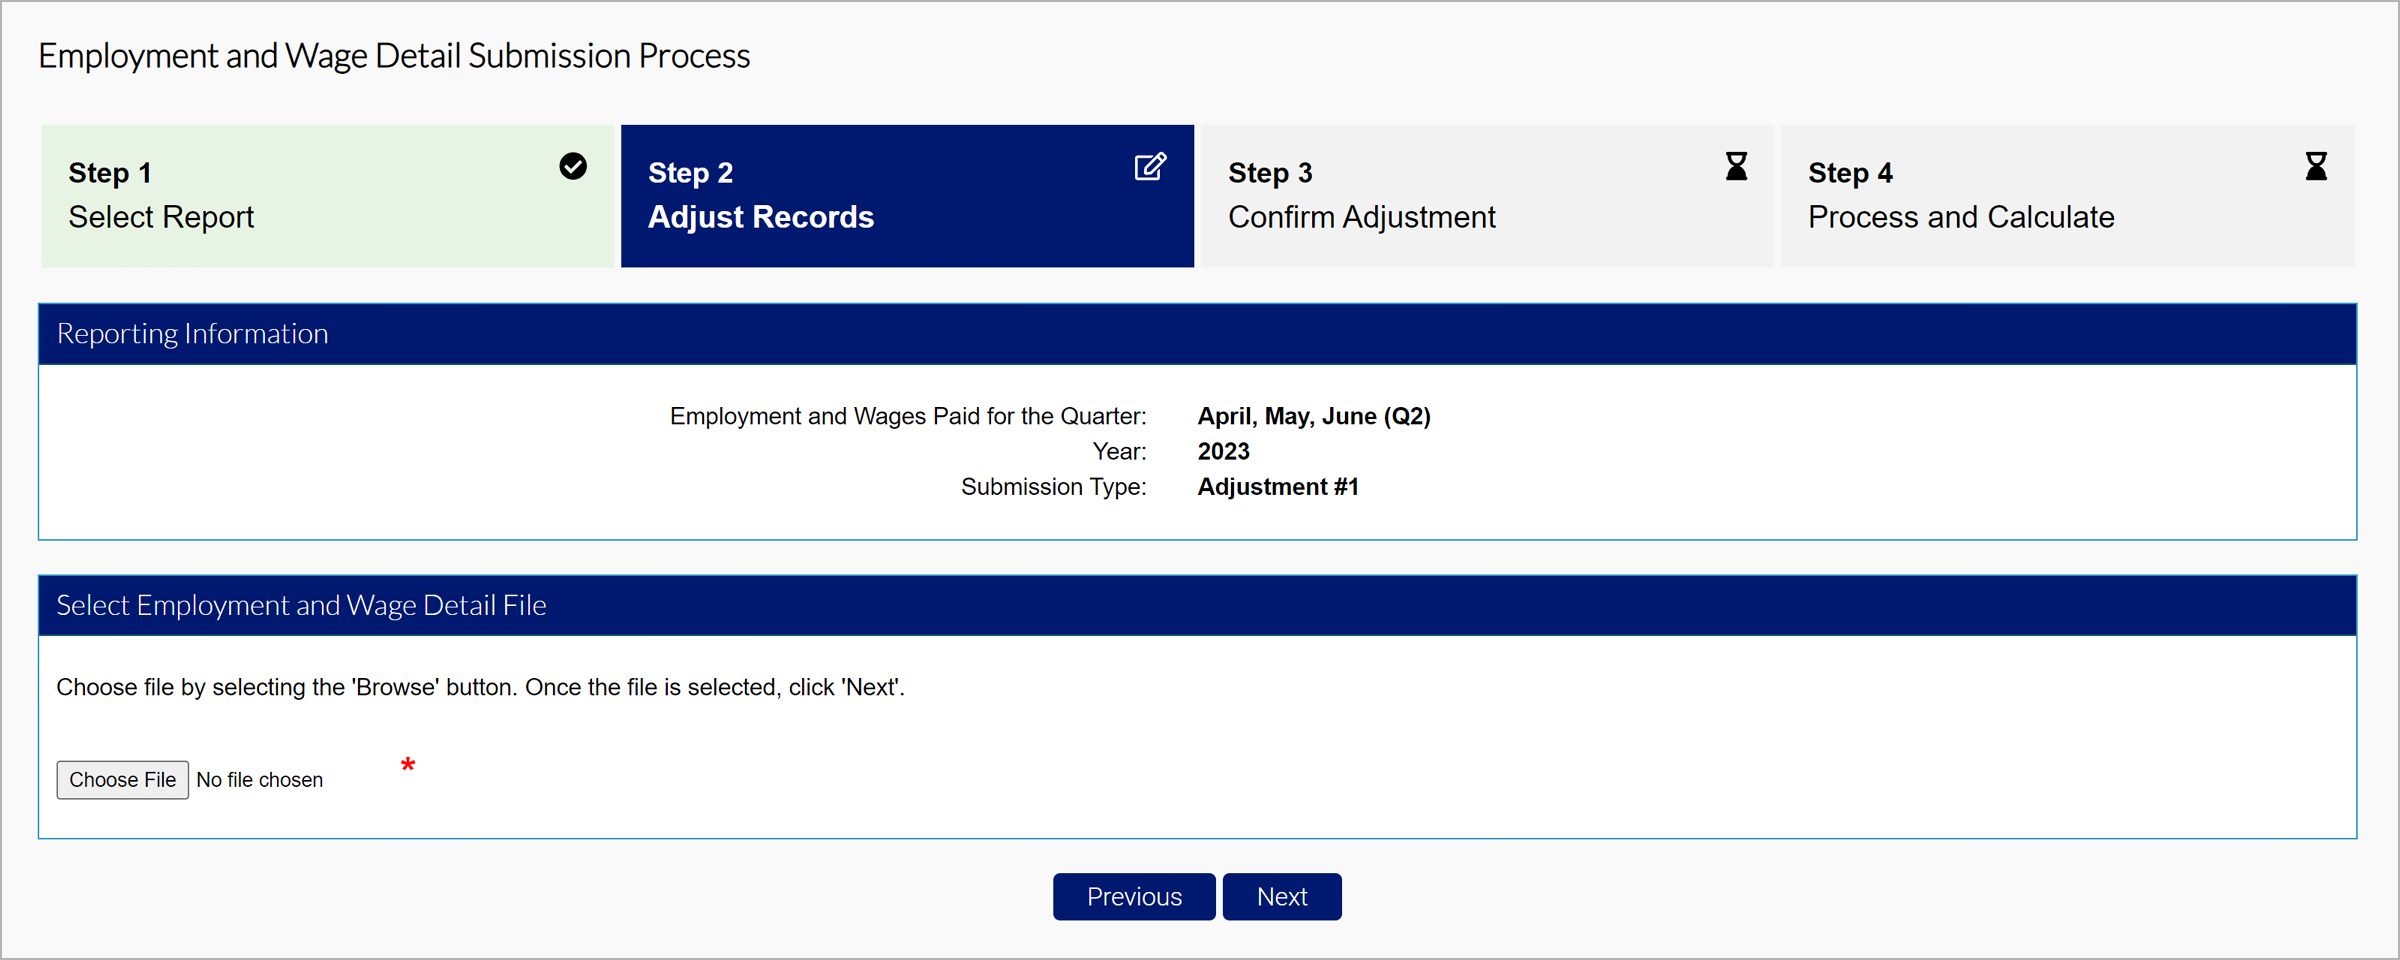
- Click the “Choose File” button and select the file you want to upload from your computer.
- Click “Next”.
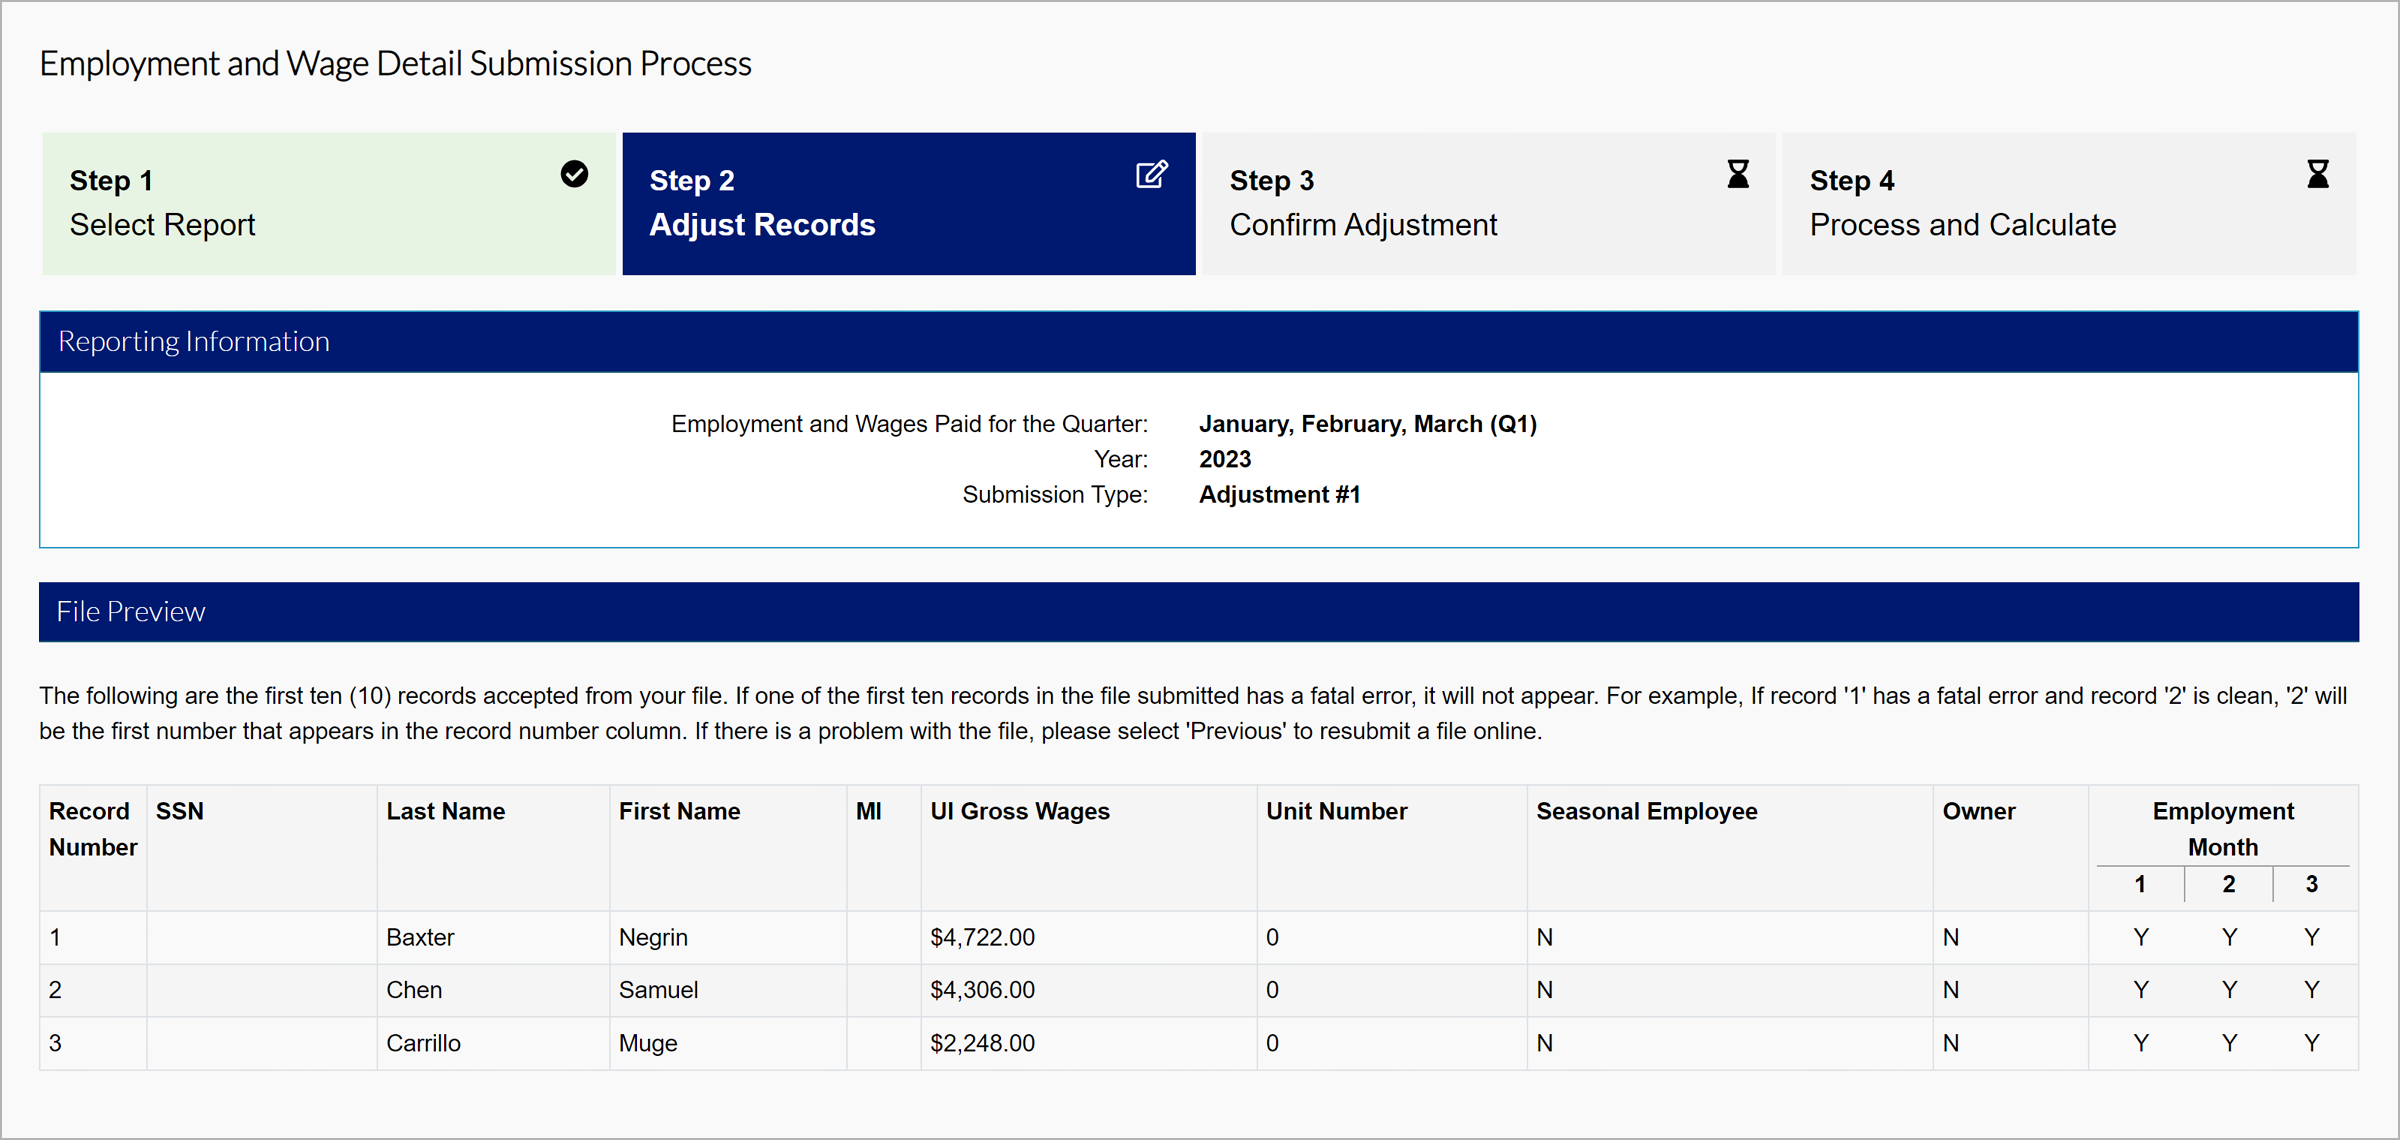
- Preview your adjusted file.
- Click “Next”.
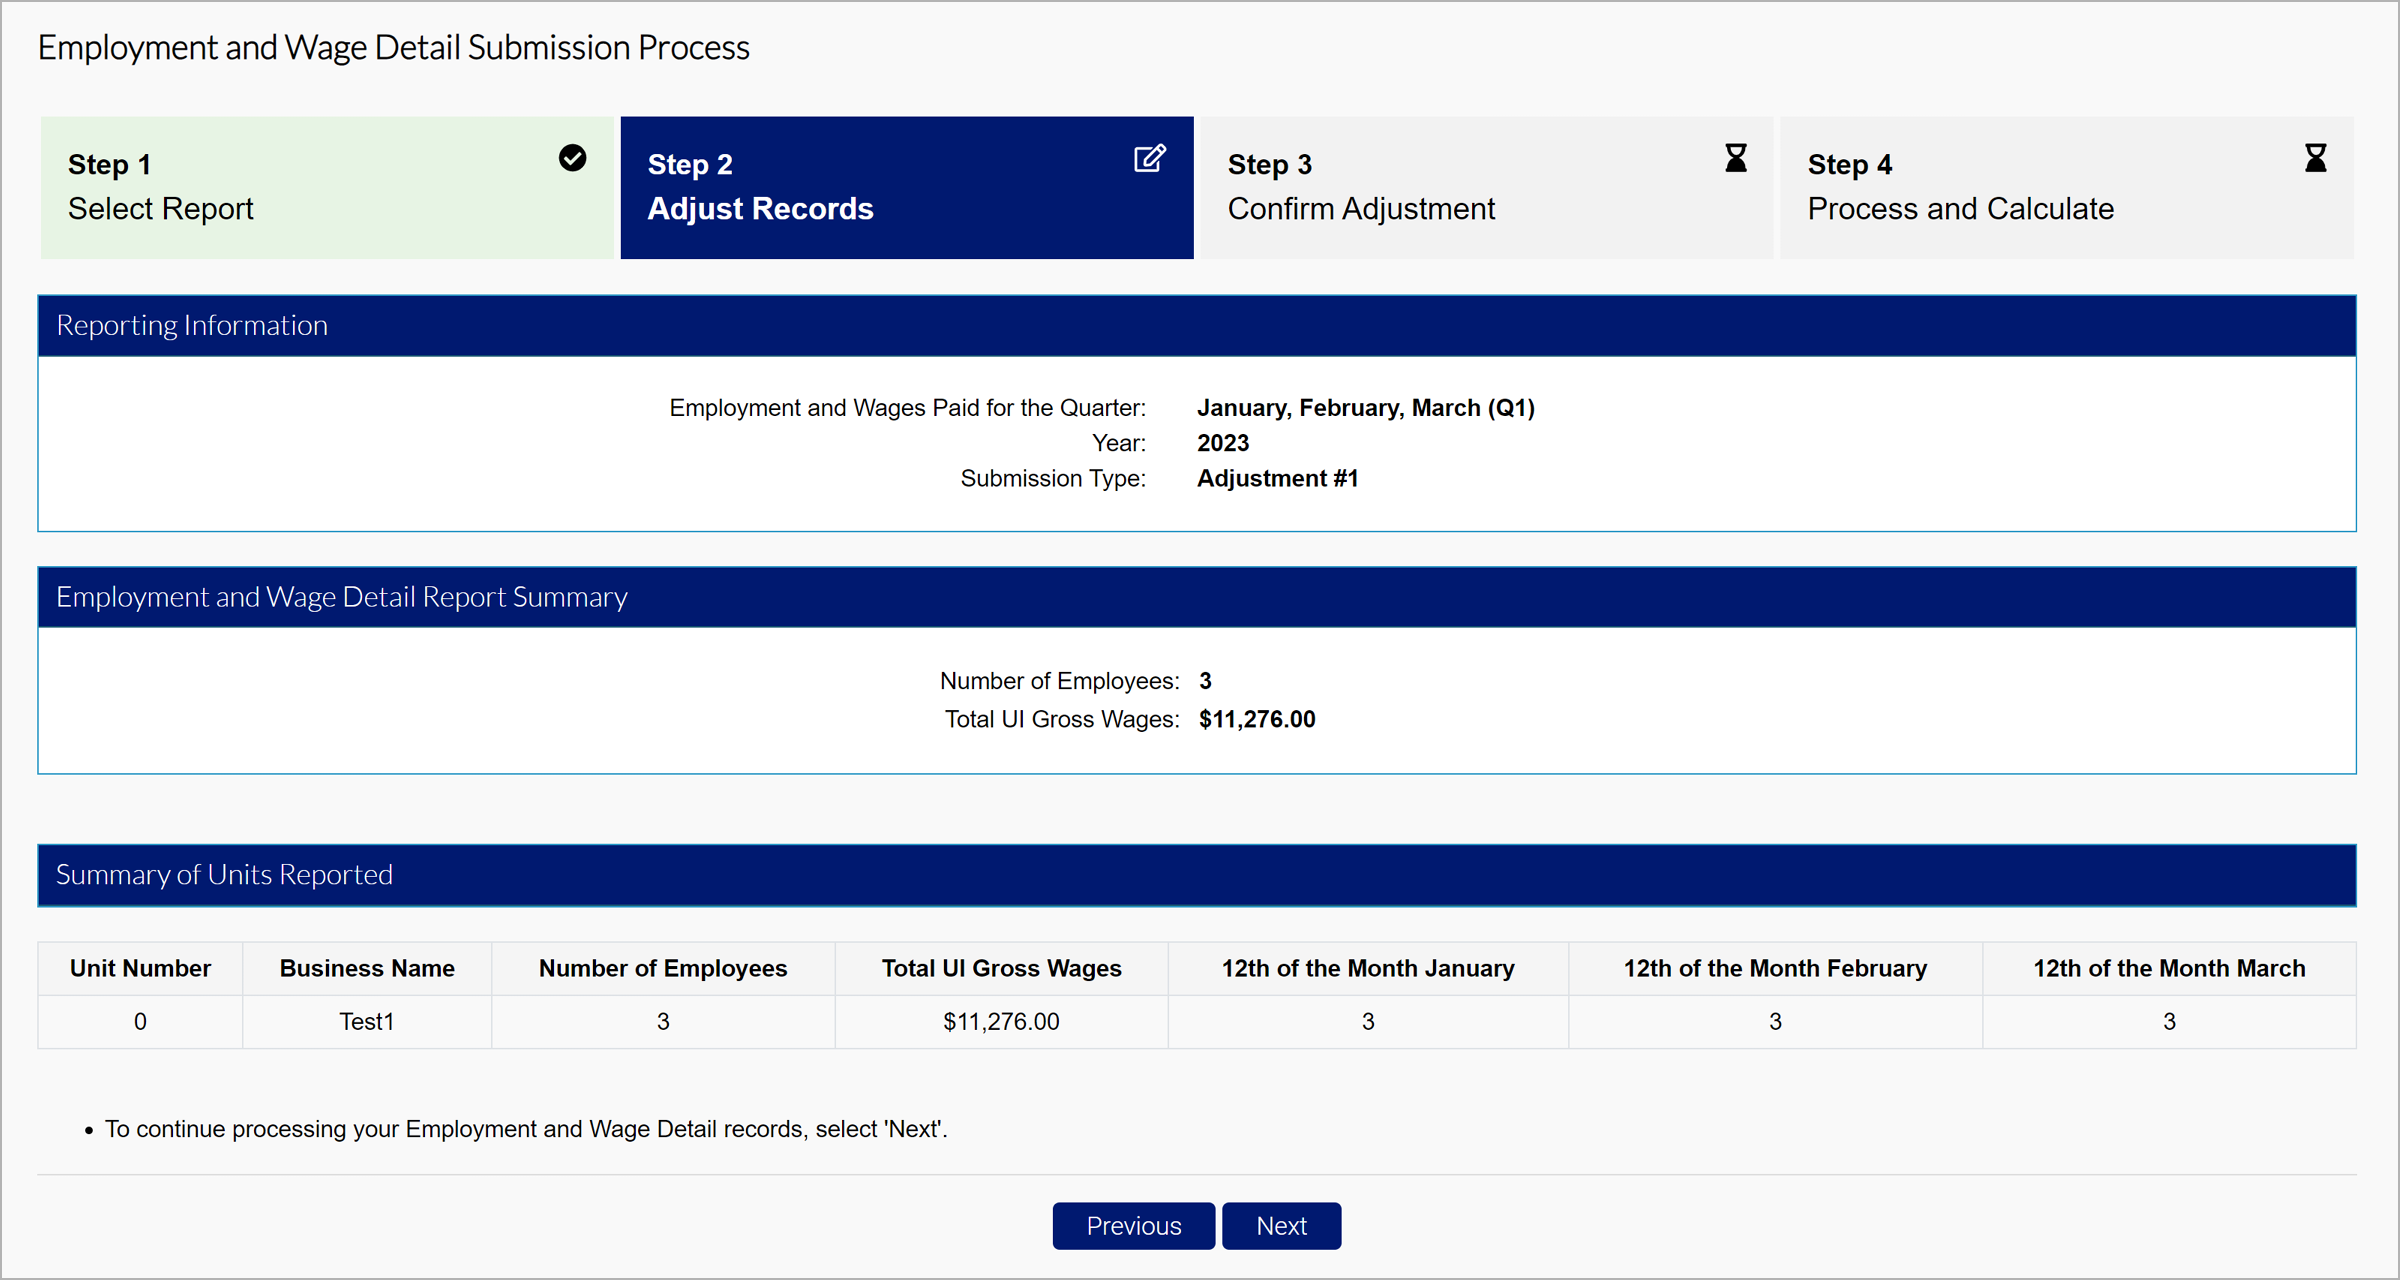
- View the summary of wages reported.
- Click “Next”.
Manual Adjustments
- Select the employees you would like to adjust from the report.
- Click “Next”.
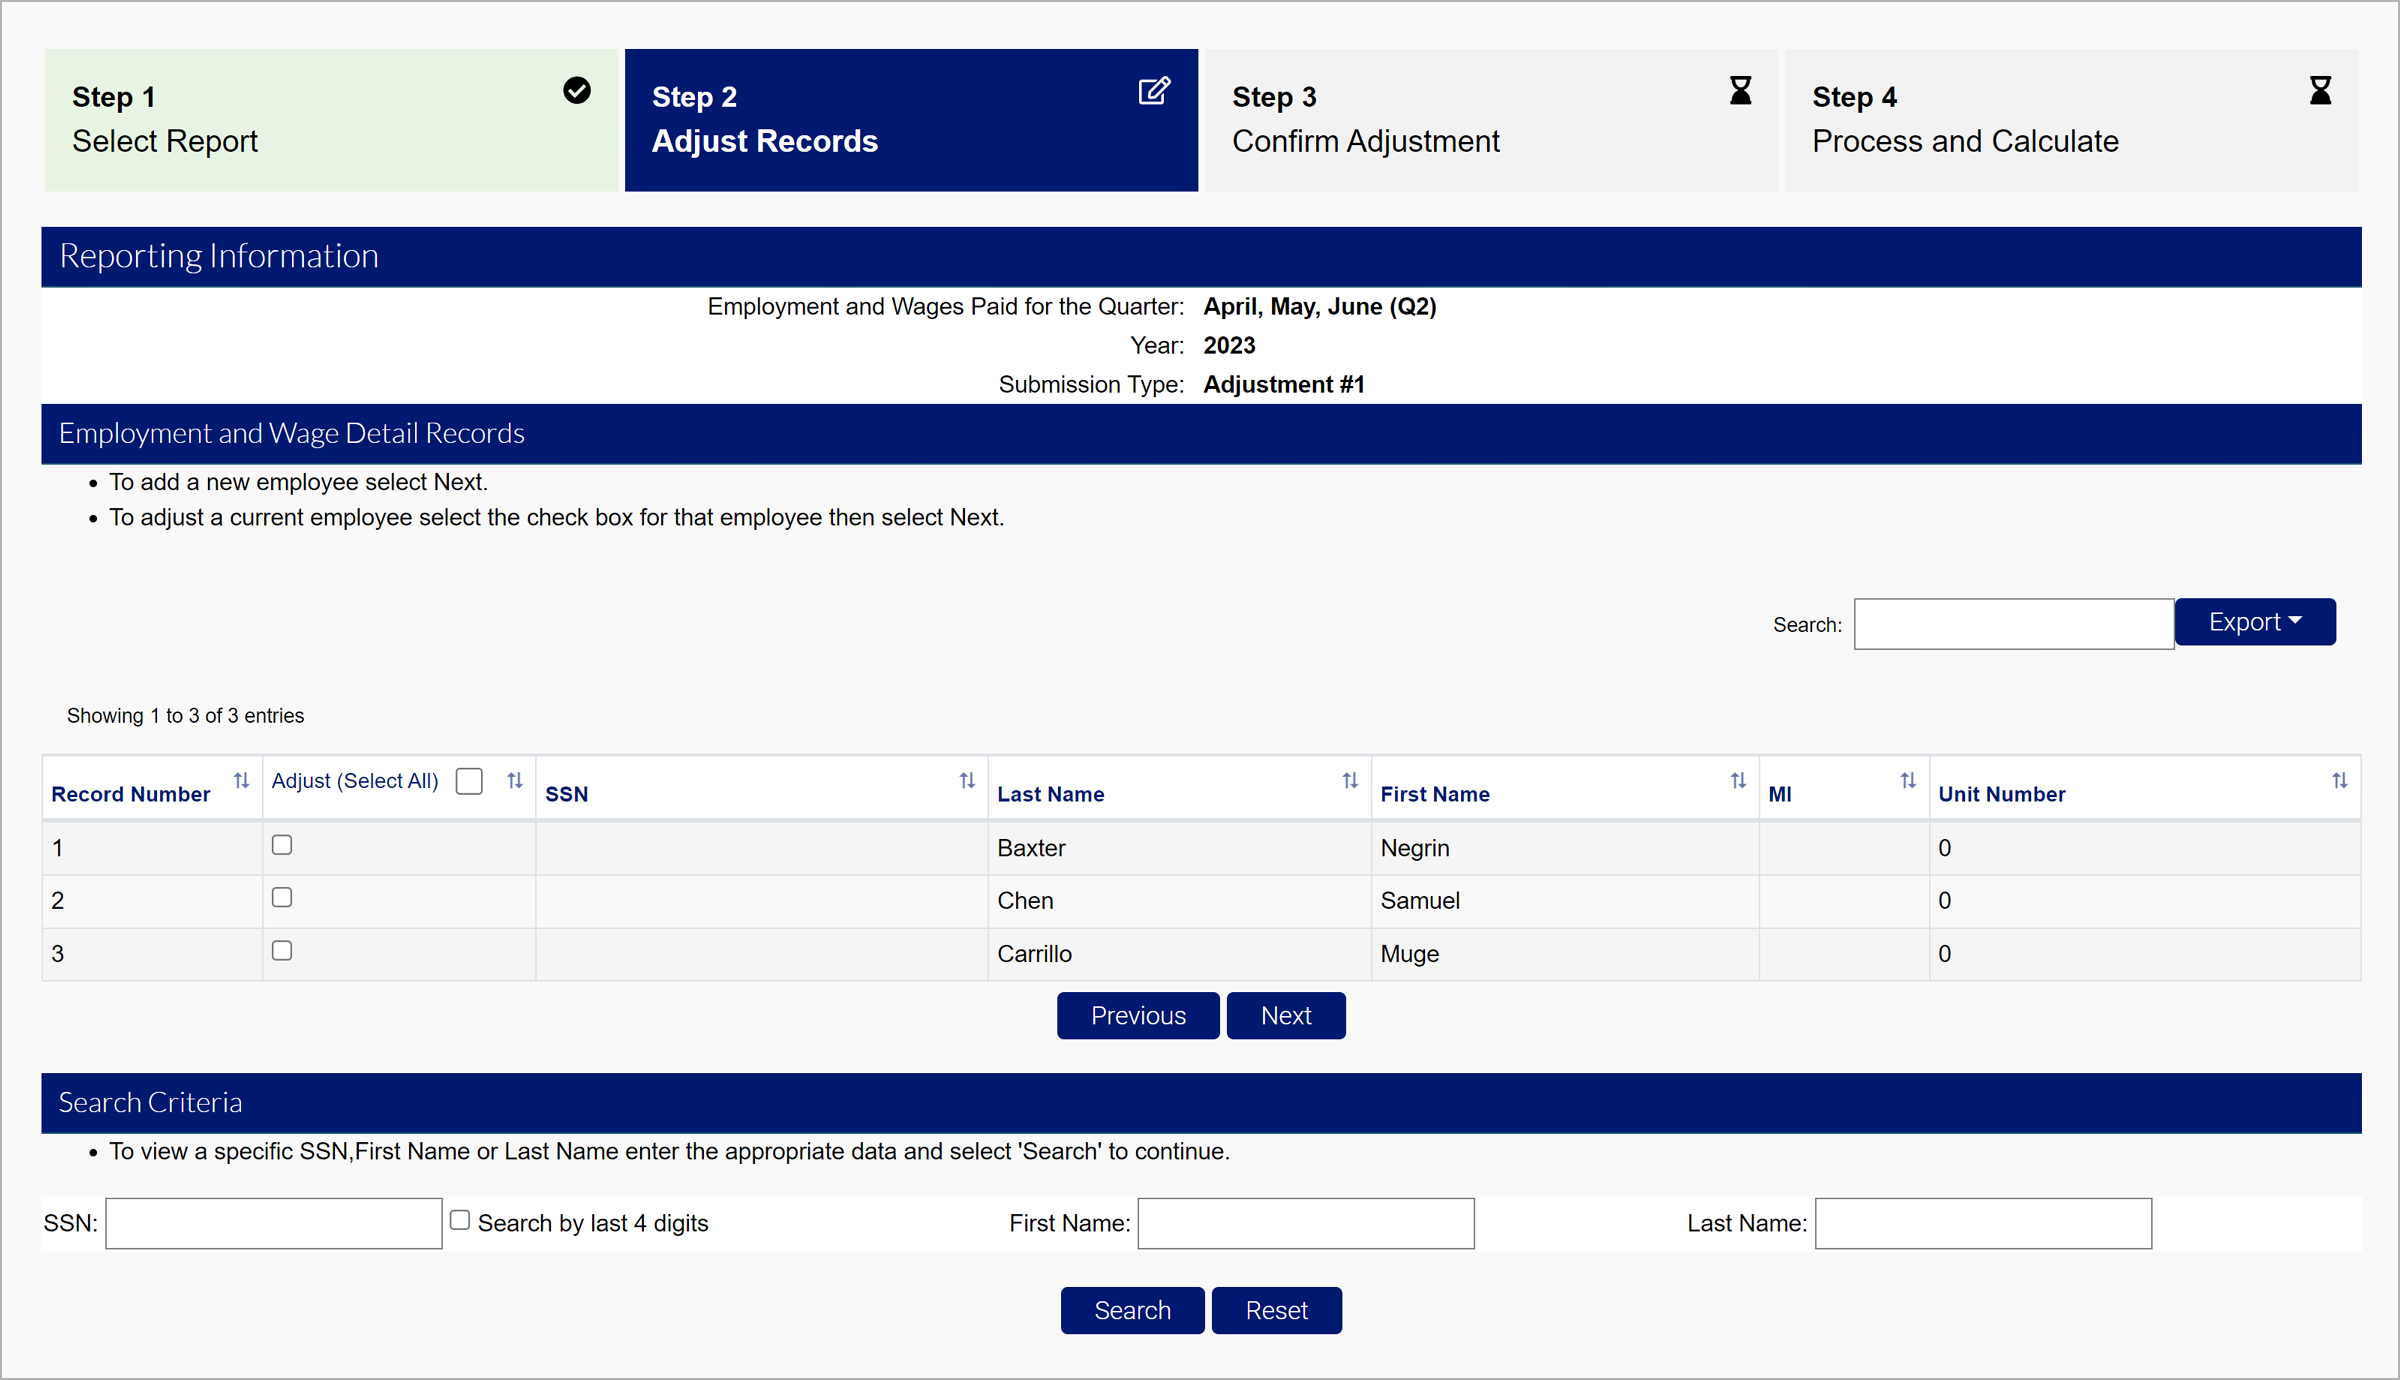
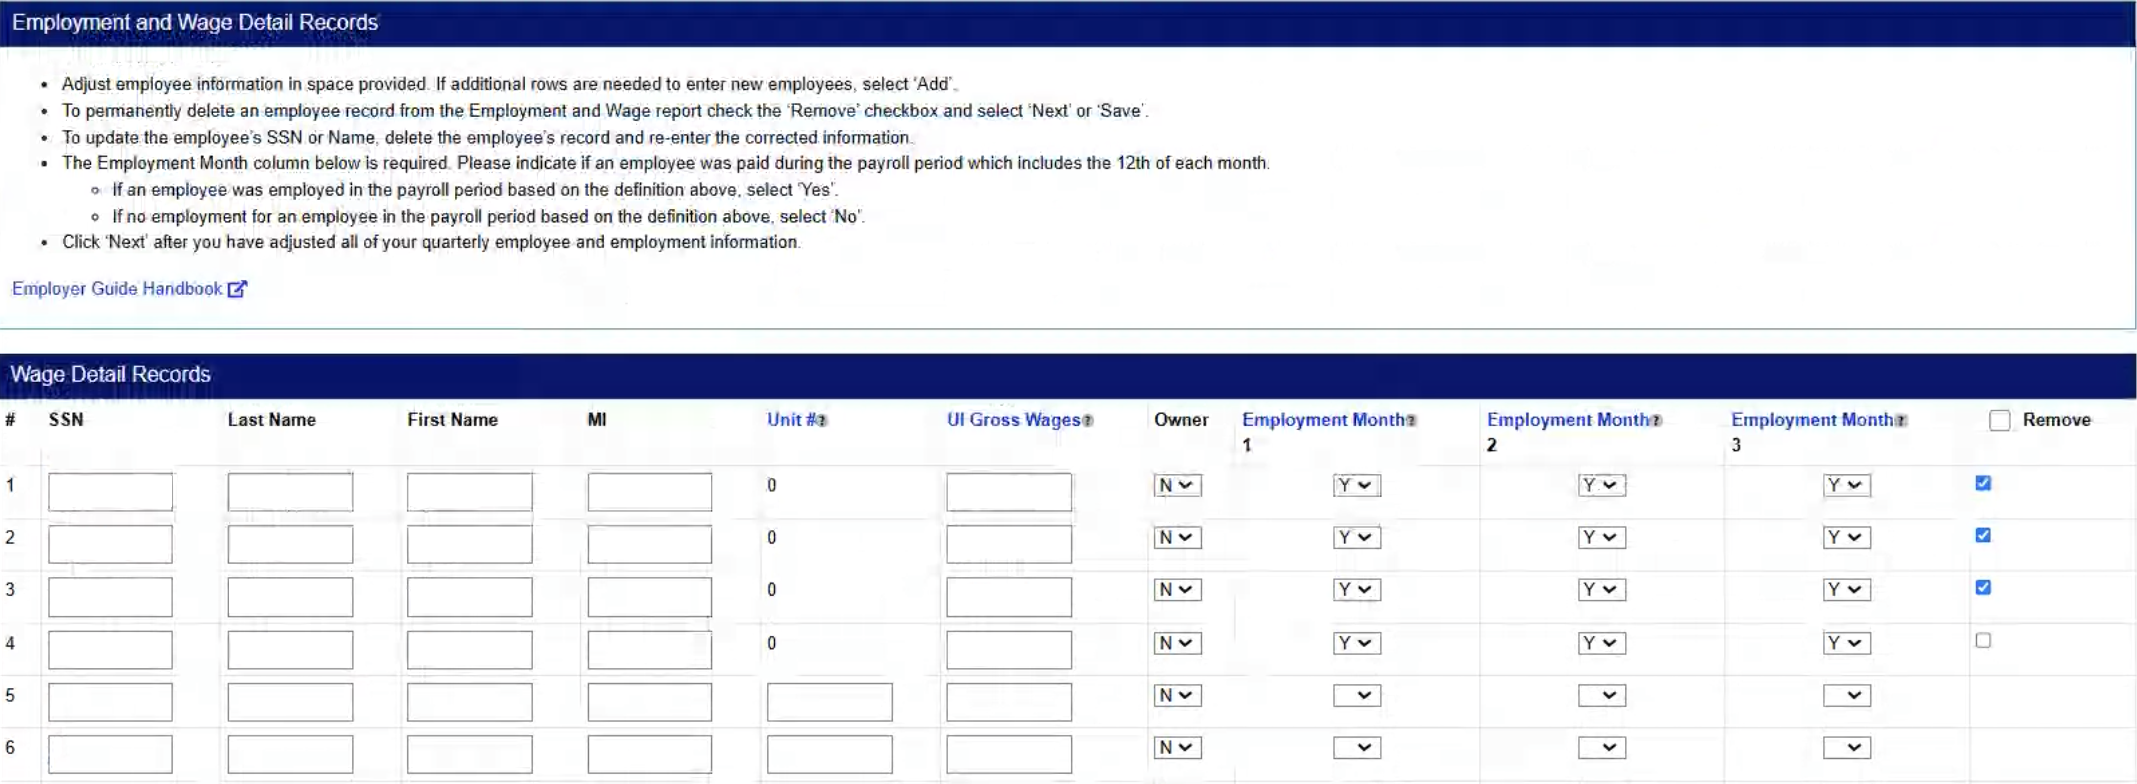
- View any selected employees and add additional employees for the adjustment in the Wage Detail Records section.
- Adjust employee information in space provided.
- To update the employee’s SSN or Name, delete the employee’s record and re-enter the corrected information.
- Click “Add” if additional rows are needed.
- Select the “Remove” checkbox to permanently delete an employee from the report.
- Click “Next” or “Save”.
- Click “Next”.
The Wage Detail Adjustment Reason Verification screen will ask for you to enter a reason for adjustment. Note: If you are removing an employee SSN, you must choose option number 5 in the Wage Detail Adjustment Reason Verification screen.
- Click “Next”.
- View the summary
- Click “Next”.
No Employment Adjustments
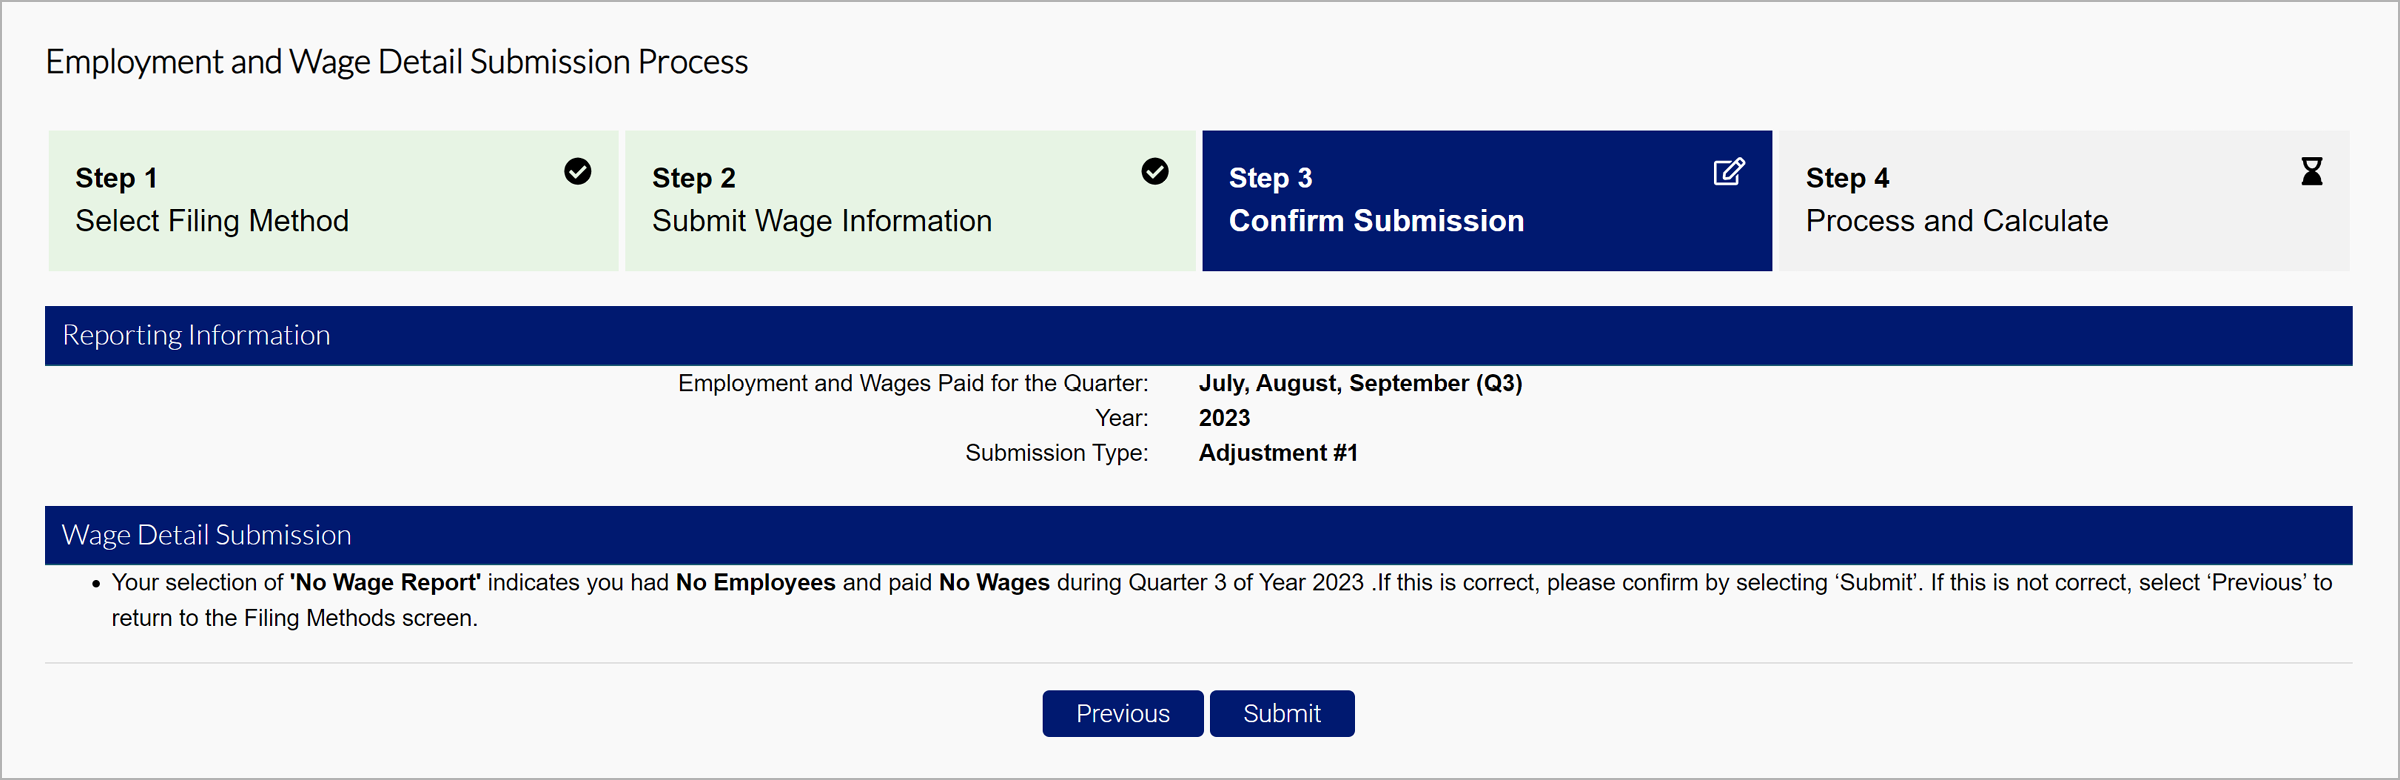
Quarters can be adjusted to reflect no employees and no wages.
- Select the “No Employment - No Wage Report” filing method.
- Review the Reporting Information and Wage Detail Submission.
- Click “Submit”.
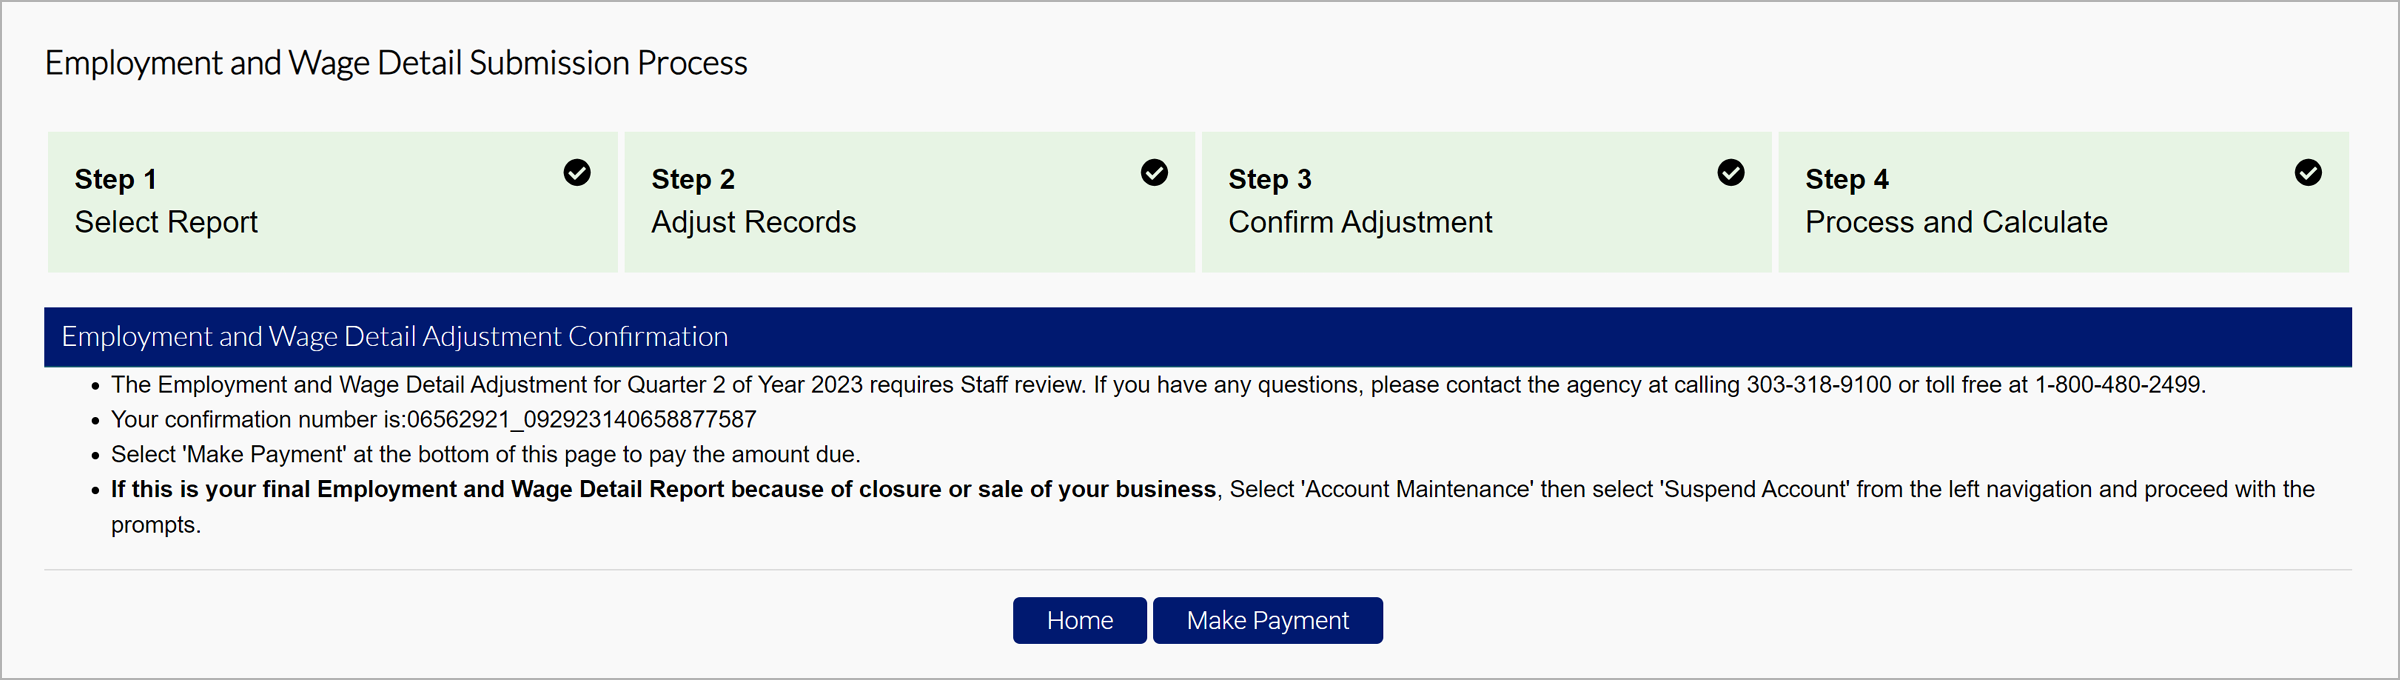
Step 4. Submit Your Adjustment
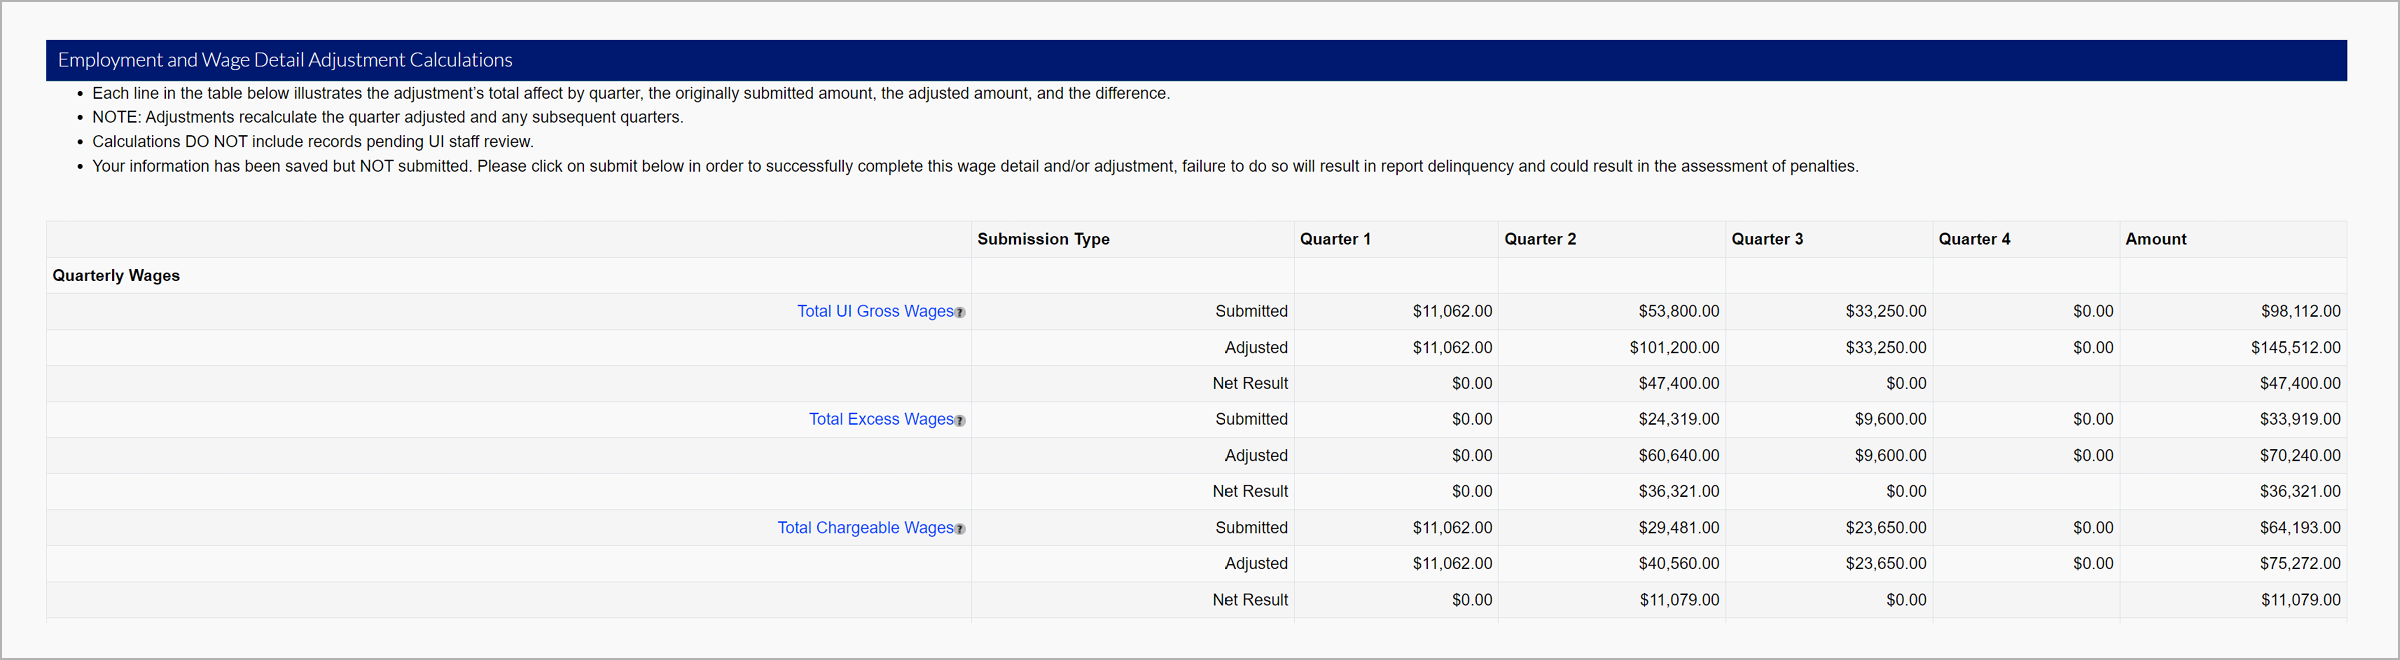
- View the breakdown including the original submission, the adjustment, and the net. You may owe additional premiums, or be provided a refund depending on the adjustment.
- Click the certification checkbox.
- Click “Submit”.

Once your adjustment is submitted, you will return to the confirmation page to make a payment or return to the Employer Home page.