How to Manage Third Party Administrator (TPA) Relationships
Colorado Employers using an accounting service, payroll service provider, or other third party administrator (TPA) to conduct any UI activities on their behalf authorize the TPA access to their online employer account. Note that your TPA cannot complete the association process for you, only employers can assign a TPA to an employer account.
TPAs may begin this process by requesting an employer account association. Once an association request is sent, the employer can review and approve (or) deny the request from the Employer Home page inside MyUI Employer+.
Alternatively, employers can assign a TPA to their account themselves. This page includes step-by-step instructions for employers assigning a TPA to their account manually.
To assign a TPA to an employer account, you will need the TPA ID (provided by the TPA) for any TPA you are trying to assign to your employer account, and designate the roles and permissions your TPA will need to manage your account on your behalf. Please note that only one TPA can be assigned to a specific role on your account at a time.
Login to MyUI Employer+ to assign a TPA to your employer account.
Adding a TPA Association
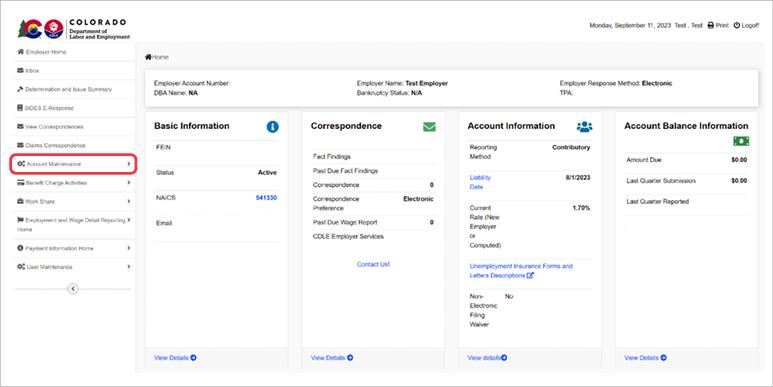
Step 1. Access TPA Authorization page
- From the employer homepage, click the “Account Maintenance'' dropdown tab in the left menu.
- Click the “Third Party Administrator (TPA) authorization” link.
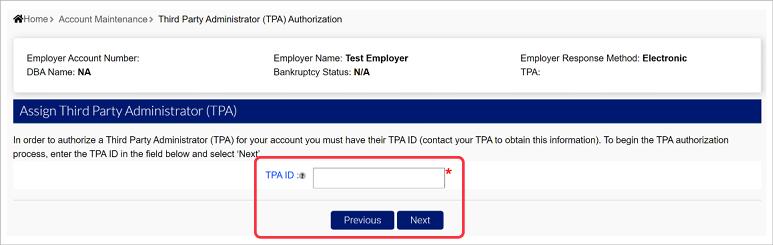
Step 2. Enter the TPA ID number
- Click the “New” button at the bottom of the page.
- Enter the TPA ID number in the “Assign Third Party Administrator” screen.
- TPA ID numbers are assigned to TPA accounts. Contact your TPA for the correct TPA ID number.
- Click “Next”.
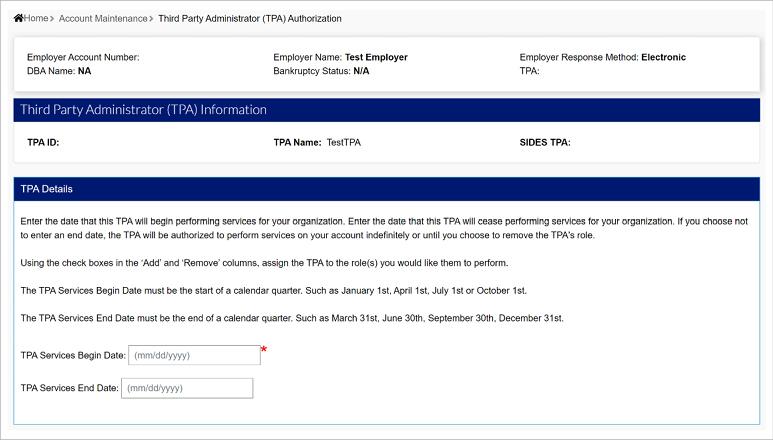
Step 3. Enter TPA relationship information
- Enter the date your TPA will begin servicing your account.
- Start dates must be at the beginning of a calendar quarter (January 1, April 1, July 1, or October 1).
- Enter the date your TPA will stop servicing your account.
- End dates must be at the end of a calendar quarter (March 31, June 30, September 30, or December 31).
Note: If a TPA relationship changes mid-quarter, it is the responsibility of the Employer to ensure that all role changes, wages, and payments are made timely in-system. Please contact UI Employer Services at 303-318-9100 for assistance.
Step 4. Assign TPA roles to your account
- In the “Un-Assigned Roles” section of the page, select the boxes in the “Add” column next to each roll you would like to assign to your TPA.
- TPAs may be assigned any combination of roles.
- Select the “Assign all Edit/Submit roles” option to assign your TPA all roles and permissions. This setting will give your TPA full access to your account.

Step 5. Save TPA relationship and roles to your account
- Click “Save” to assign the TPA with selected roles to your employer account.
- Once a TPA is assigned to an employer account they will be able to access and manage your account immediately.
- Click “Modify” to assign and un-assign TPA roles, or to remove the TPA from your employer account.
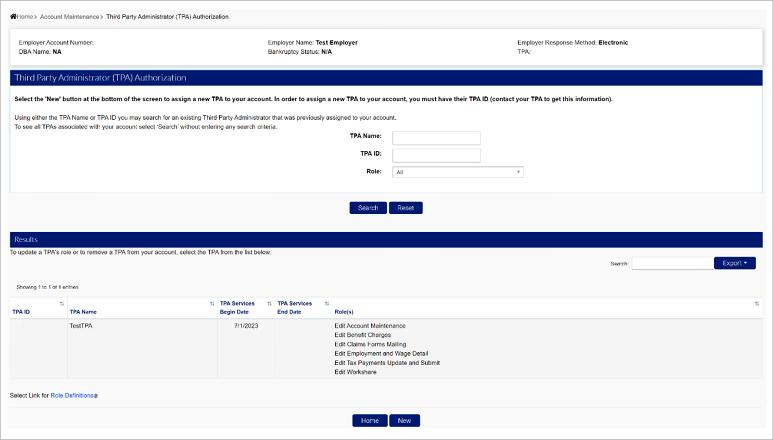
Step 6. Search existing TPA relationships
- From the employer homepage, click the “Account Maintenance'' dropdown tab in the left menu.
- Click the “Third Party Administrator (TPA) authorization” link.
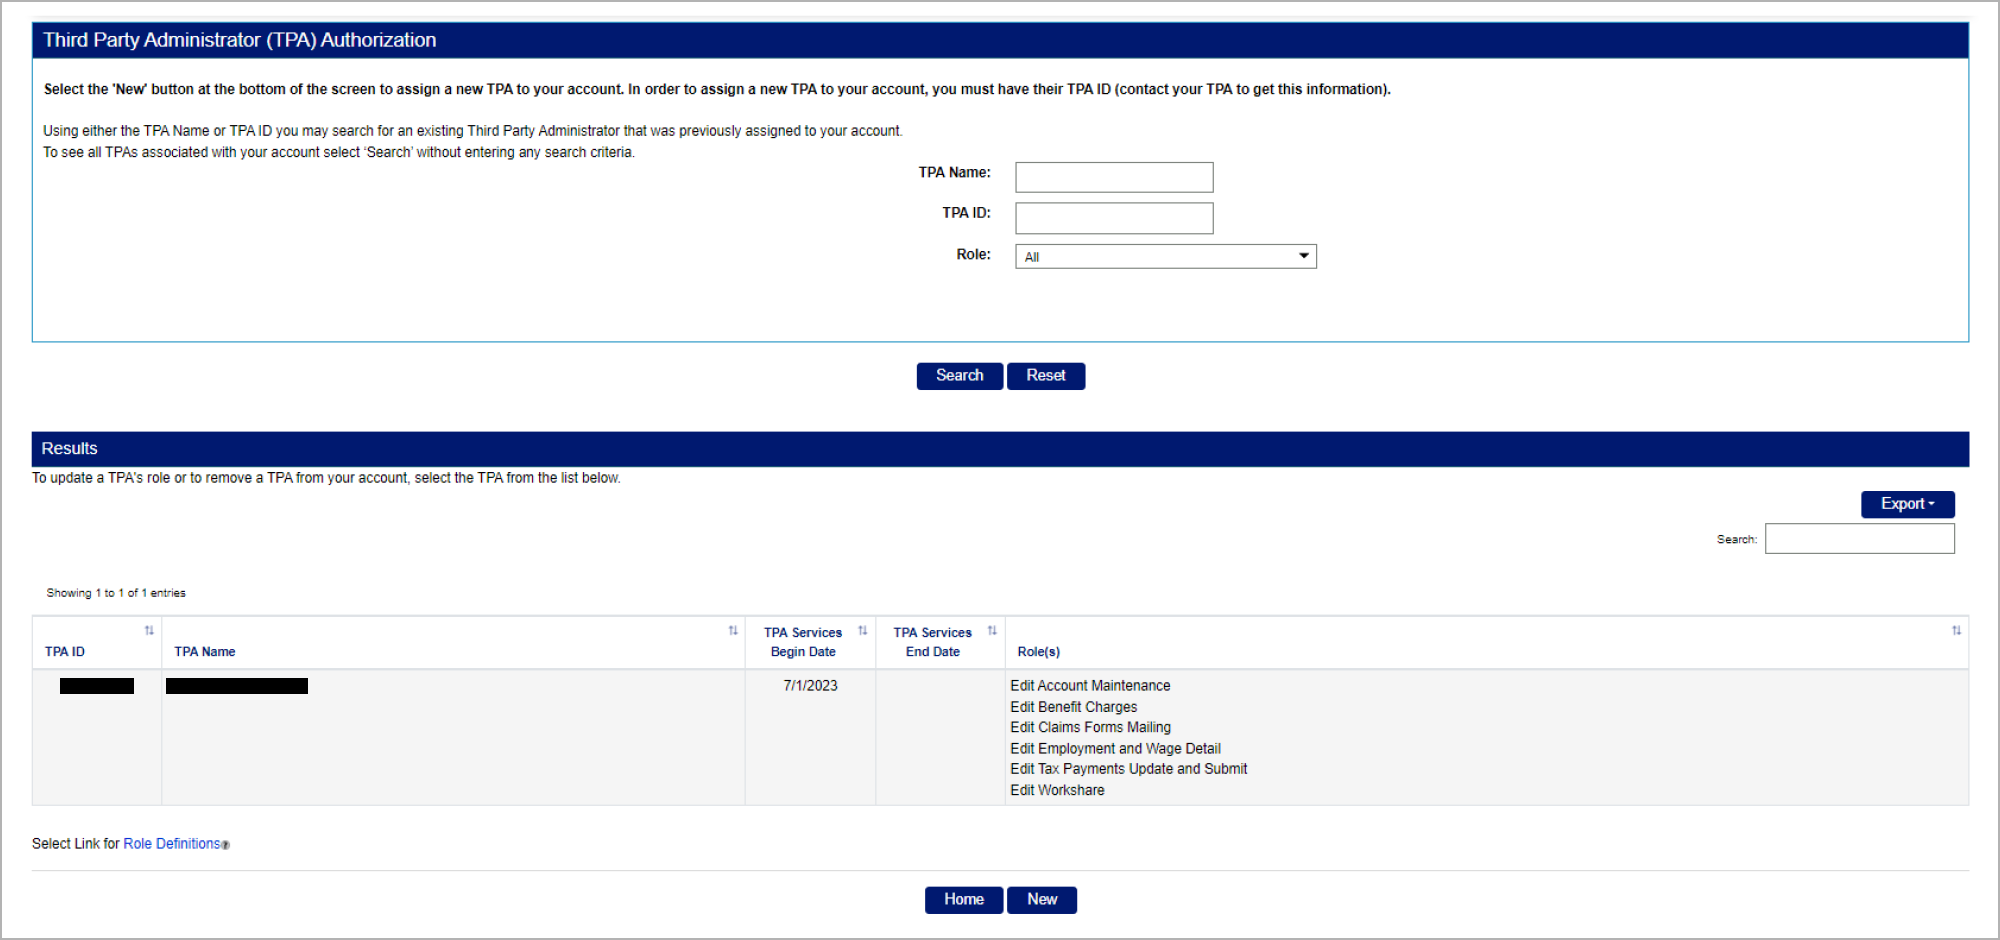
- Click the “Search” button on the Third Party Administrator (TPA) Authorization screen to see a list of TPAs assigned to your account.
- You can also search existing TPA relationships by TPA name, TPA ID, or assigned roles.
Managing TPA Roles
Employers can add and remove roles to associated TPA accounts. Note: Only one role can be assigned to a TPA account at one time.
Step 1. Search existing TPA associations
- From the employer homepage, click the “Account Maintenance'' dropdown tab in the left menu.
- Click the “Third Party Administrator (TPA) authorization” link.
- Click the “Search” button on the Third Party Administrator (TPA) Authorization screen to see a list of TPAs assigned to your account.
- You can also search existing TPA relationships by TPA name, TPA ID, or assigned roles.
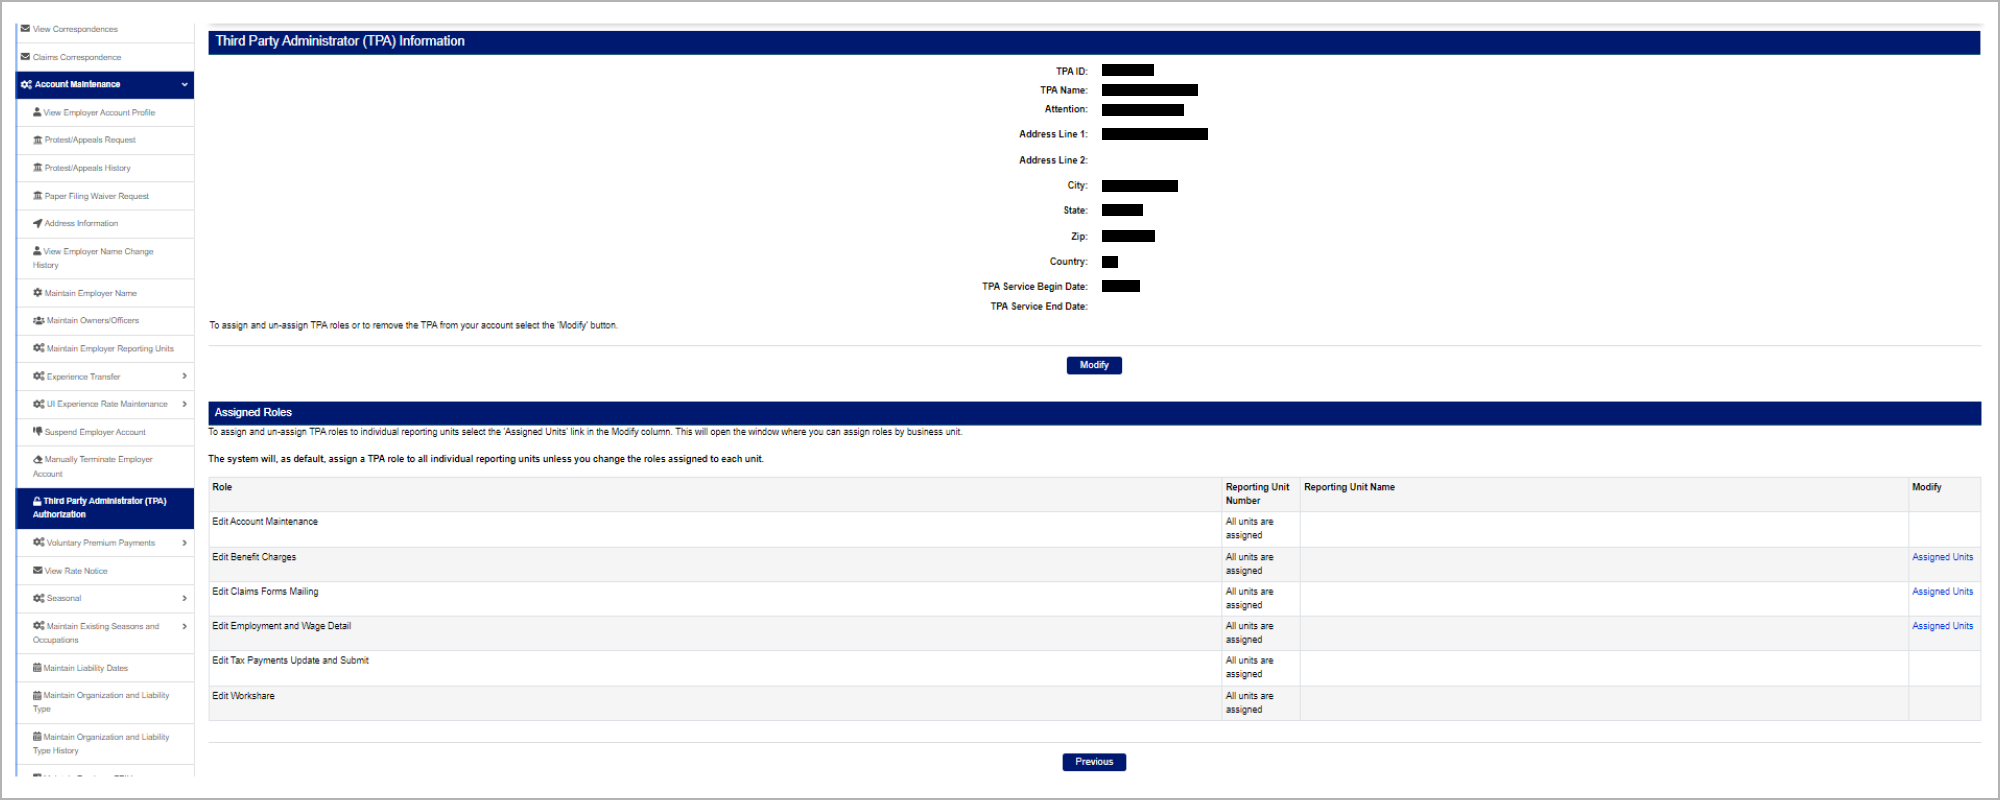
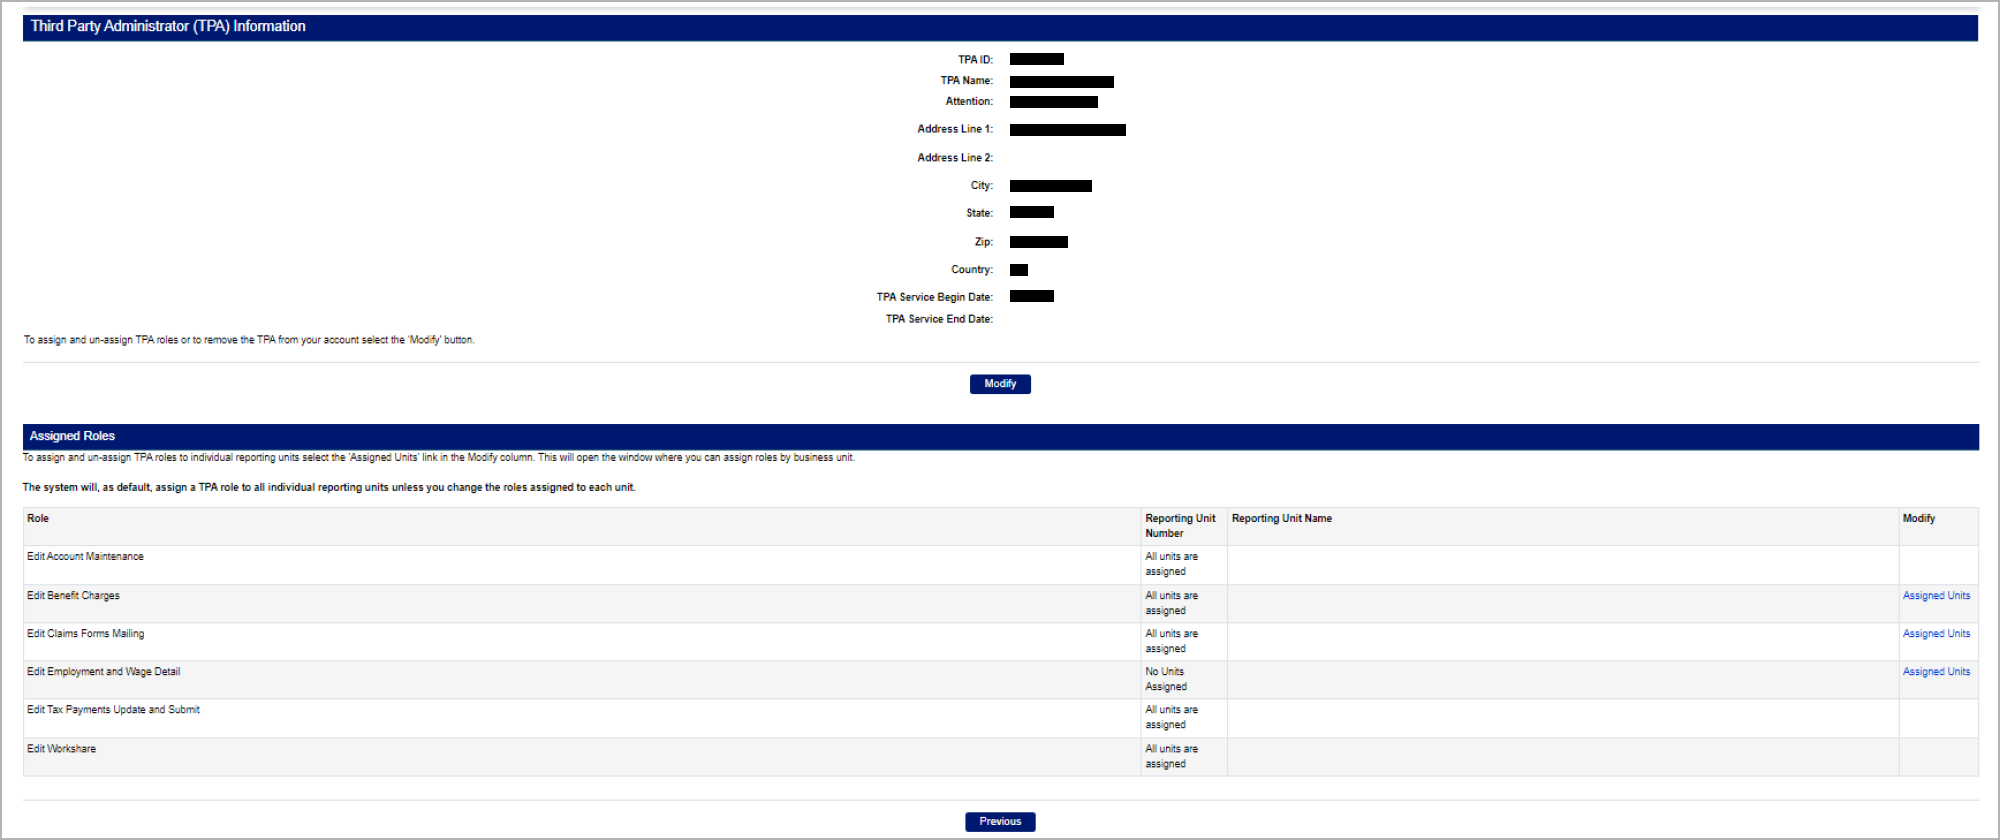
- Click the hyperlink on the related TPA ID number to view the TPA’s information and assigned roles.
- Click the “Assigned Units” hyperlink in the Modify column in the Assigned Roles section of the page to see all assigned reporting roles to the associated TPA account.
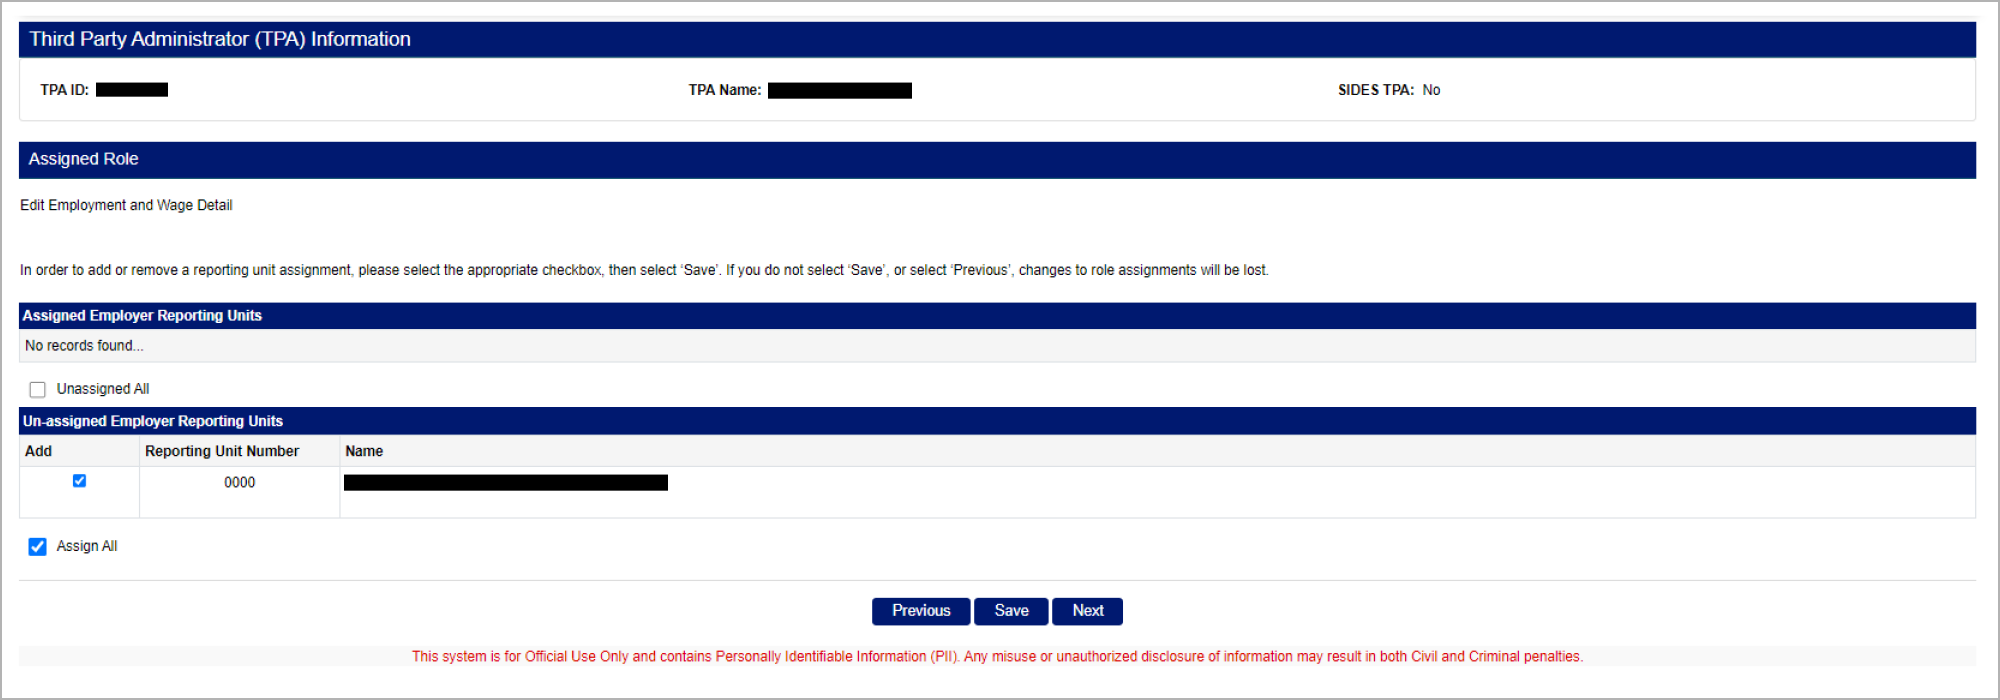
Step 2. Add/Remove TPA roles
- To add a role: Select the checkbox next to the role you wish to assign in the Unassigned Employer Reporting Units section of the page.
- To assign all roles to the associated TPA, select the “Assign All” checkbox.
- To remove a role: Select the checkbox next to the role you wish to remove in the Assigned Employer Reporting Units section of the page.
- To remove all roles assigned to the TPA, select the Unassign All checkbox.
- Click the “Save” button to add or remove the selected role(s).
Removing a TPA Association
Step 1. Search existing TPA associations
- From the employer homepage, click the “Account Maintenance'' dropdown tab in the left menu.
- Click the “Third Party Administrator (TPA) authorization” link.
- Click the “Search” button on the Third Party Administrator (TPA) Authorization screen to see a list of TPAs assigned to your account.
- You can also search existing TPA relationships by TPA name, TPA ID, or assigned roles.
Step 2. Remove the TPA association
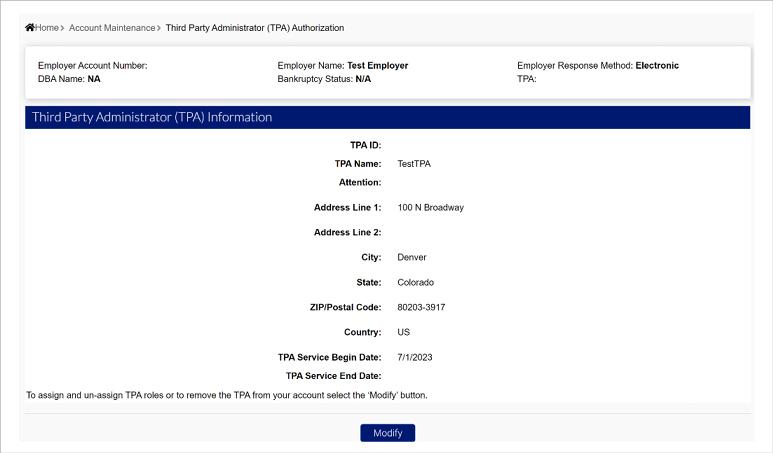
- Click the hyperlink on the related TPA ID number to view the TPA’s information and assigned roles.
- Click the “Modify” button in the TPA Information section.
- Add a TPA Services End Date in the field provided on the TPA Details screen.
- End Dates must be the end of the calendar quarter.
Note: In order to maintain access to the employer account’s historical data, do not unassign any roles from the TPA account before removing the association. Once the TPA association is removed, the TPA will maintain “view-only” permissions for the employer’s historical data.
- End Dates must be the end of the calendar quarter.

- Click the “Save” button.
The TPA association will automatically be removed from the employer account on the End Date specified.