How to File a Non-Bulk File Employer Wage Report (for TPAs)
Employer wage detail reports must be filed quarterly if the employer is determined to be liable. Wage reports are required to be filed electronically in the MyUI Employer+ system unless you have a valid non-electronic communication waiver.
Third party administrators (TPAs) can report employer wages in MyUI Employer+ by uploading a file, filing manually, copying from a previous quarter, or file a no employment (zero wage) report. TPAs filing reports for multiple employer clients at once can also submit a bulk file. Please review How to Adjust a Wage Report for more information and step-by-step instructions on adjusting previously submitted wage reports.
Employer wage reports are due quarterly.
- April 30: Quarter 1 reports are due for wages paid in January, February, March.
- July 31: Quarter 2 reports are due for wages paid in April, May, June.
- October 31: Quarter 3 reports are due for wages paid in July, August, September.
- January 31: Quarter 4 reports are due for wages paid in October, November, December.
TPAs will need to access the related employer account to submit a non-bulk file employer wage report.
Accessing An Employer Account
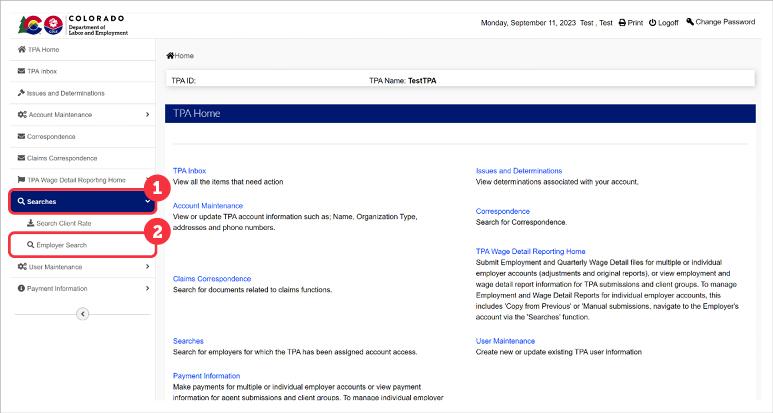
TPAs will login to the TPA account and use the Employer Search functionality to find and access their employer client accounts.
Click ‘Searches’ in the left-hand navigation menu.
Click the ‘Employer Search’ subtab.
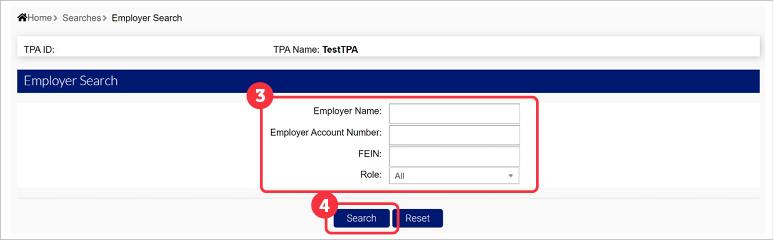
- Enter the information related to the employer you are searching for in the fields provided, or click ‘Search’ to view all employers assigned to your TPA account with no criteria assigned. Larger TPAs will be able to view a subset of employers when searching with no criteria.
Possible search criteria include:- Employer Name - The name of the employer.
- Employer Account Number - The employer account number assigned to the employer.
- FEIN - The employer’s FEIN.
- Role - The role the employer has assigned to you, as their TPA.
- Click ‘Search’ to search based on the specified information.
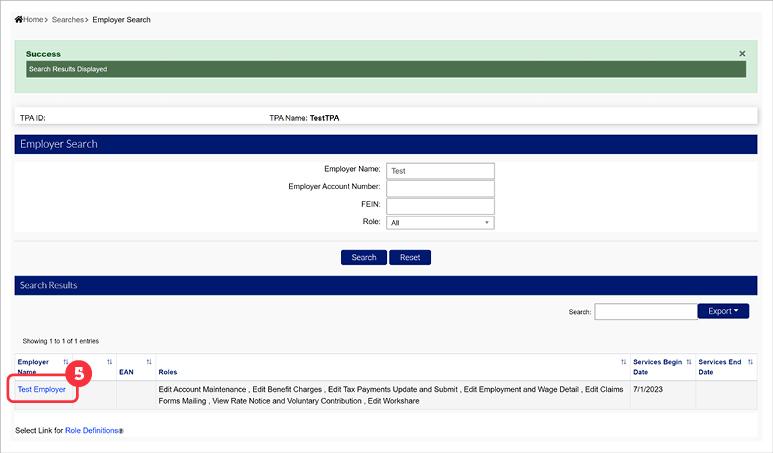
The search results will populate based on the identified search criteria.
- Click the blue hyperlink over the Employer Name to access the employer account.
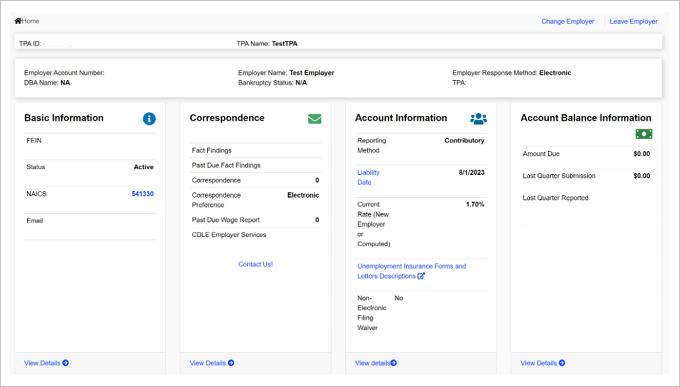
TPAs can manage the employer account and make updates based on their assigned roles from the Employer Homepage.
Submitting An Employer Wage Report (Non-Bulk File)
Step 1. Access Employment and Wage Detail Reporting Page
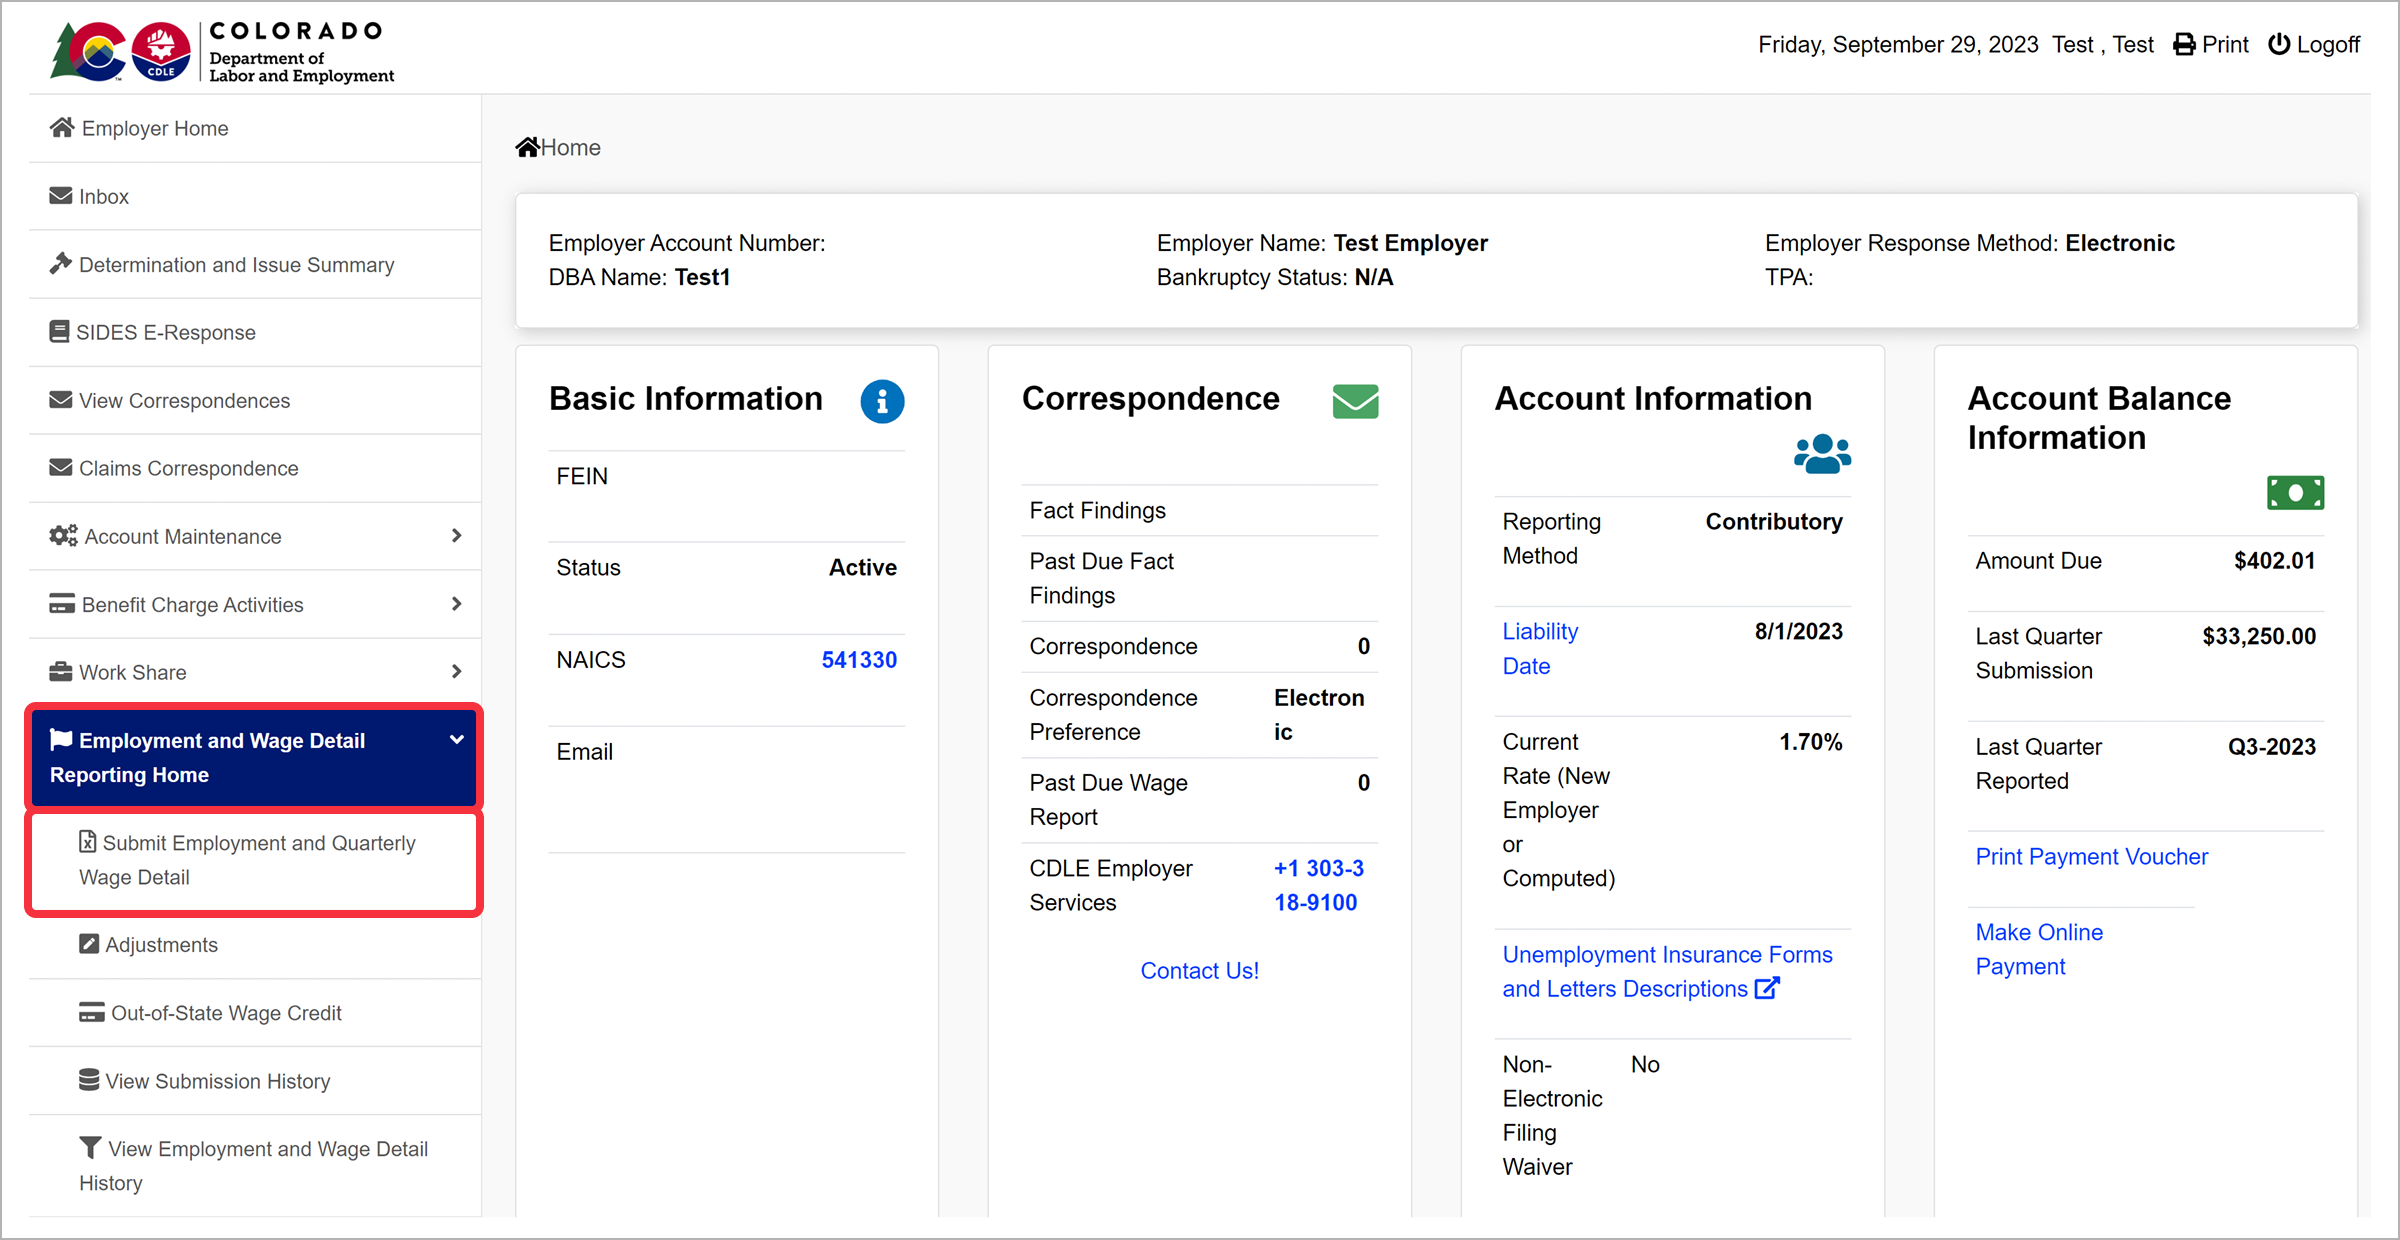
Click the “Employment and Wage Detail Reporting Home” tab on the left-hand navigation menu.
Click the “Submit Employment and Quarterly Wage Detail” subtab to begin.
Step 2. Select Reporting Period and Filing Method
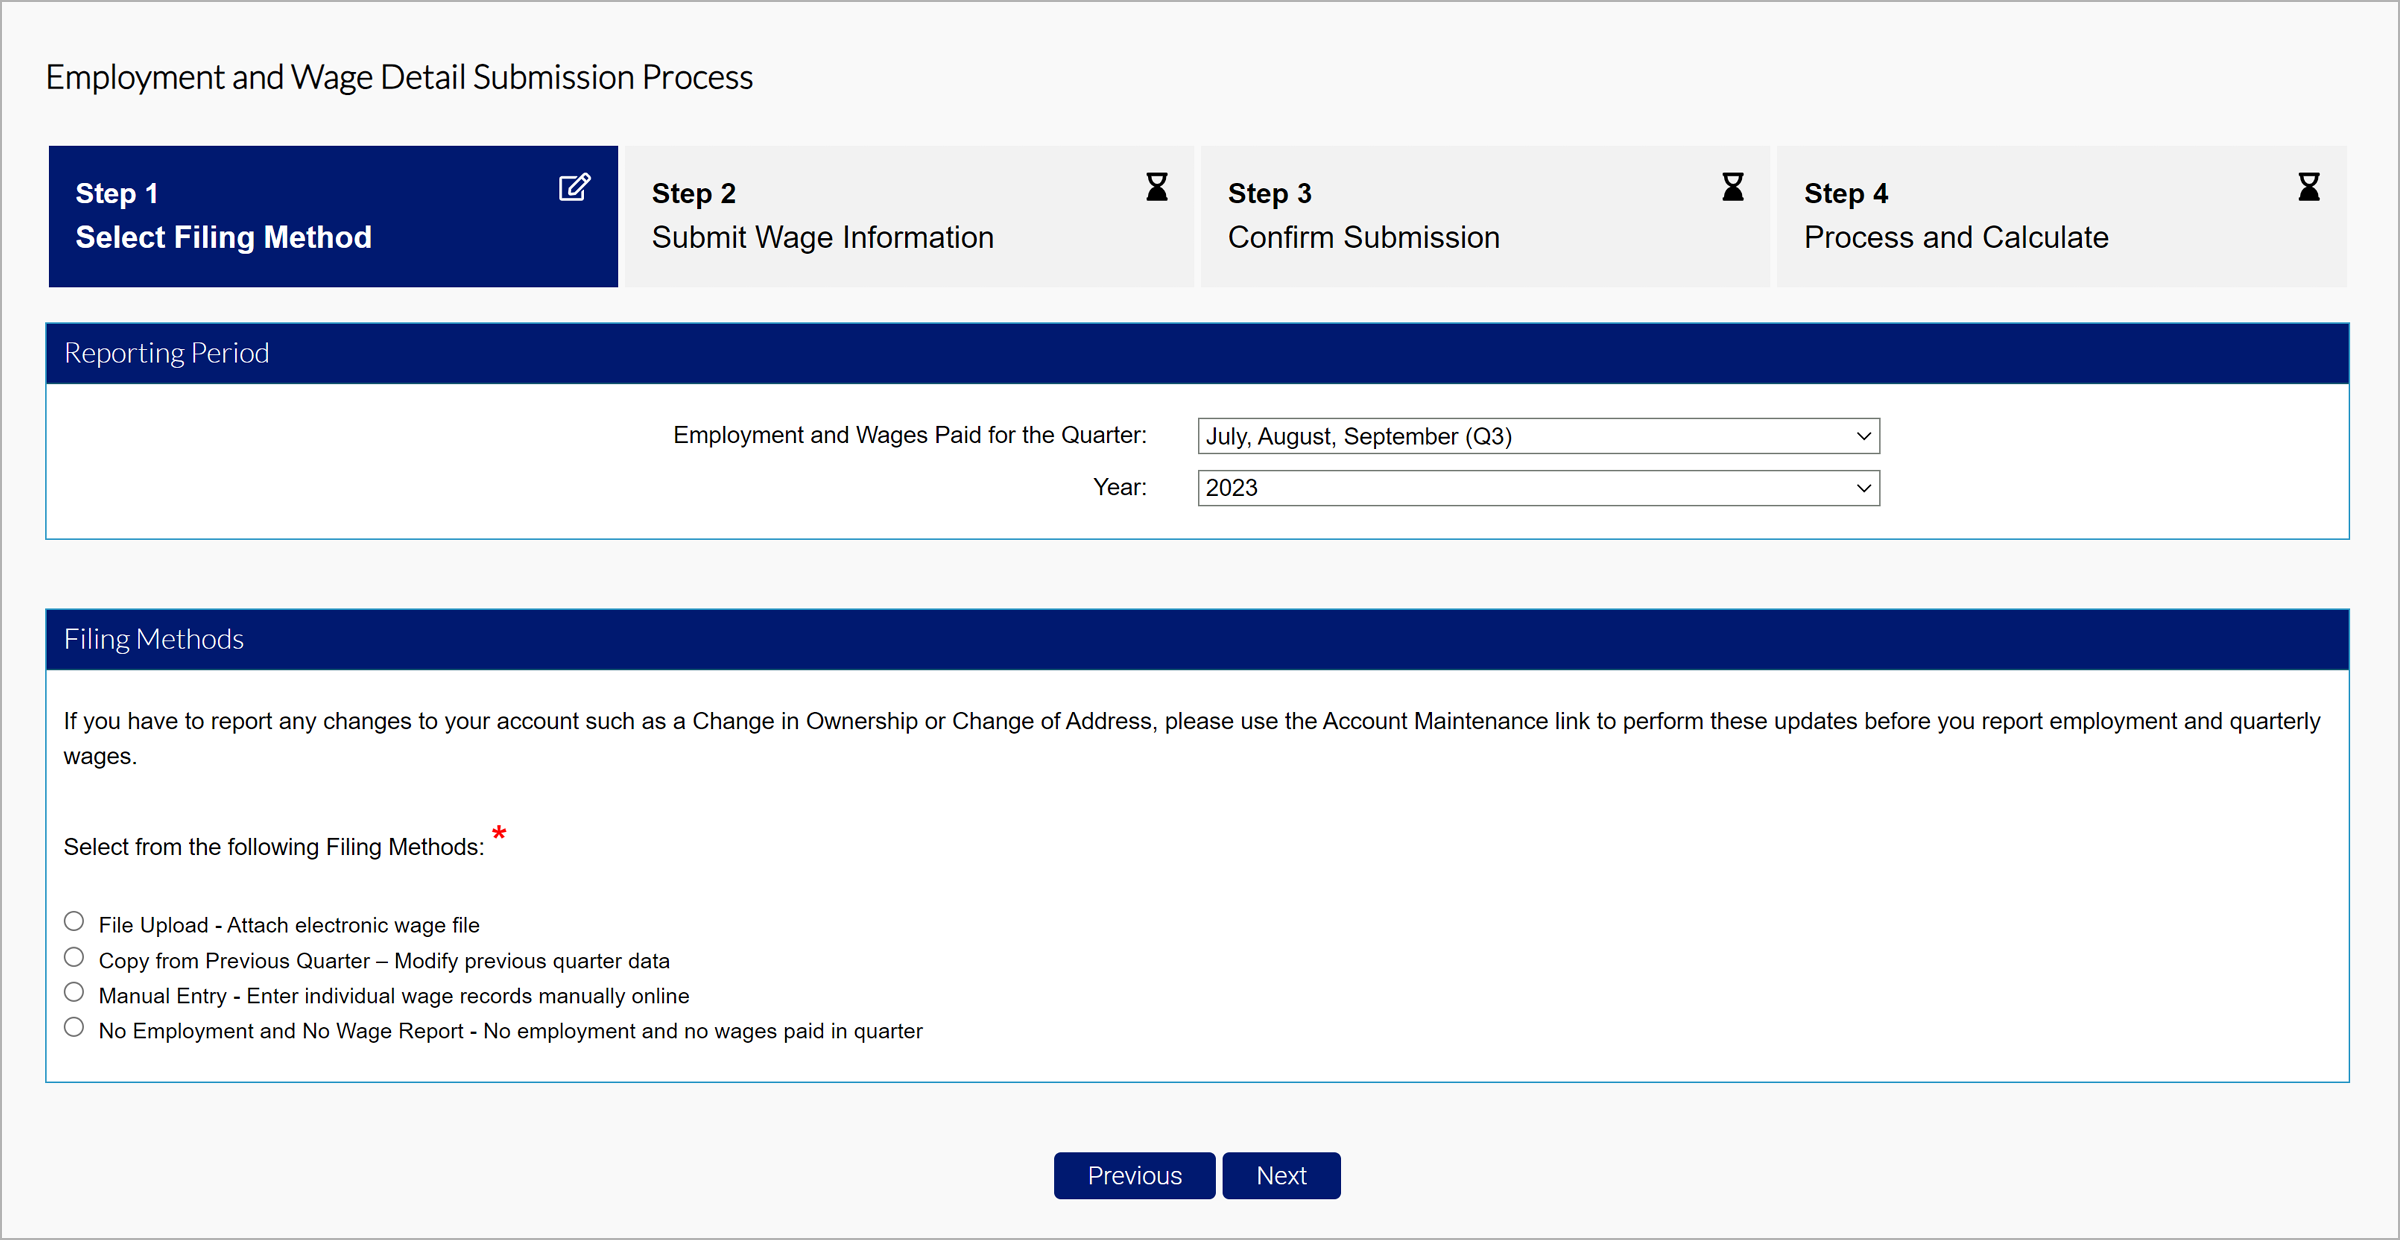
Select the reporting period, including the Quarter and Year, in the Reporting Period section.
Note: System settings default to the current reporting period, please make sure to select the correct reporting period. MyUI Employer+ only accepts wage submissions for the current quarter, or previous quarters the employer has been found liable for.
Select a filing method from the available options:
- Manual Entry - Enter individual wage records manually online. Note: This method should be used when submitting an employer's initial wage report.
- File Upload - Attach electronic wage file.
- Copy from Previous Quarter – Modify previous quarter data. Note: This method should be used when little-to-no information has changed in the employer's wages to expedite the filing process (review Step 2.3).
- No Employment and No Wage Report - No employment and no wages paid in quarter.
Click “Next”.
2.1 Manual Entry
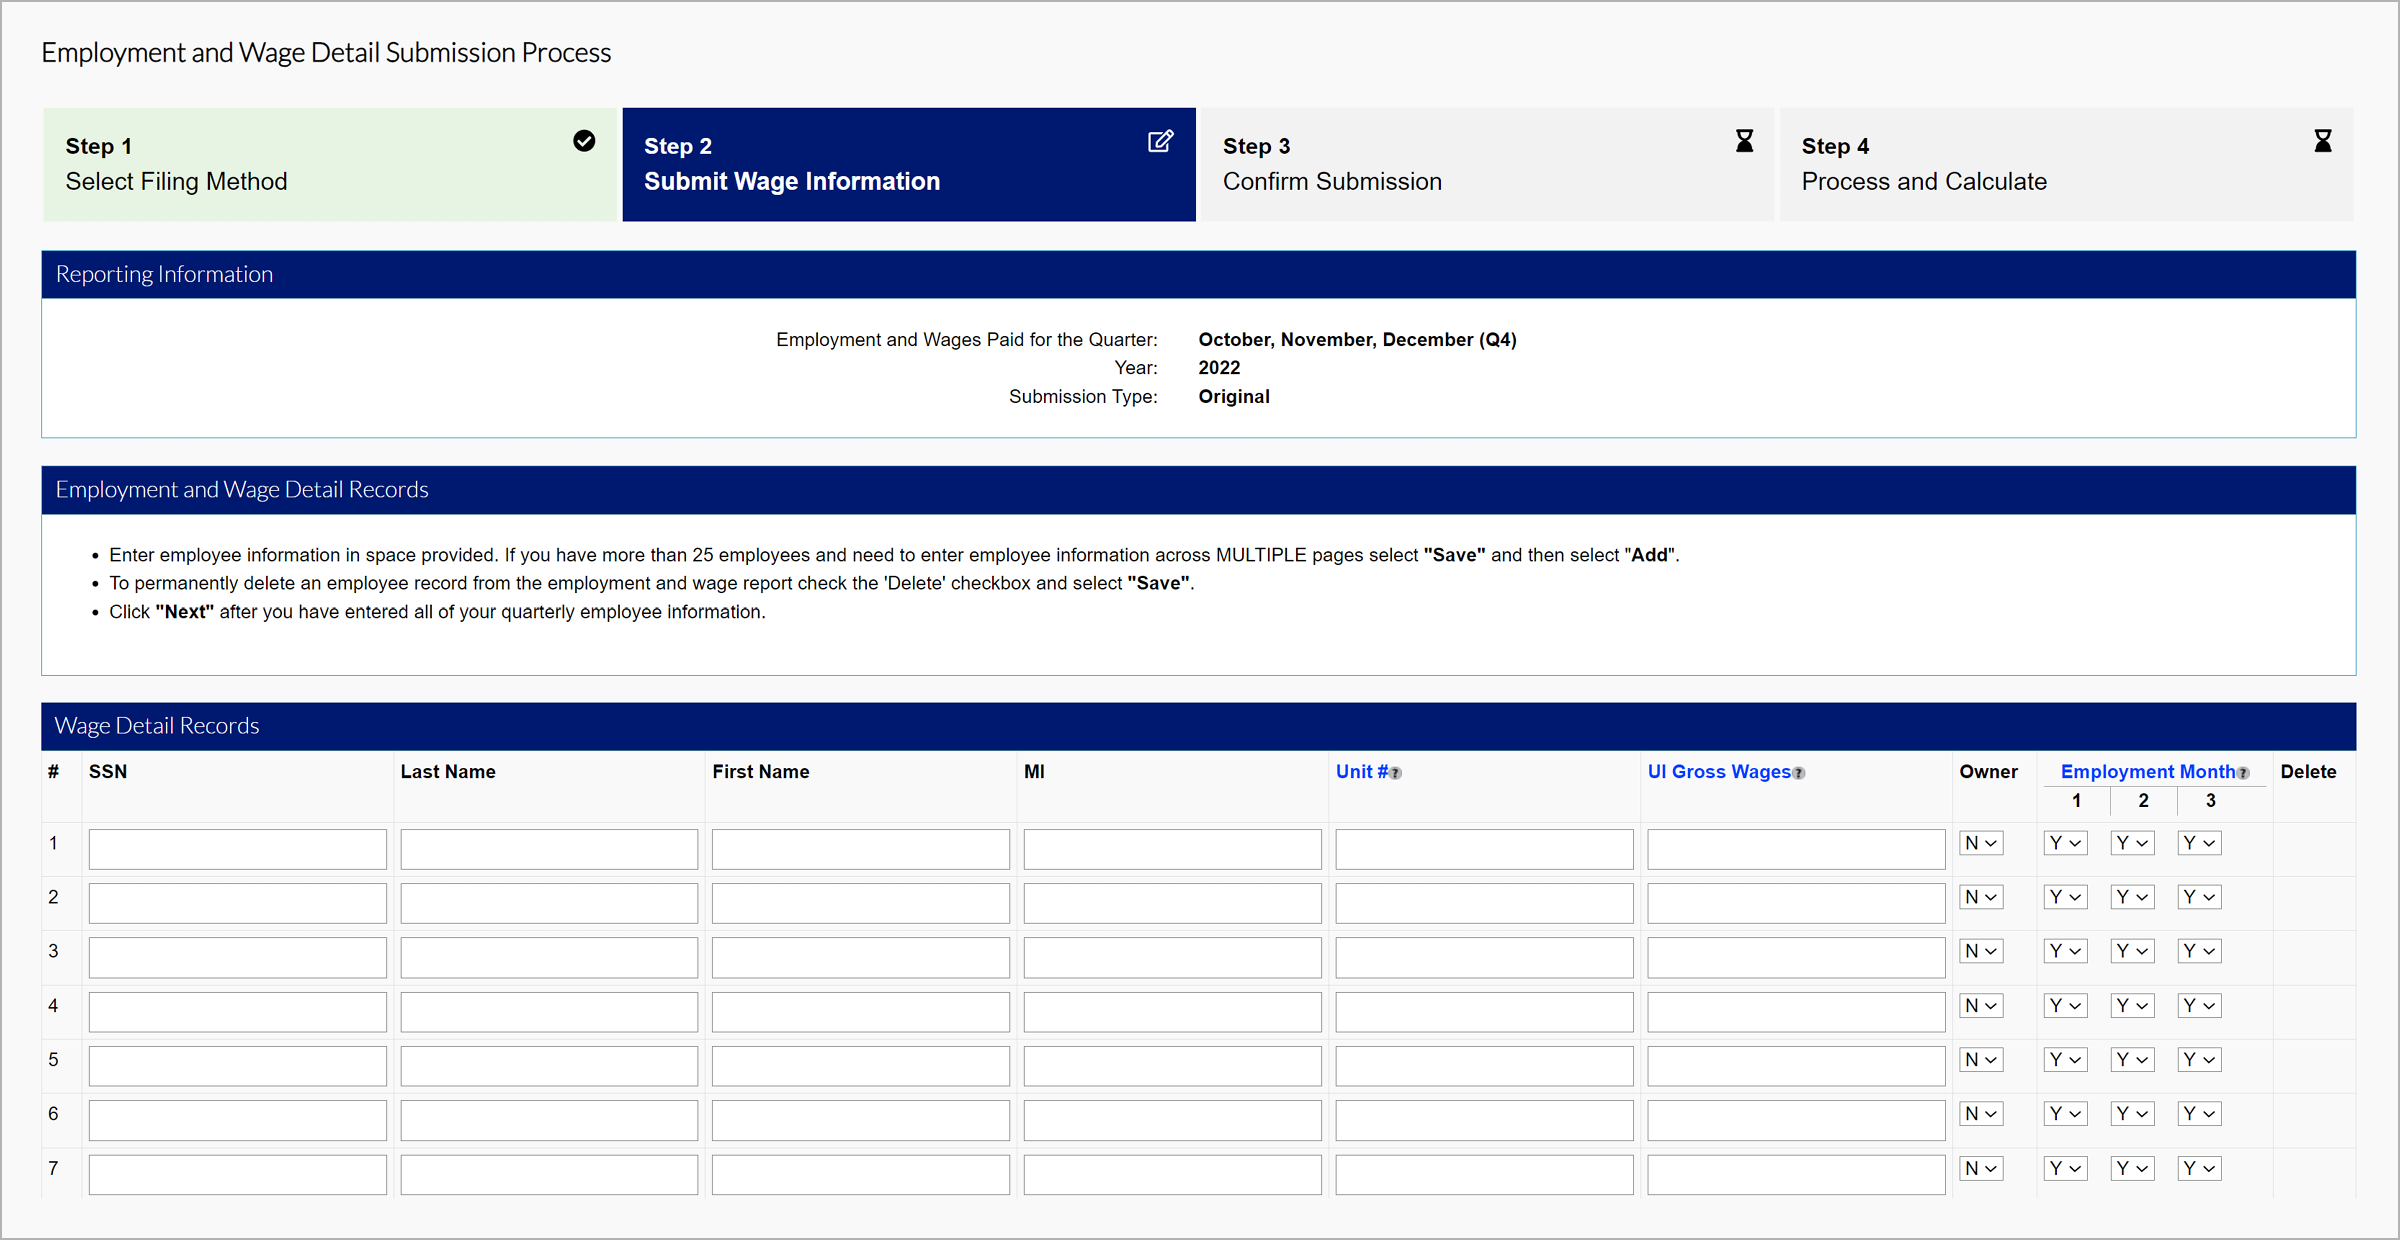
TPAs can manually enter employer wages in-line.
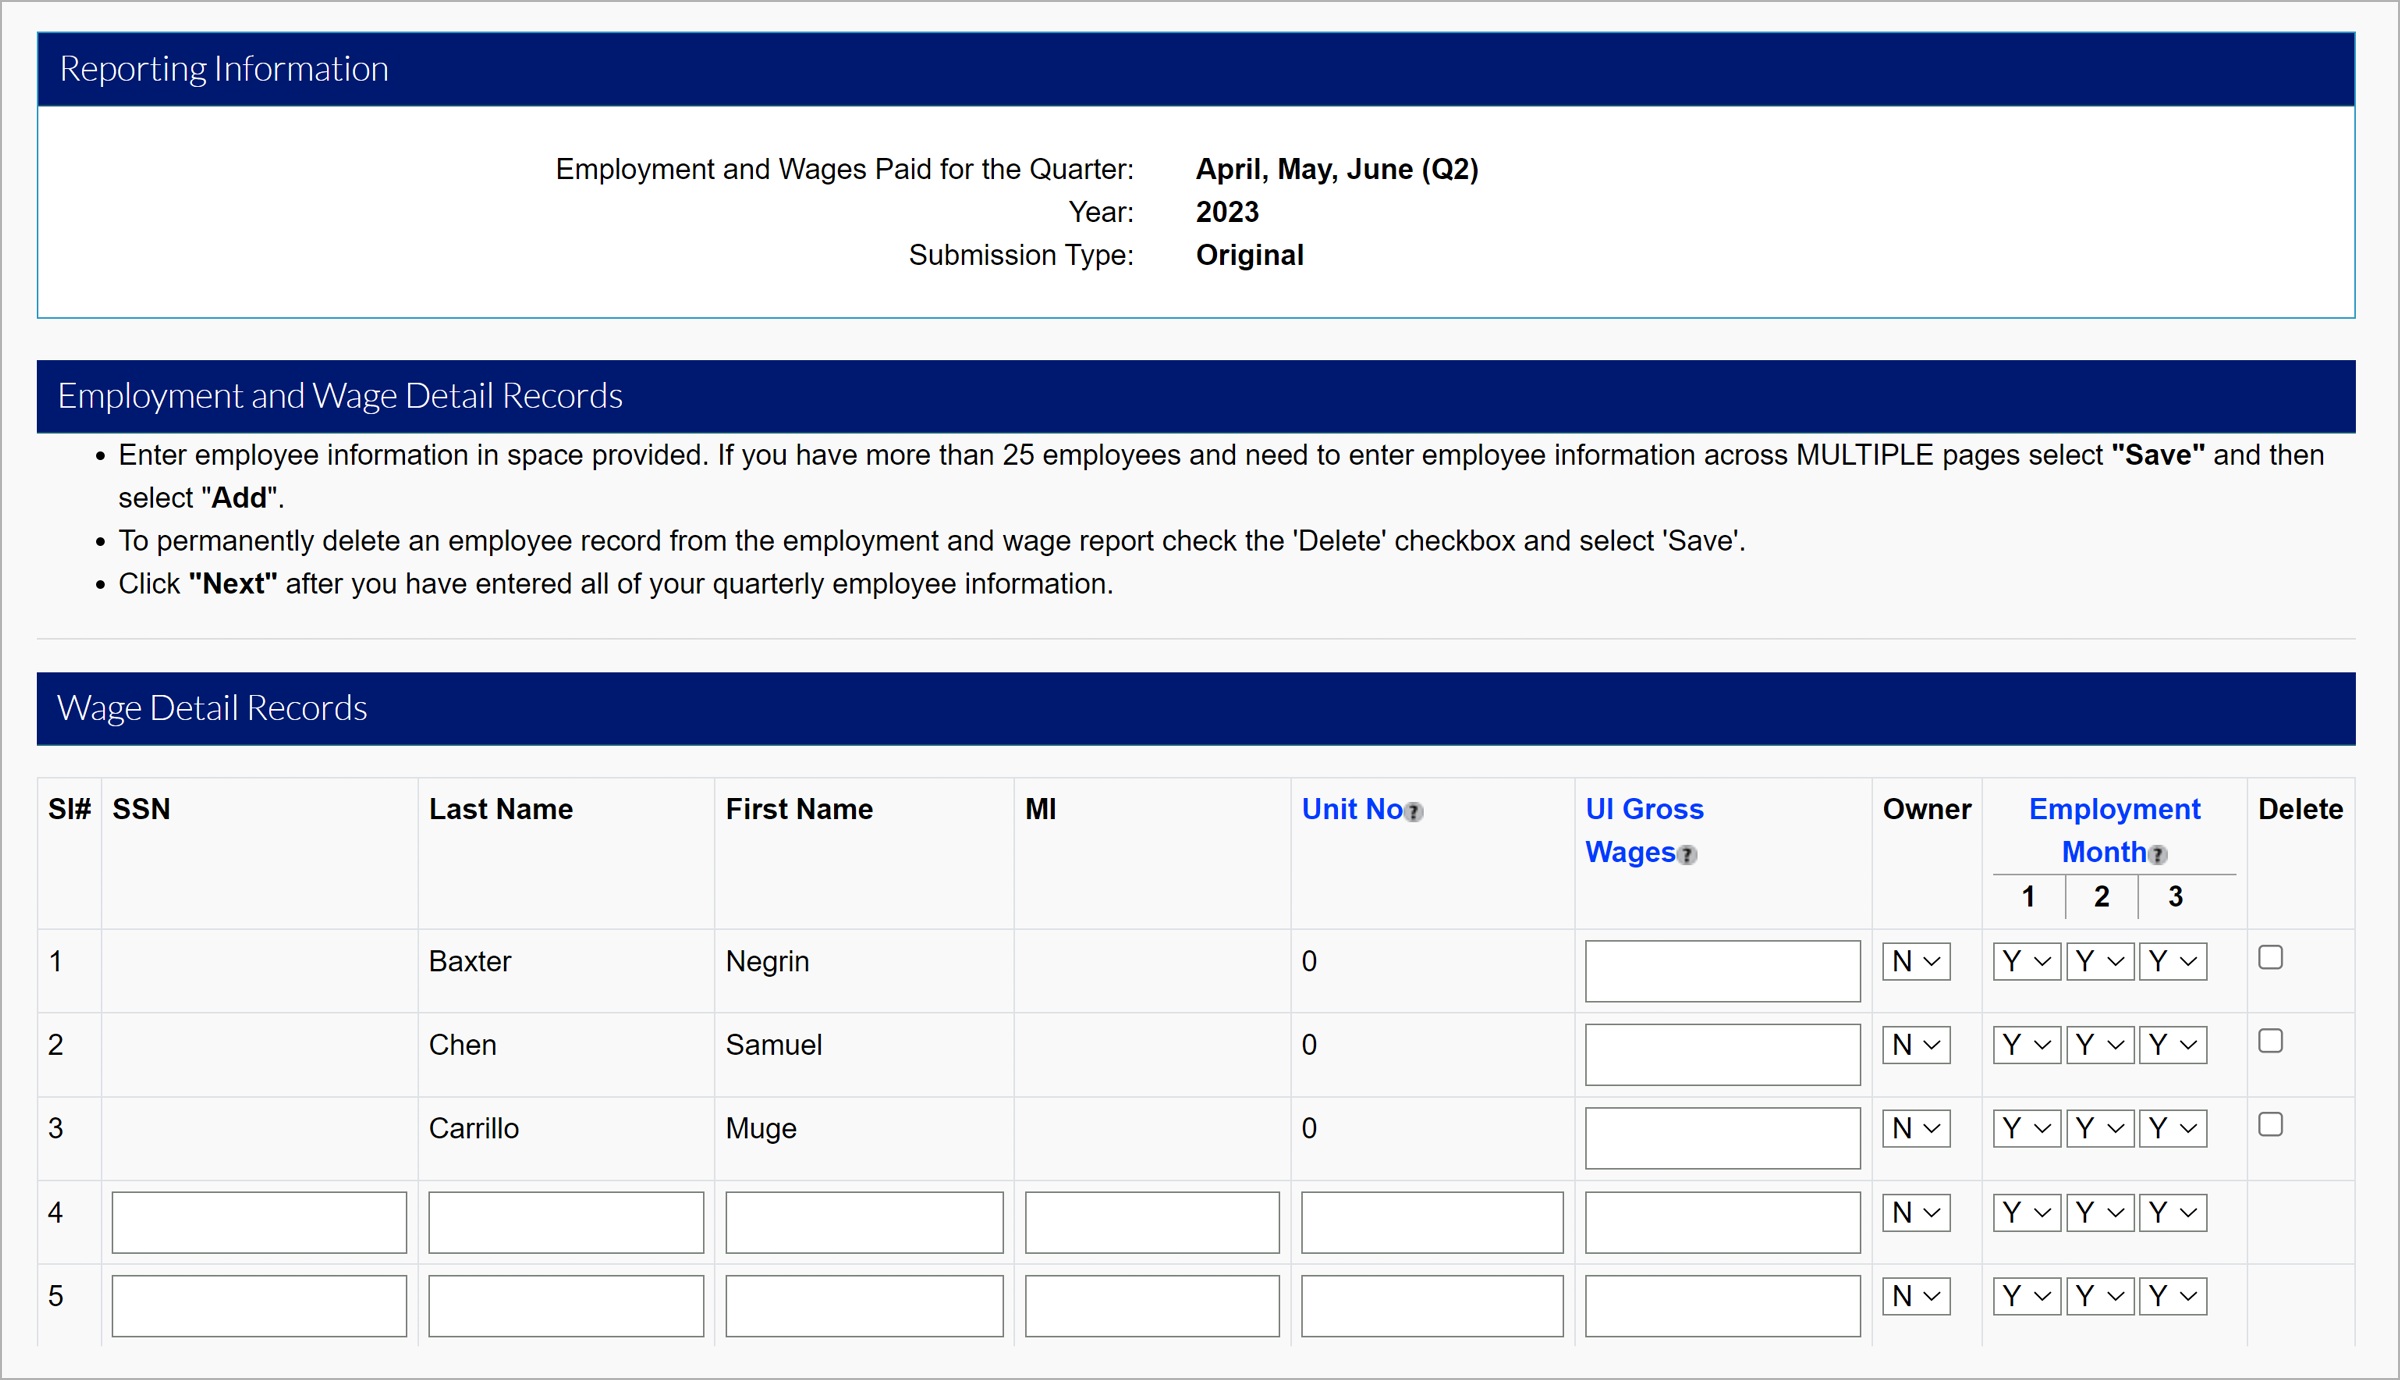
Enter the employer's wage detail records for each employee in the fields provided:
Social Security Number (SSN)
Last Name
First Name
Middle Initial (MI)
Unit #
UI Gross Wages
Ownership
Employment Months
See the Wage and Hour Laws page on CDLE’s website for a complete definition of wages and payments that are considered to be exempt.
Note: Employment Month reporting is required. The monthly employment data should be a count of all full-time and part-time workers in covered employment (subject to Colorado's Unemployment Compensation Law) that performed services during the payroll period which includes the 12th of the month. Respond 'Yes' if an employee was employed in the payroll period based on this definition.
Click “Save” after entering the wage detail information.
Click “Next”.
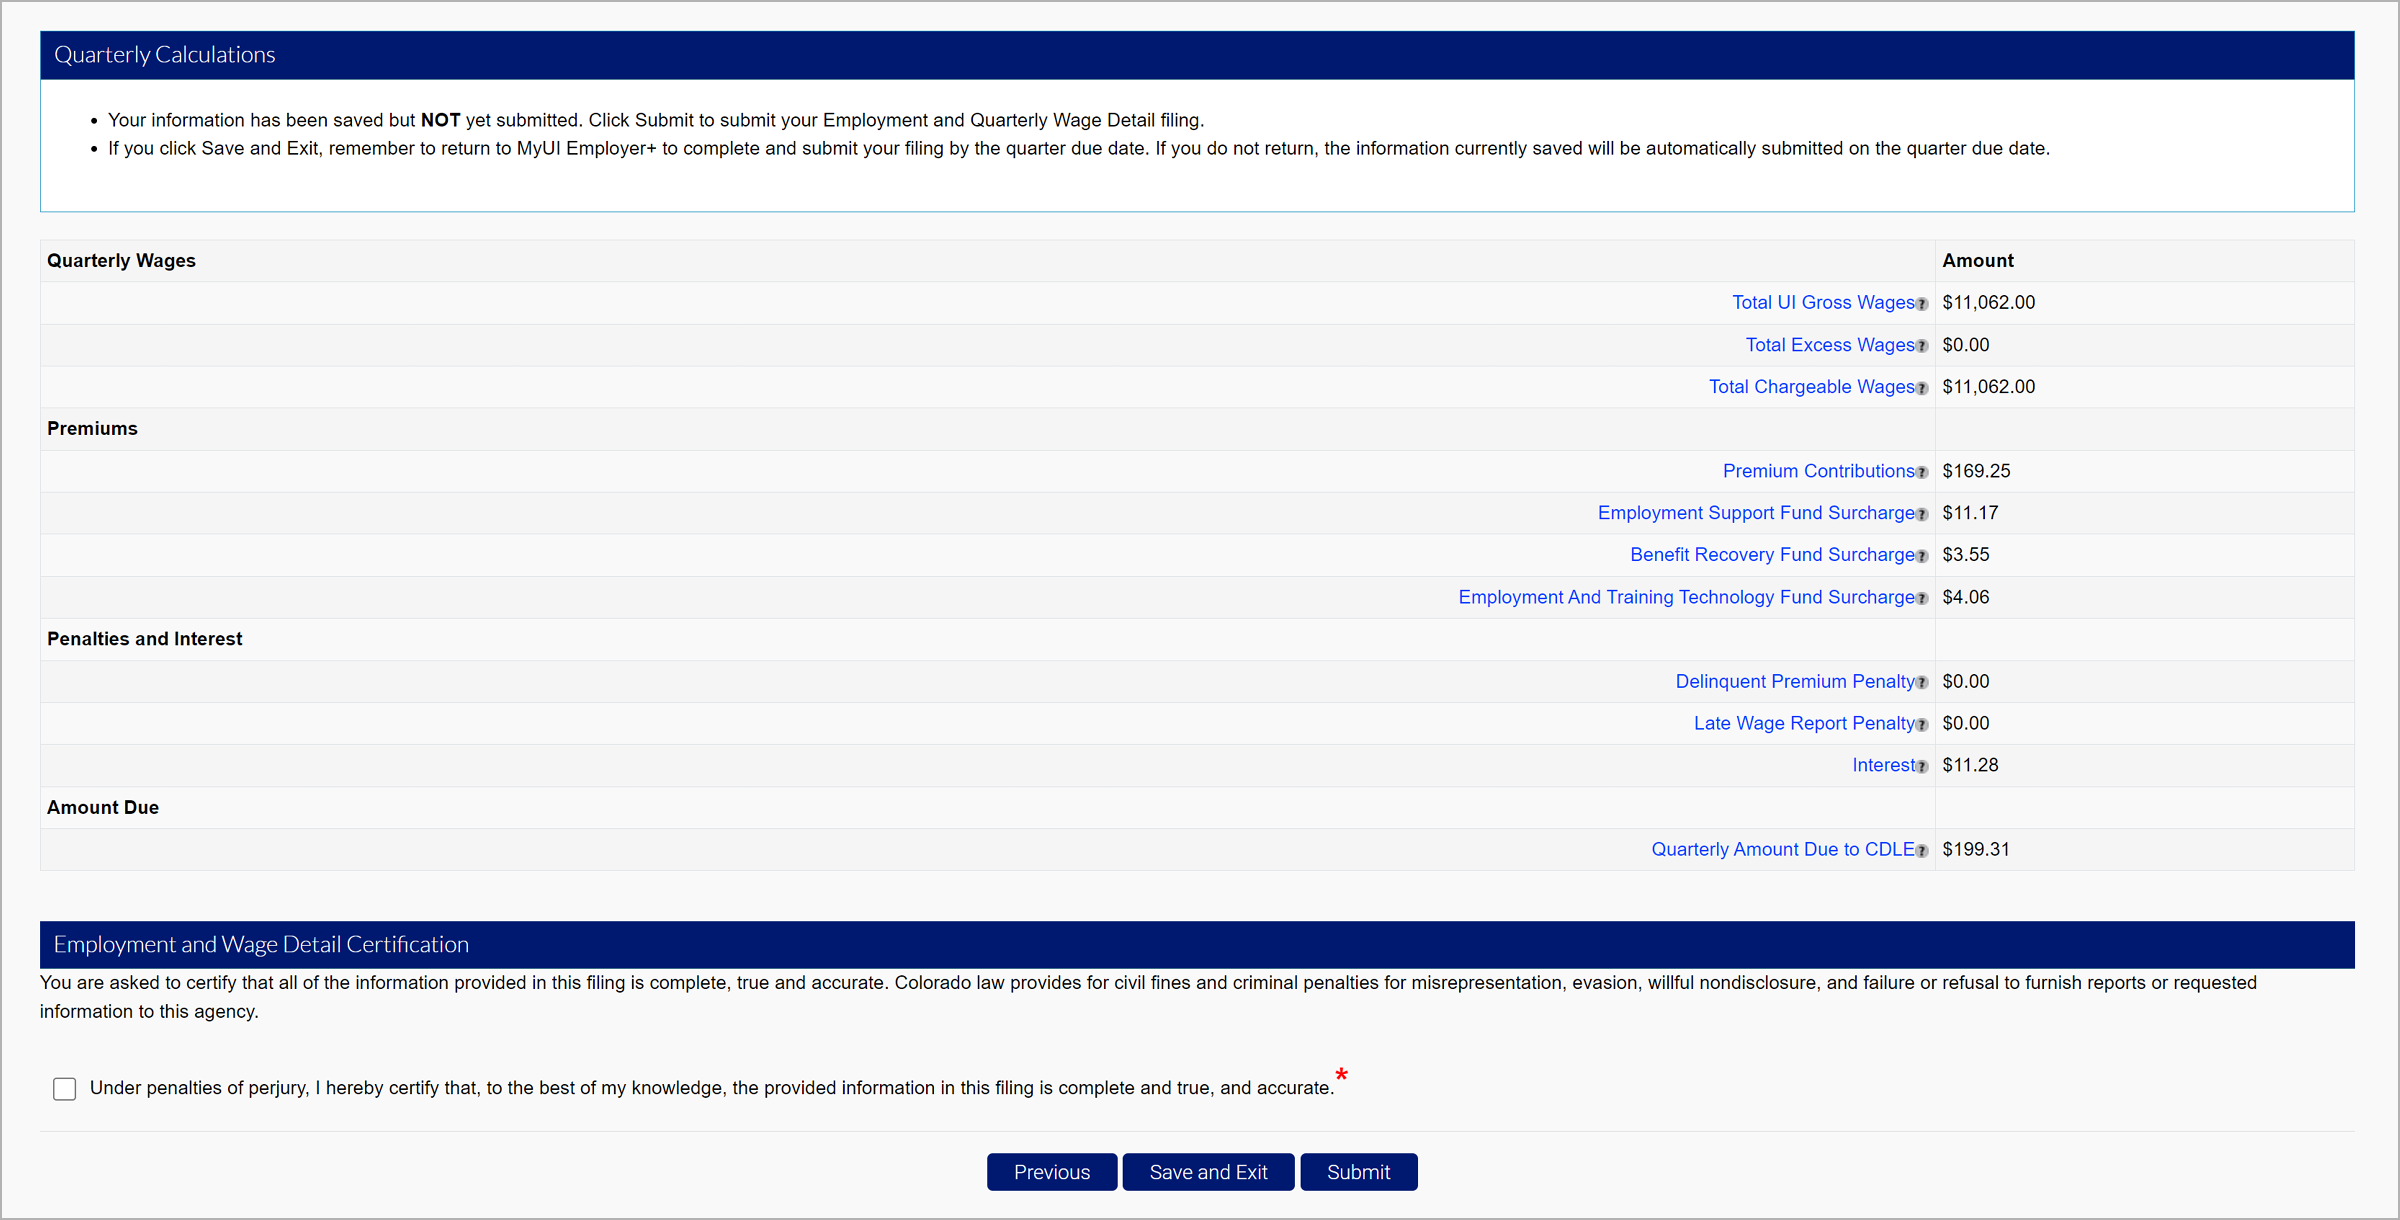
The Quarterly Calculations screen includes the breakdown of wages, premiums, penalties and interest, and the total amount due.
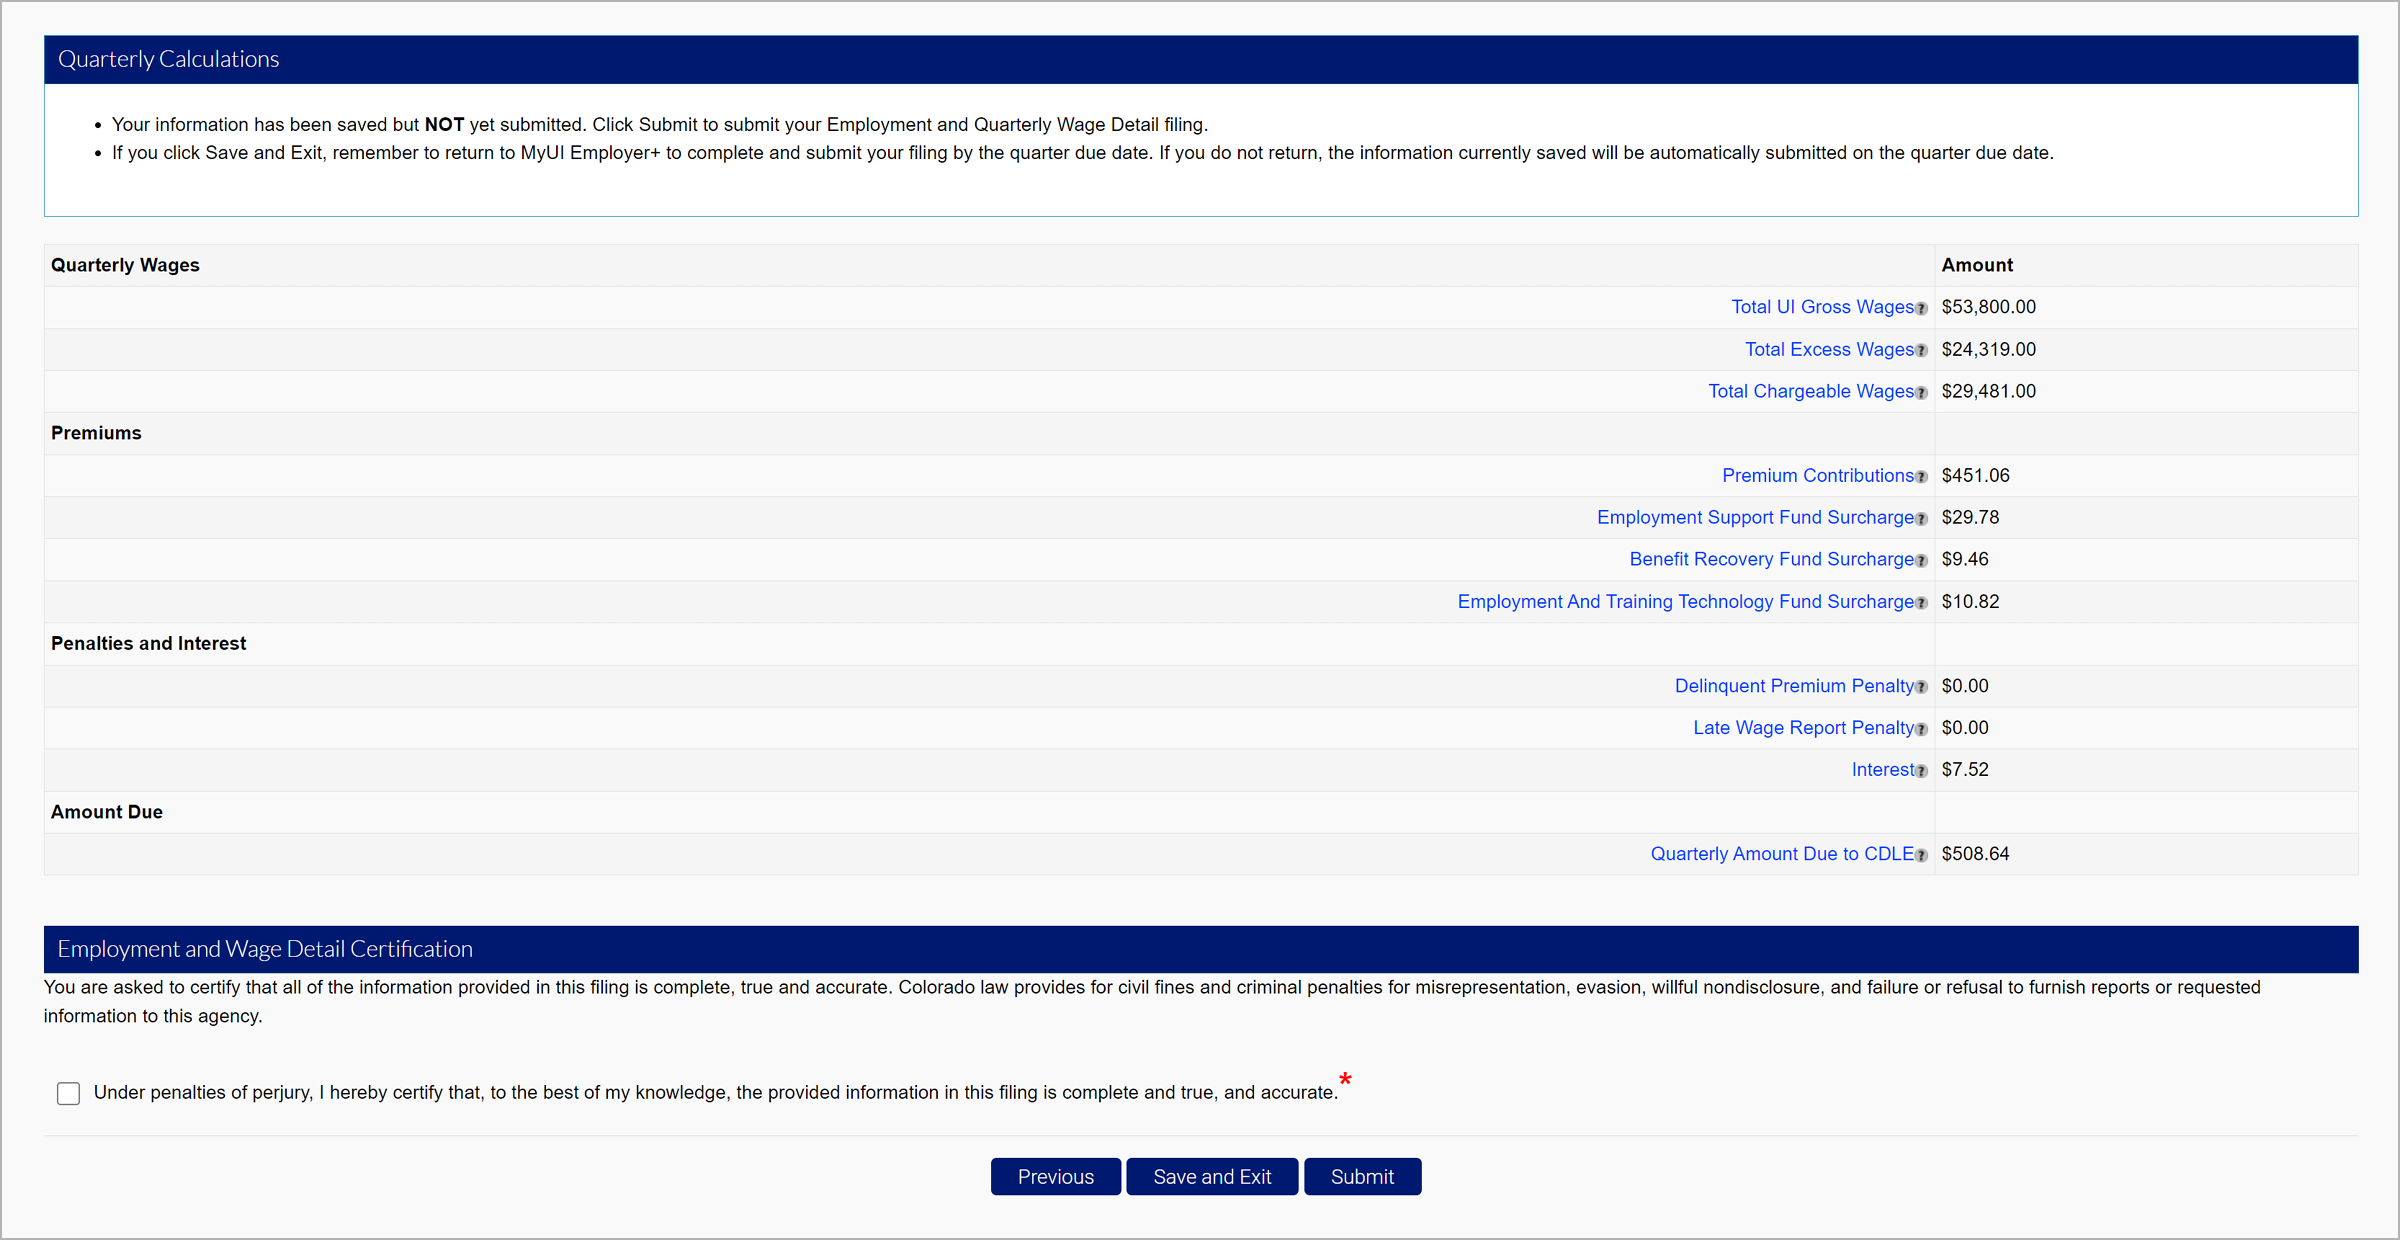
Select the certification checkbox and click “Submit” to submit the employer wage report.
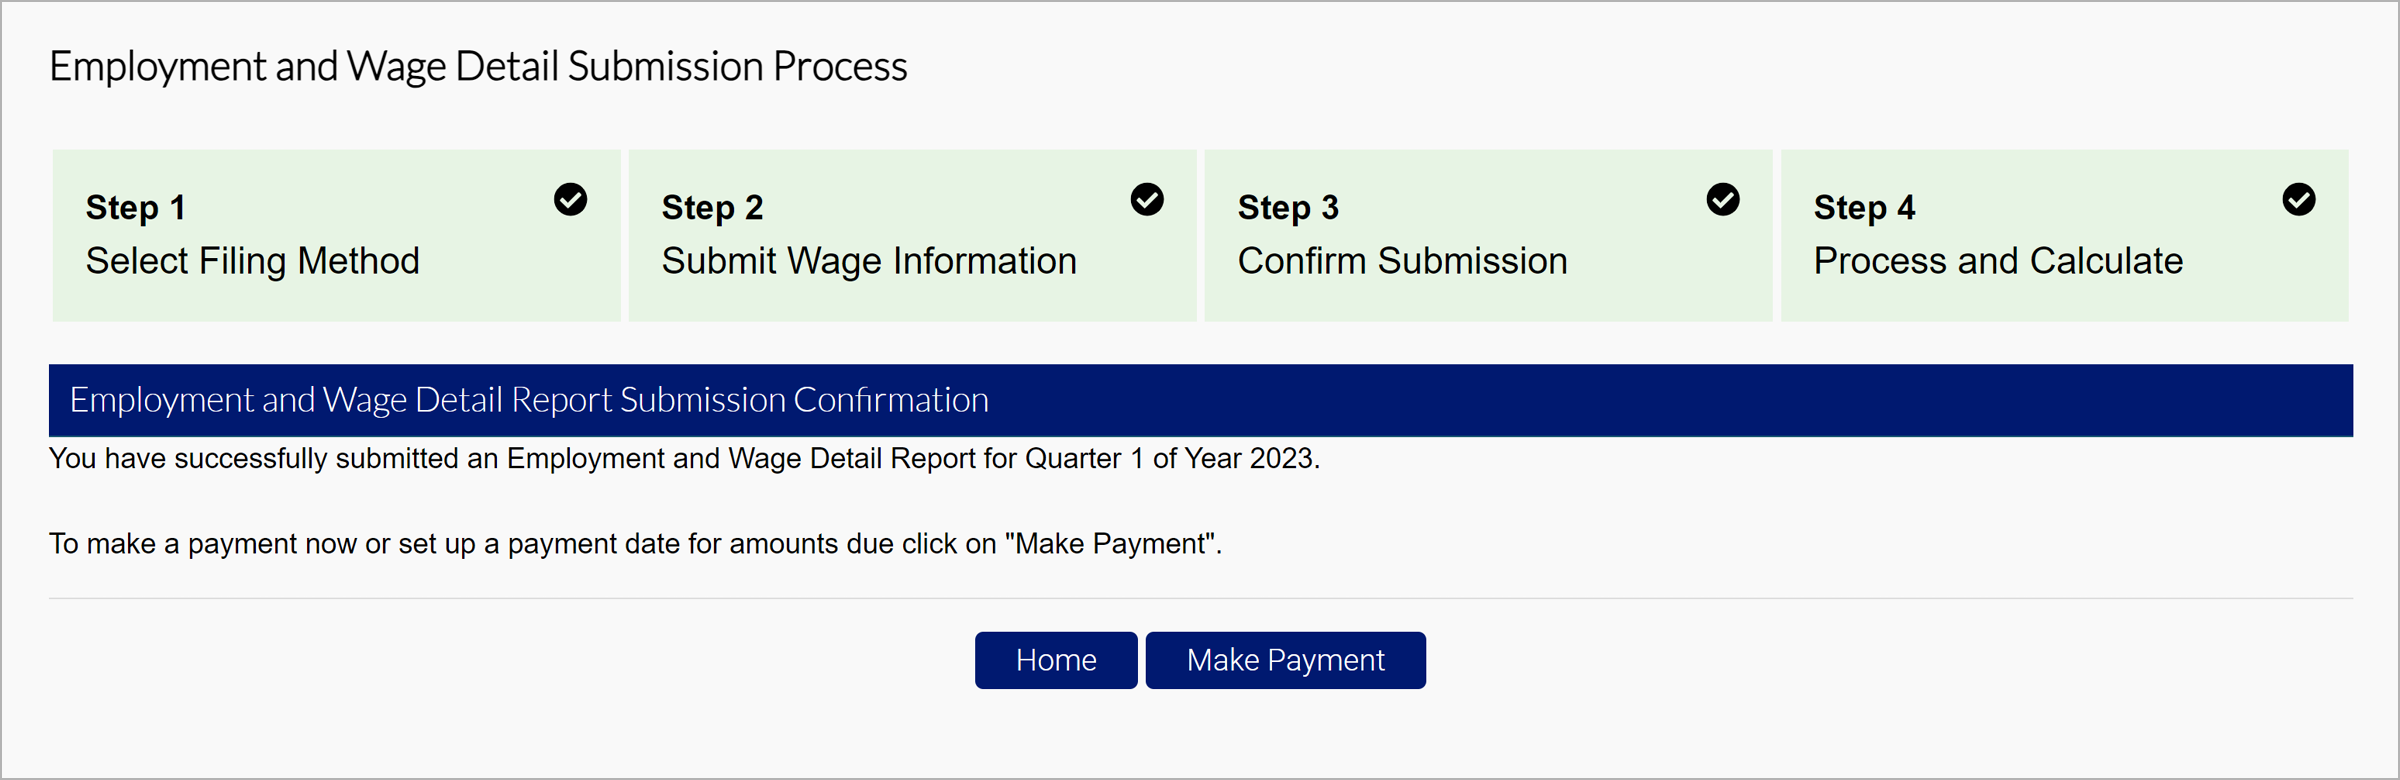
A confirmation screen will confirm the submission.
- Click "Home" to return to the Employer Home page.
- Click "Make Payment" to continue to the premium payment screens.
2.2 File Upload
There are four eligible file types to upload:
- Delimited format - .txt or .csv file that can be exported from Excel. The length of this file will vary and be accepted up to 20MB. Review the Delimited Specifications sheet for more information.
- ICESA format - .txt file in the NASWA standard file format. This will be 277 characters long. Review the ICESA Specification sheet for more information.
- EFW2 format - .txt file formally known as MMREF-SSA. This will be 512 characters long. Review the EFW2 Specification sheet for more information.
- XML format - .xml file that will vary in length and be accepted up to 20MB. Review the XML Specification sheet for more information.
The tooltip over each file type includes an editable PDF of the selected file format.
The file specifications for bulk and individual submissions are the same. NOTE: All file types should use the EAN format found on Employer accounts in MyUI Employer+ (example: 01234567).

The tooltip over each file type includes a downloadable PDF of the file format sample document.
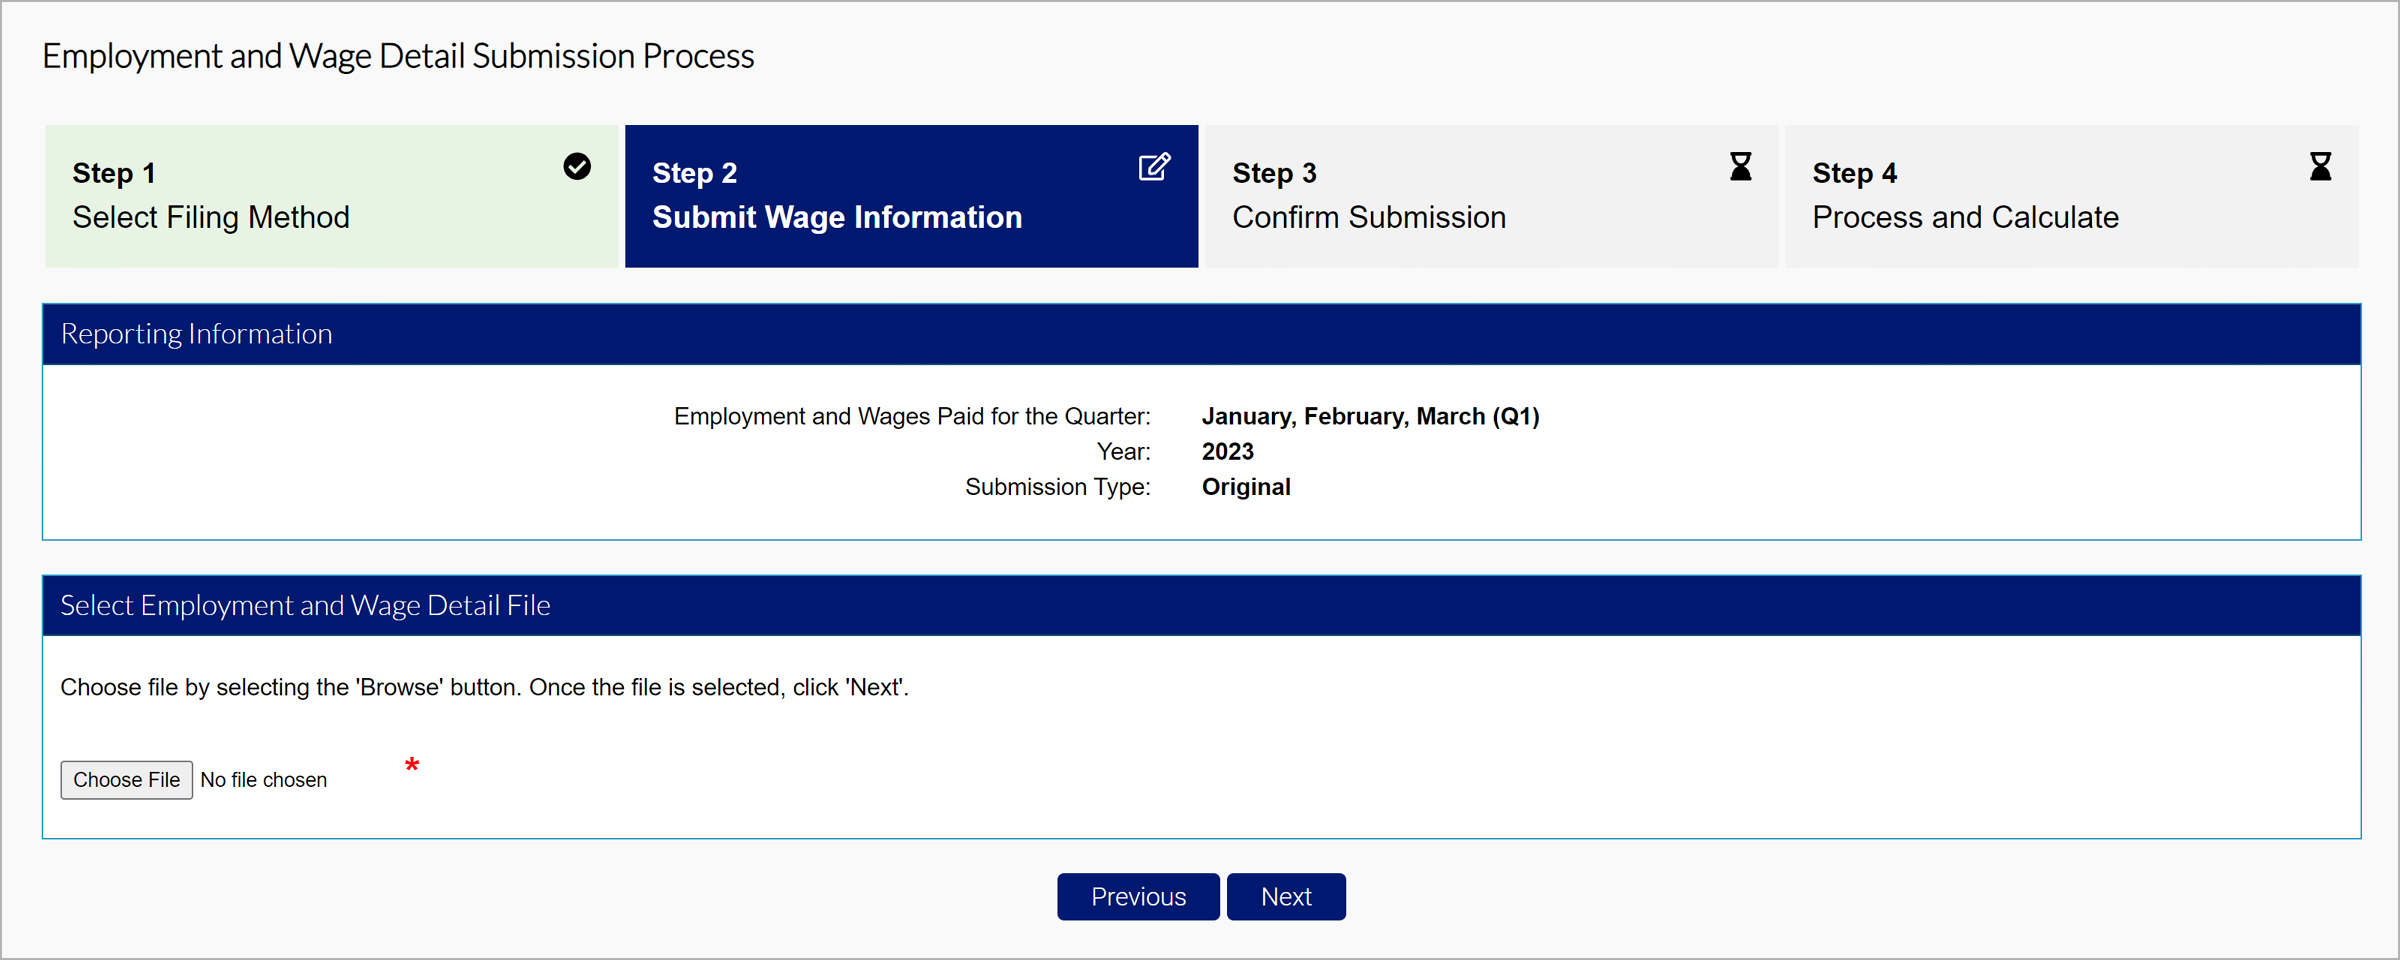
Select the file type you wish to submit, and click “Next”.
Select the file you would like to attach based on the selected format, and click “Next”.
The File Preview section will display any fatal or non-fatal errors, if applicable. Fatal errors must be resolved before the system will accept the submission. The error message will include a description of the error and what needs to be corrected, if applicable. More details on fatal and non-fatal errors can be found in each file specification PDF.
The File Error tooltip reads:
- Missing Employer Account Number - If a file is submitted without an employer account number, or an invalid account number, the information for that specific set of records will not be accepted. All sub-records (units and wages) will be rejected. If not corrected, the employer will be subject to the late report penalty, the late payment penalty, and interest on the late contribution amount unpaid.
- Missing Unit Number - Missing or Invalid Reporting Unit Number. Employment and Wages must be assigned to a Reporting Unit. Employee data will be processed and associated with parent or base employer.
- Duplicate SSN - Duplicate SSN within unit will be rejected and not included in calculations.
- Missing Last Name - Missing or Invalid Last Name. Must be Alpha. Error will be produced for each missing record, but if all other data is available, record will be processed. Missing Names may create issues for employee.
- Missing First Name - Missing or Invalid First Name. Must be Alpha. Error will be produced for each missing record, but if all other data is available, record will be processed. Missing Names may create issues for employee.
- Invalid Middle Initial - Must be Alpha.
- Missing UI Gross Wages - Missing or Invalid UI Gross Wages must include at least a "0" and must be a positive numeric value. No commas will be accepted. Decimal for cents will be accepted for the ‘Delimited’ file format only. Records without UI Gross Wages will not (can not) be included for calculations.
- Missing 12th of the Month Employment Data - Missing or Invalid 12th of the Month Employment Data. UI requires the reporting of 12th of the Month employment information. The data must be submitted as numeric.
- Quarter/Year Not Open - The quarter/year entered is prior to the employer’s liability date.
- Incorrect File Format - The file submitted is incorrectly formatted based on the selected file type. Please check the format for the file type selected, make corrections, and re-submit the file.
- Invalid Record Length - The file submitted has an invalid record length based on the selected file type. Please check the format for the selected file type, make any corrections, and re-submit the file.
- Invalid Year and Quarter Data - Missing or Invalid Year and Quarter Data. Employer data will not be processed. Re-submit information with appropriate year and quarter data.
If no fatal errors are present in your submission, the first 10 records in the file will appear on the screen.
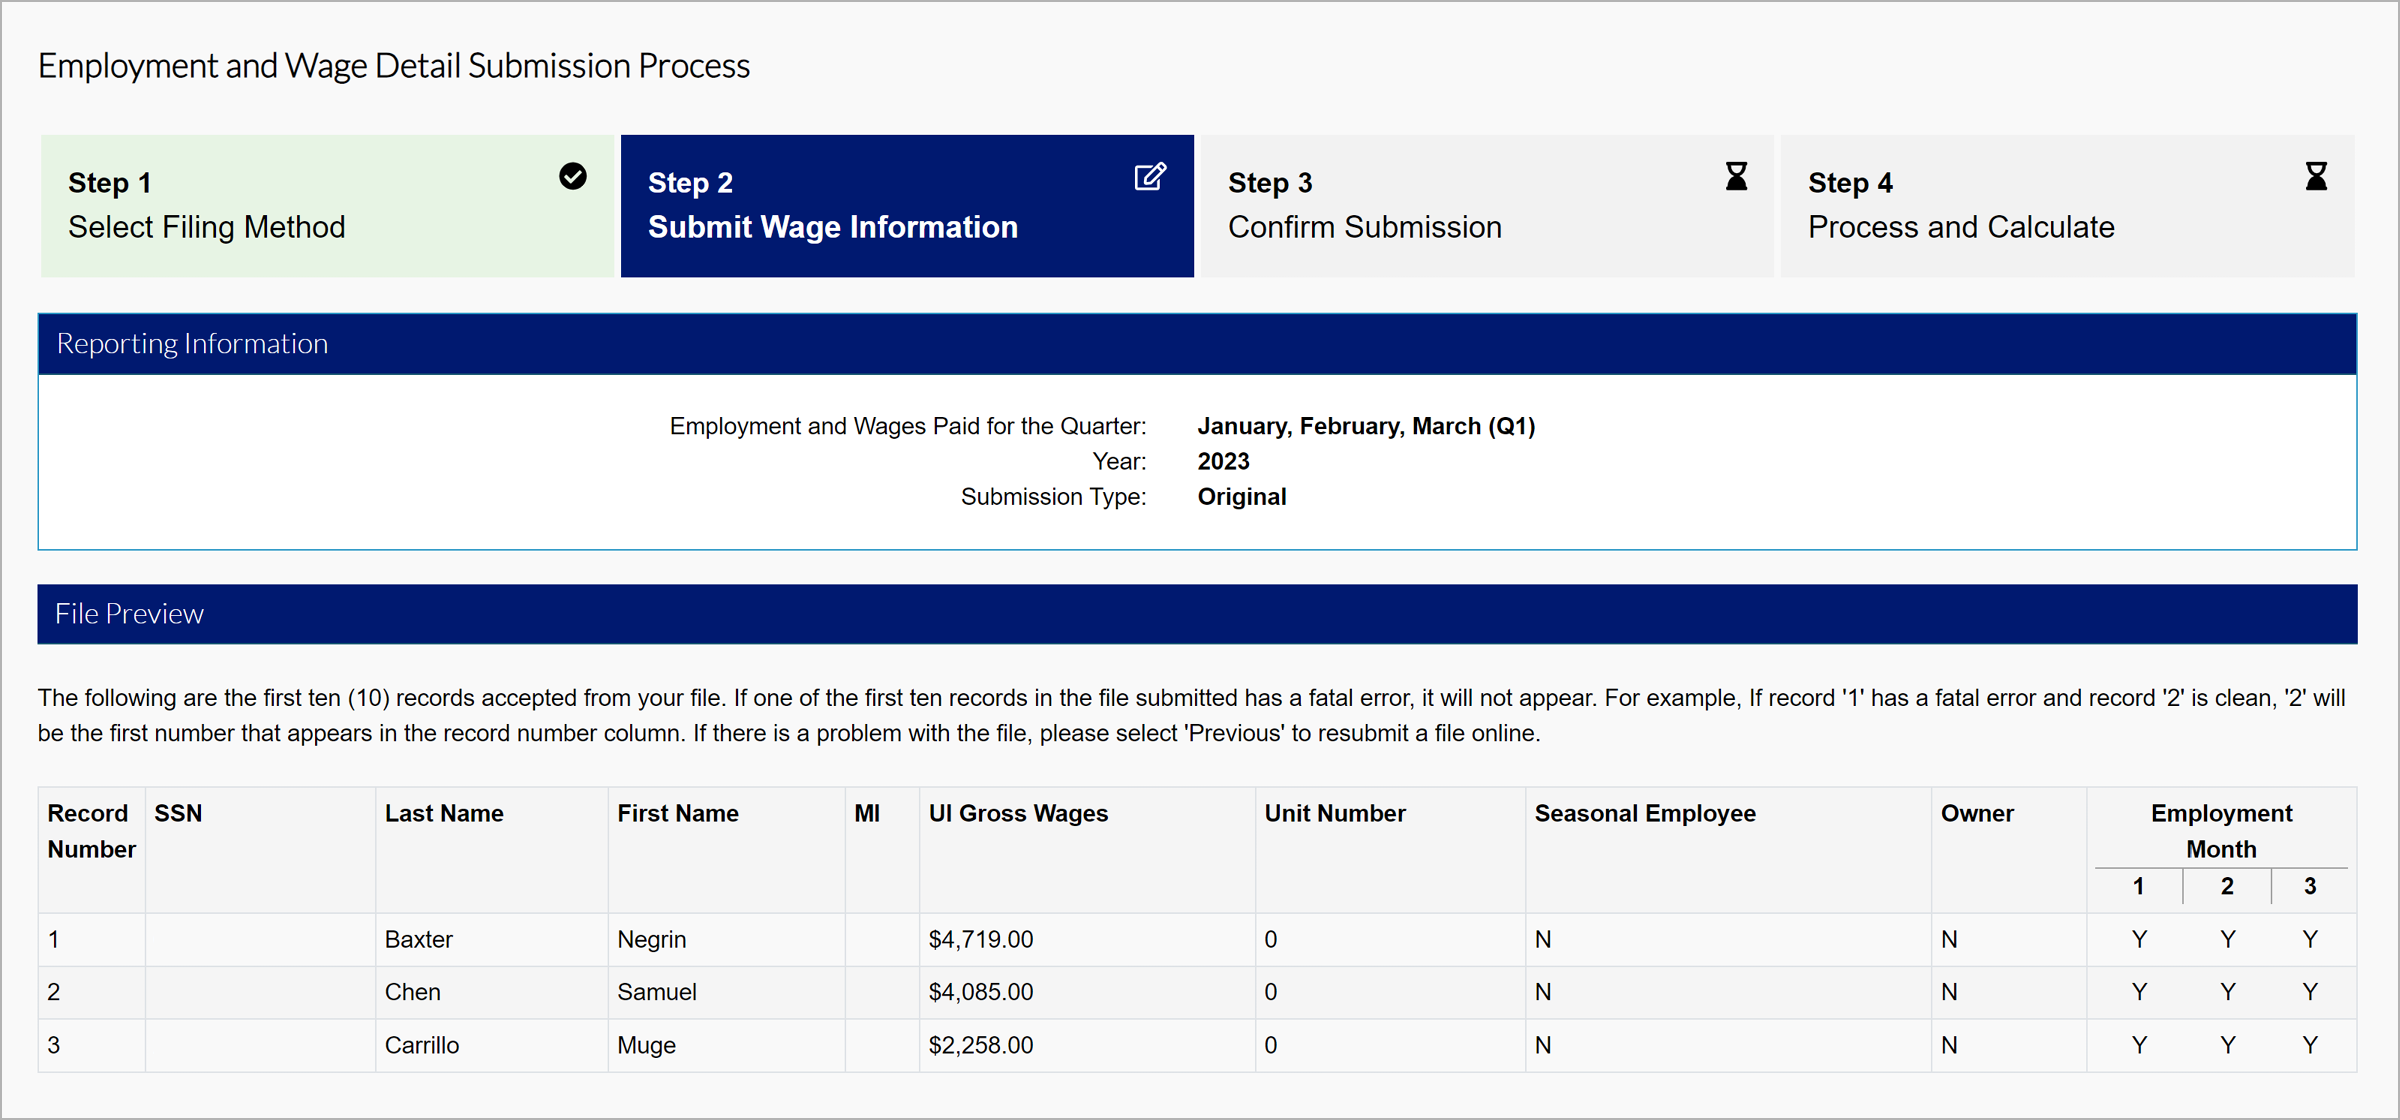
Review your submission details and click “Next” to continue to the Quarterly Calculations screen.
Select the certification checkbox, and click “Submit” to submit your wage report.
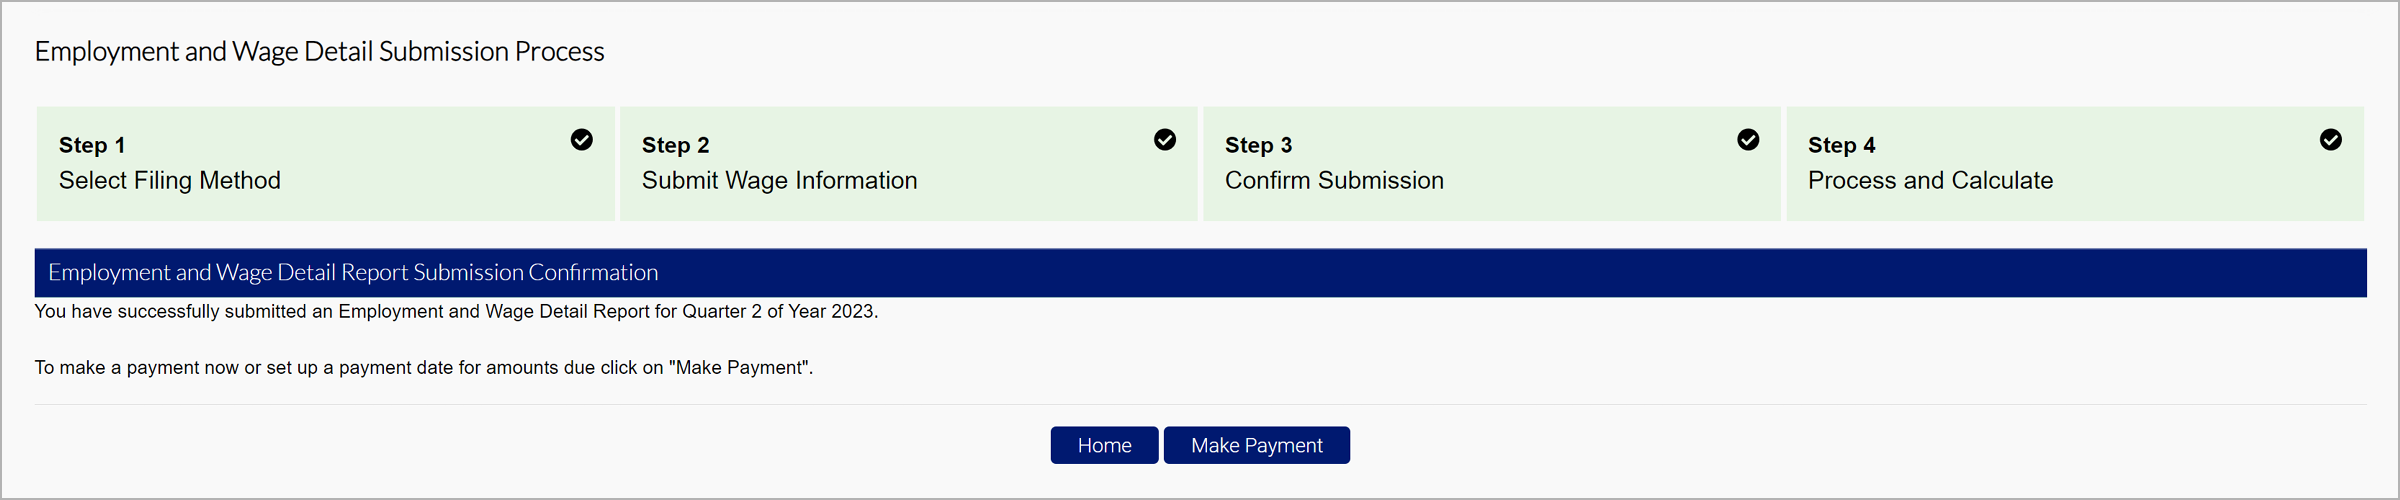
A confirmation screen will confirm the submission.
Click "Home" to return to the Employer Home page.
Click "Make Payment" to continue to the premium payment screens.
2.3 Copy From Previous Quarter
You may copy and modify wage information from a previous quarter.
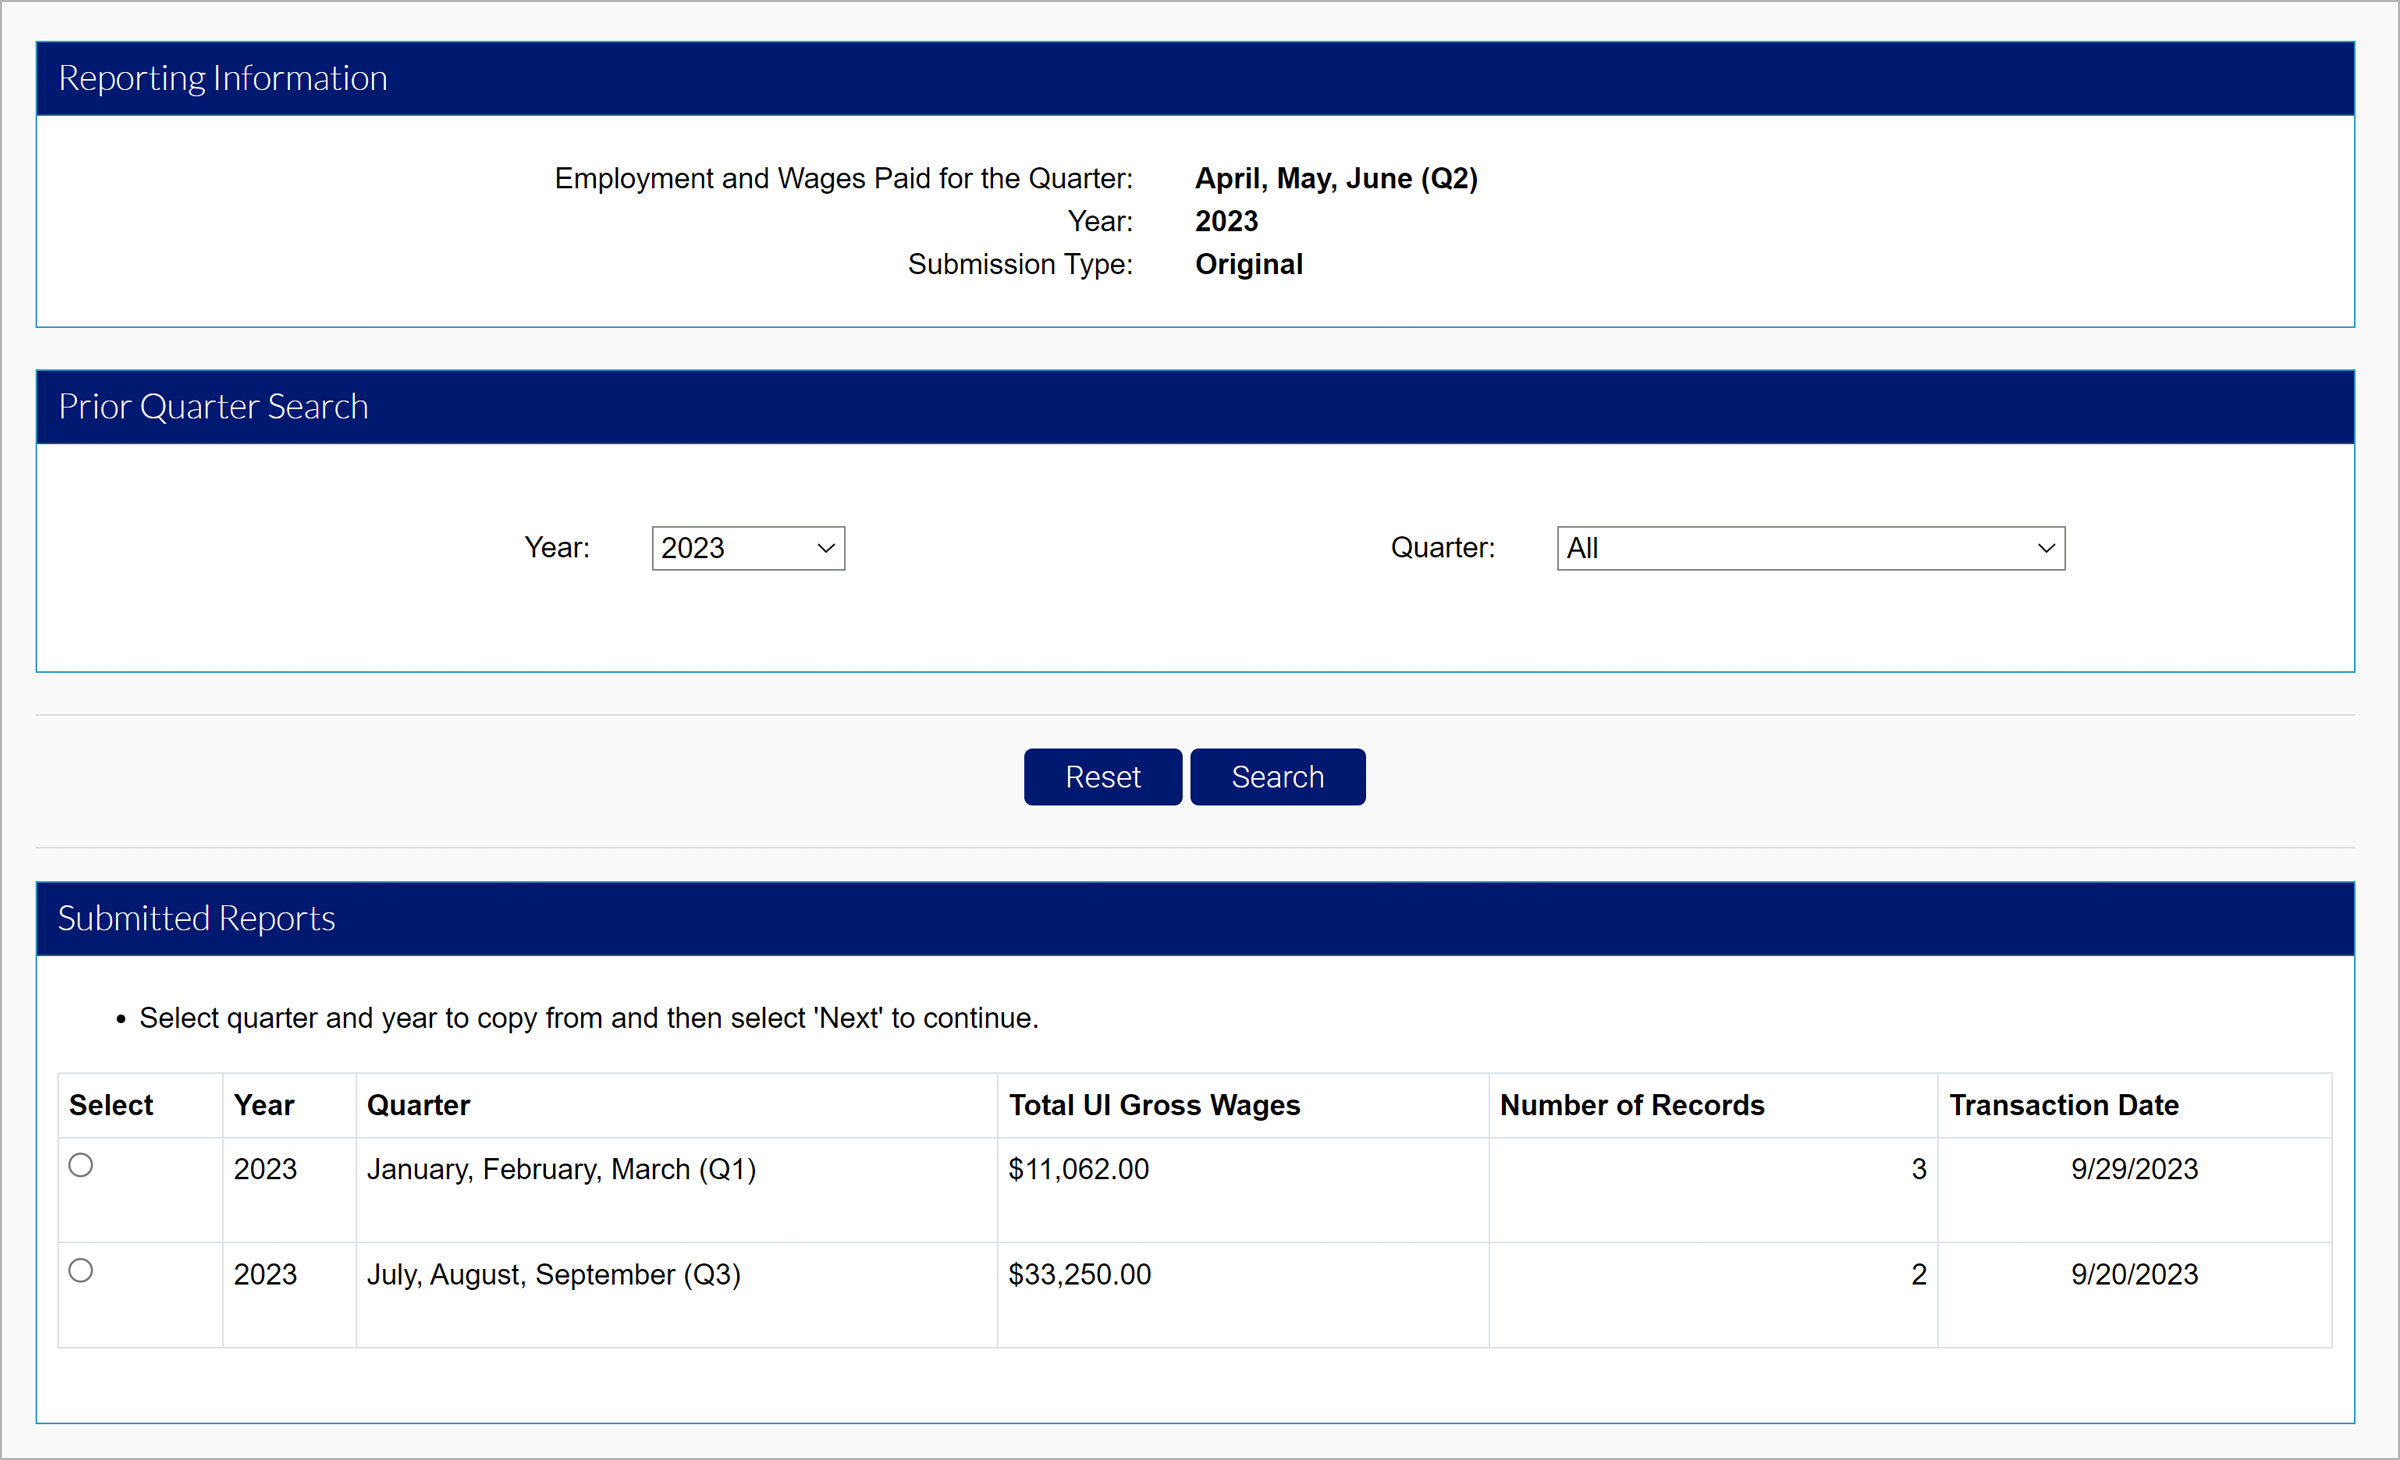
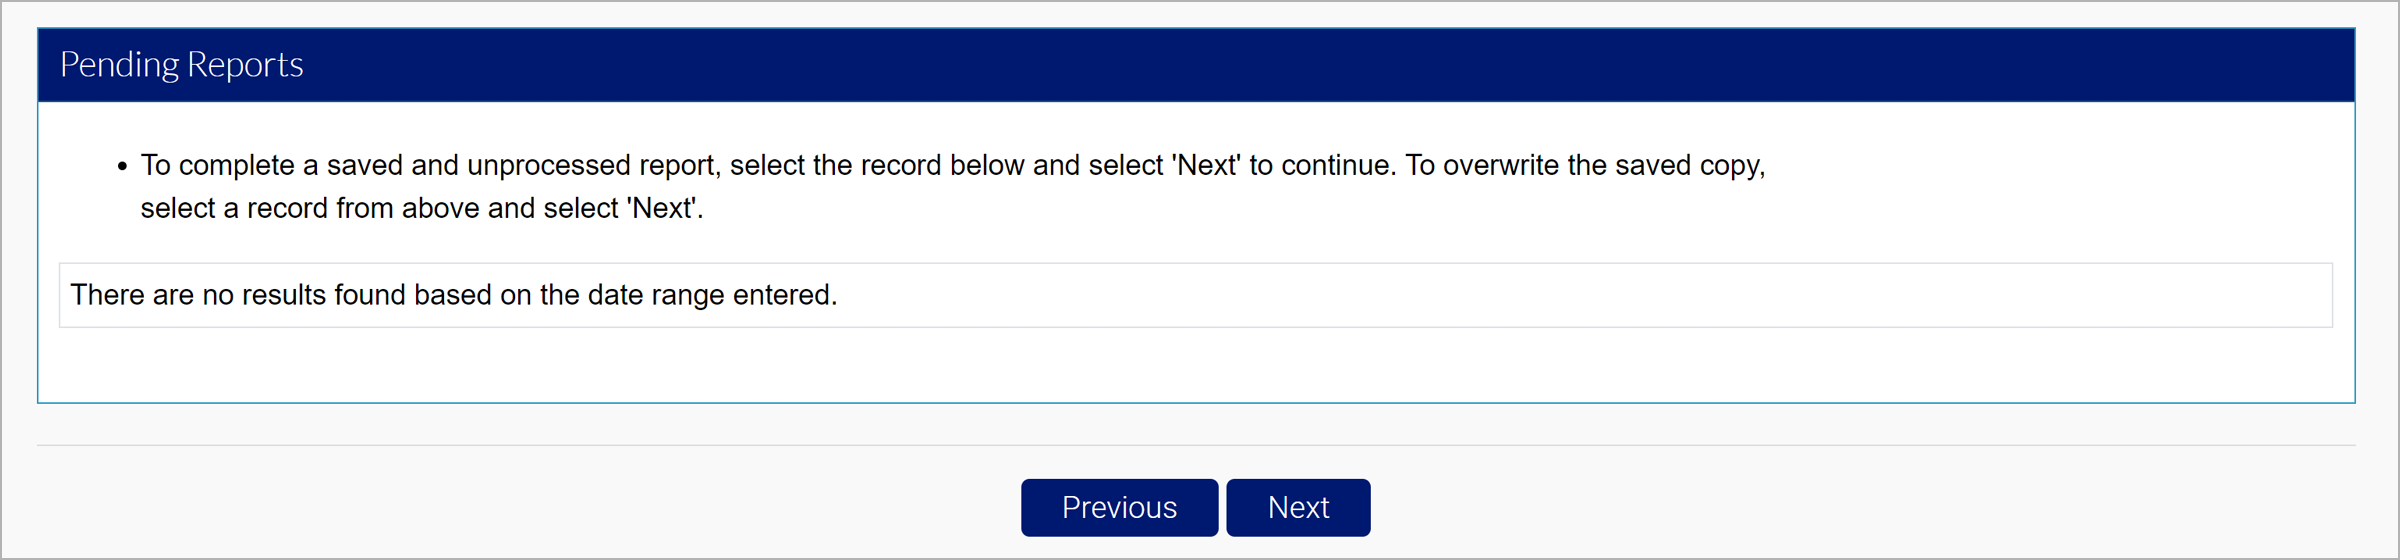
- Select the submitted quarter you want to copy.
- You may search from previous quarter submissions or select from the submitted reports.
- Select the report you want to copy.
- Click “Next”.
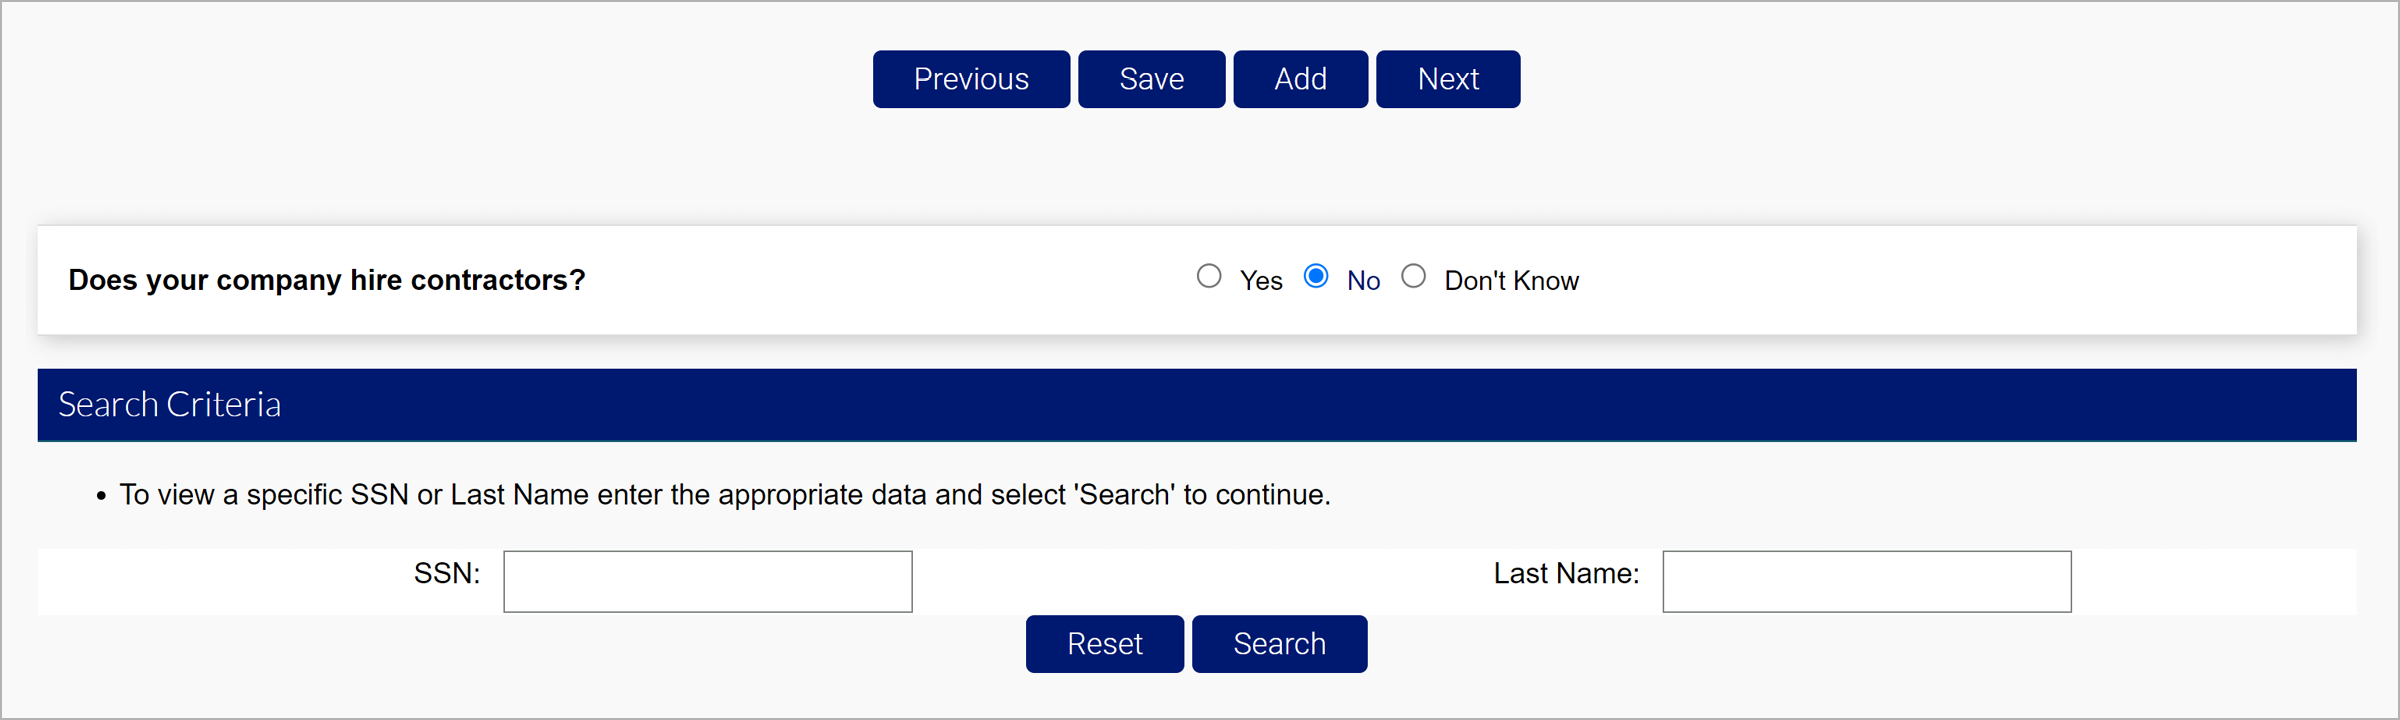
Enter wages, adjust employment months, and add or delete individuals in the Wage Detail Records section.
Click “Save” after your entry, and click “Next” to proceed.
If you would like to search for specific individuals, search by SSN or Last Name at the bottom of the screen.
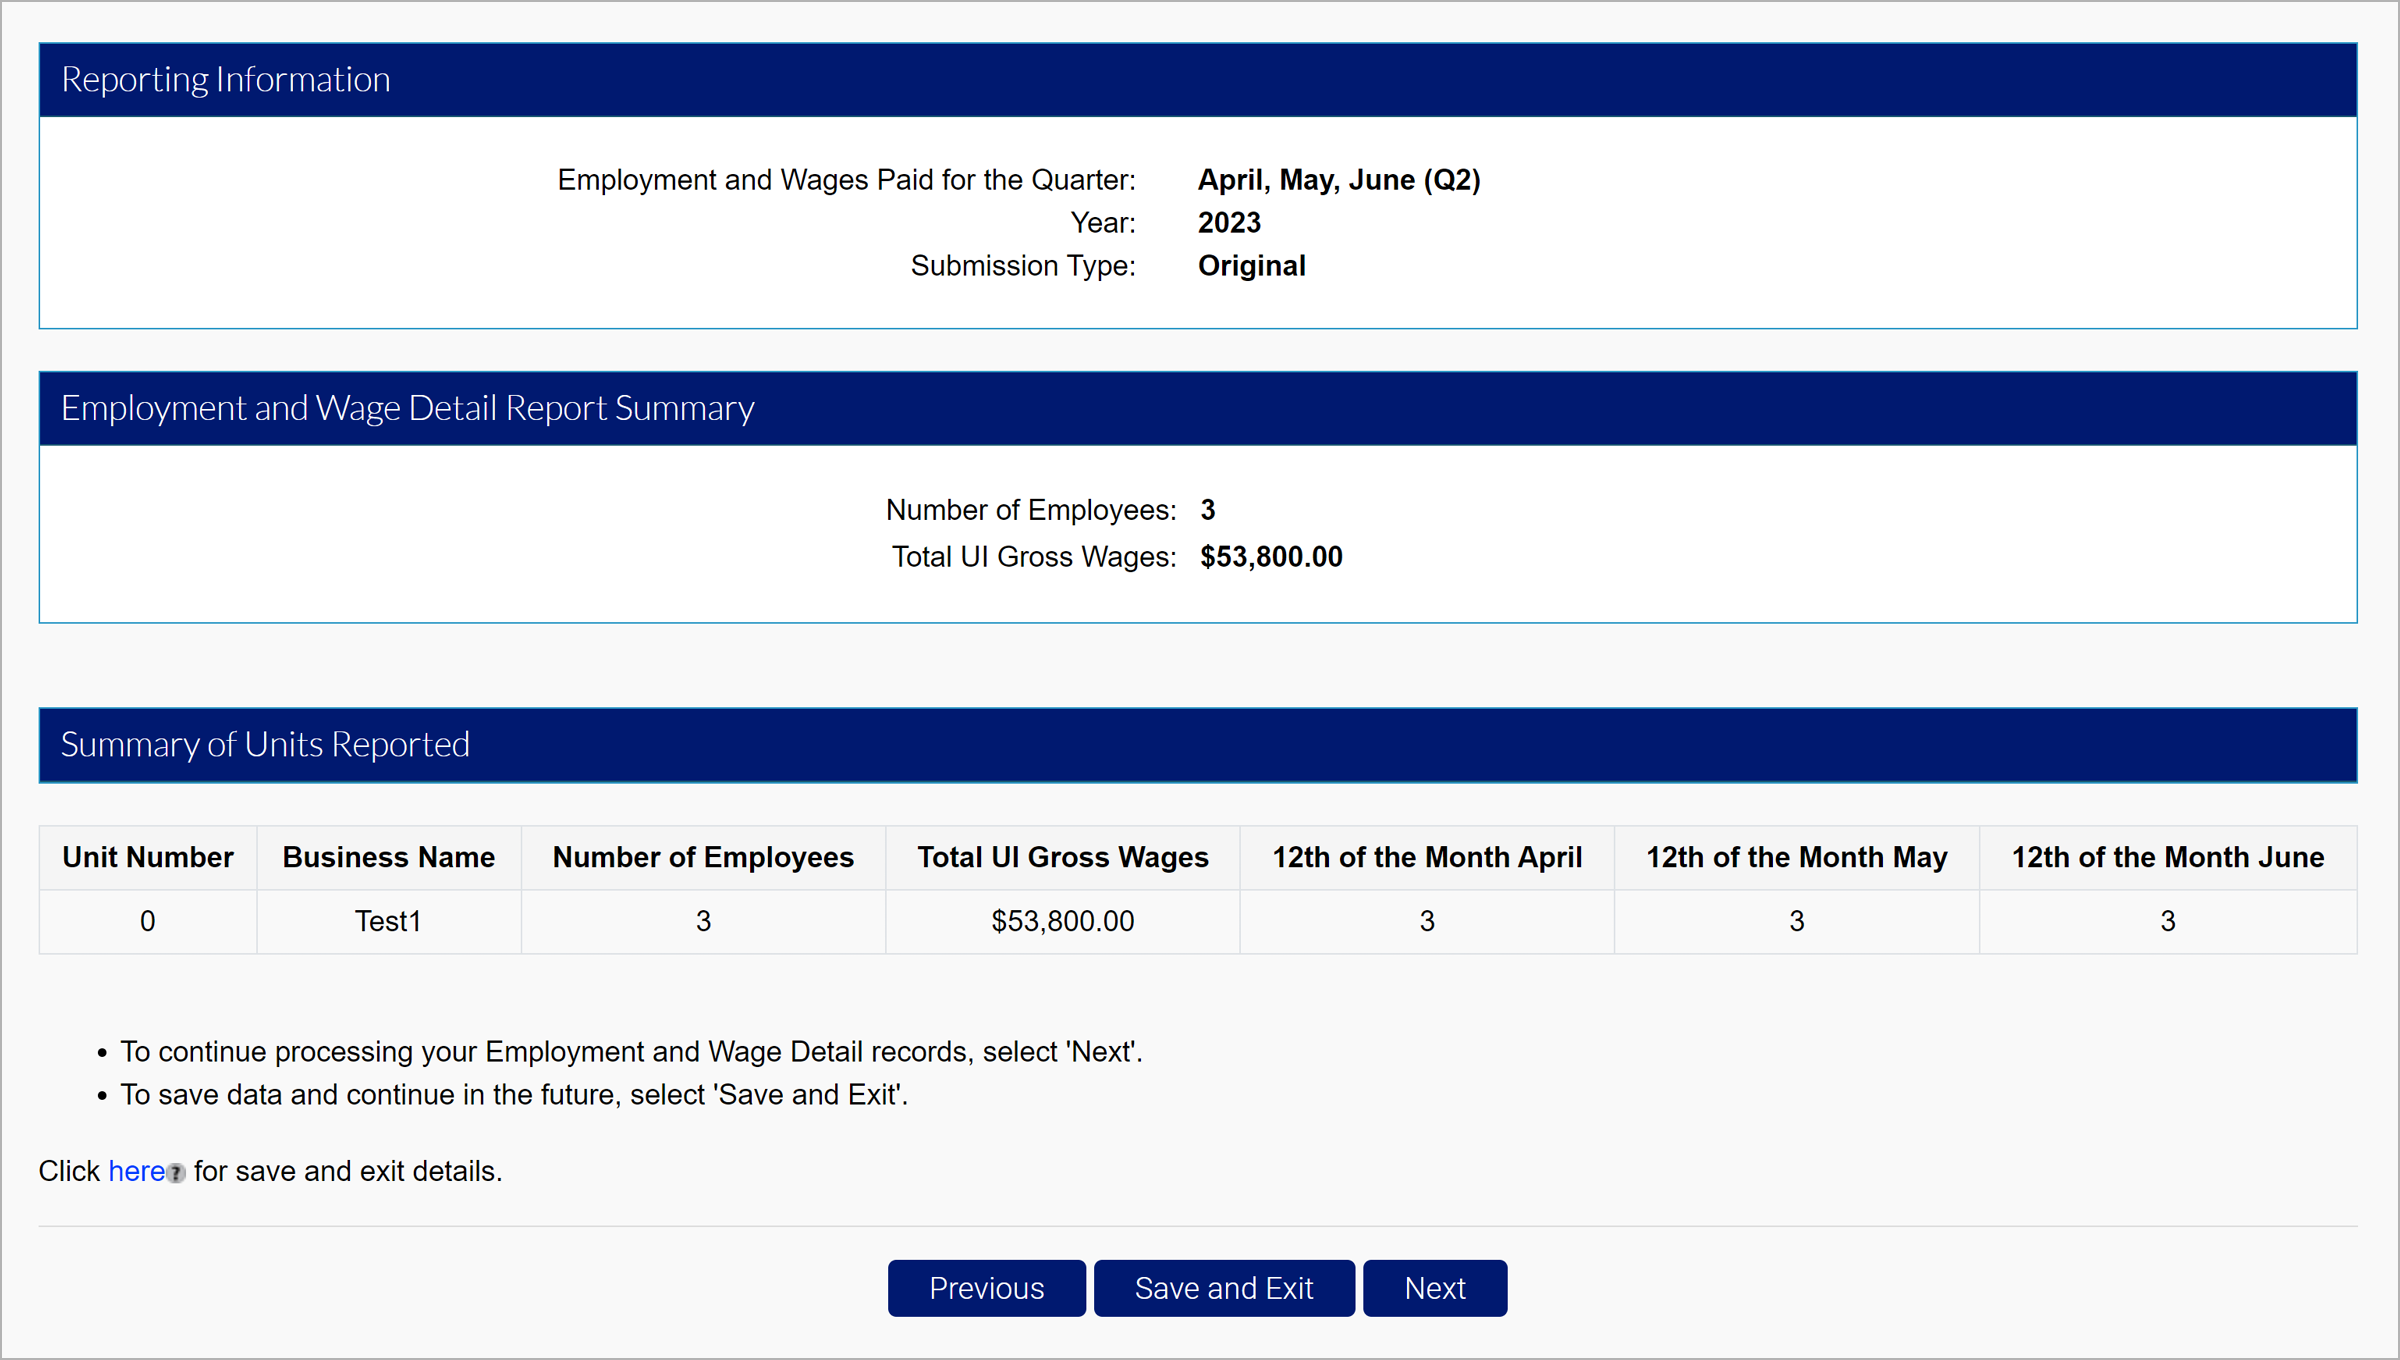
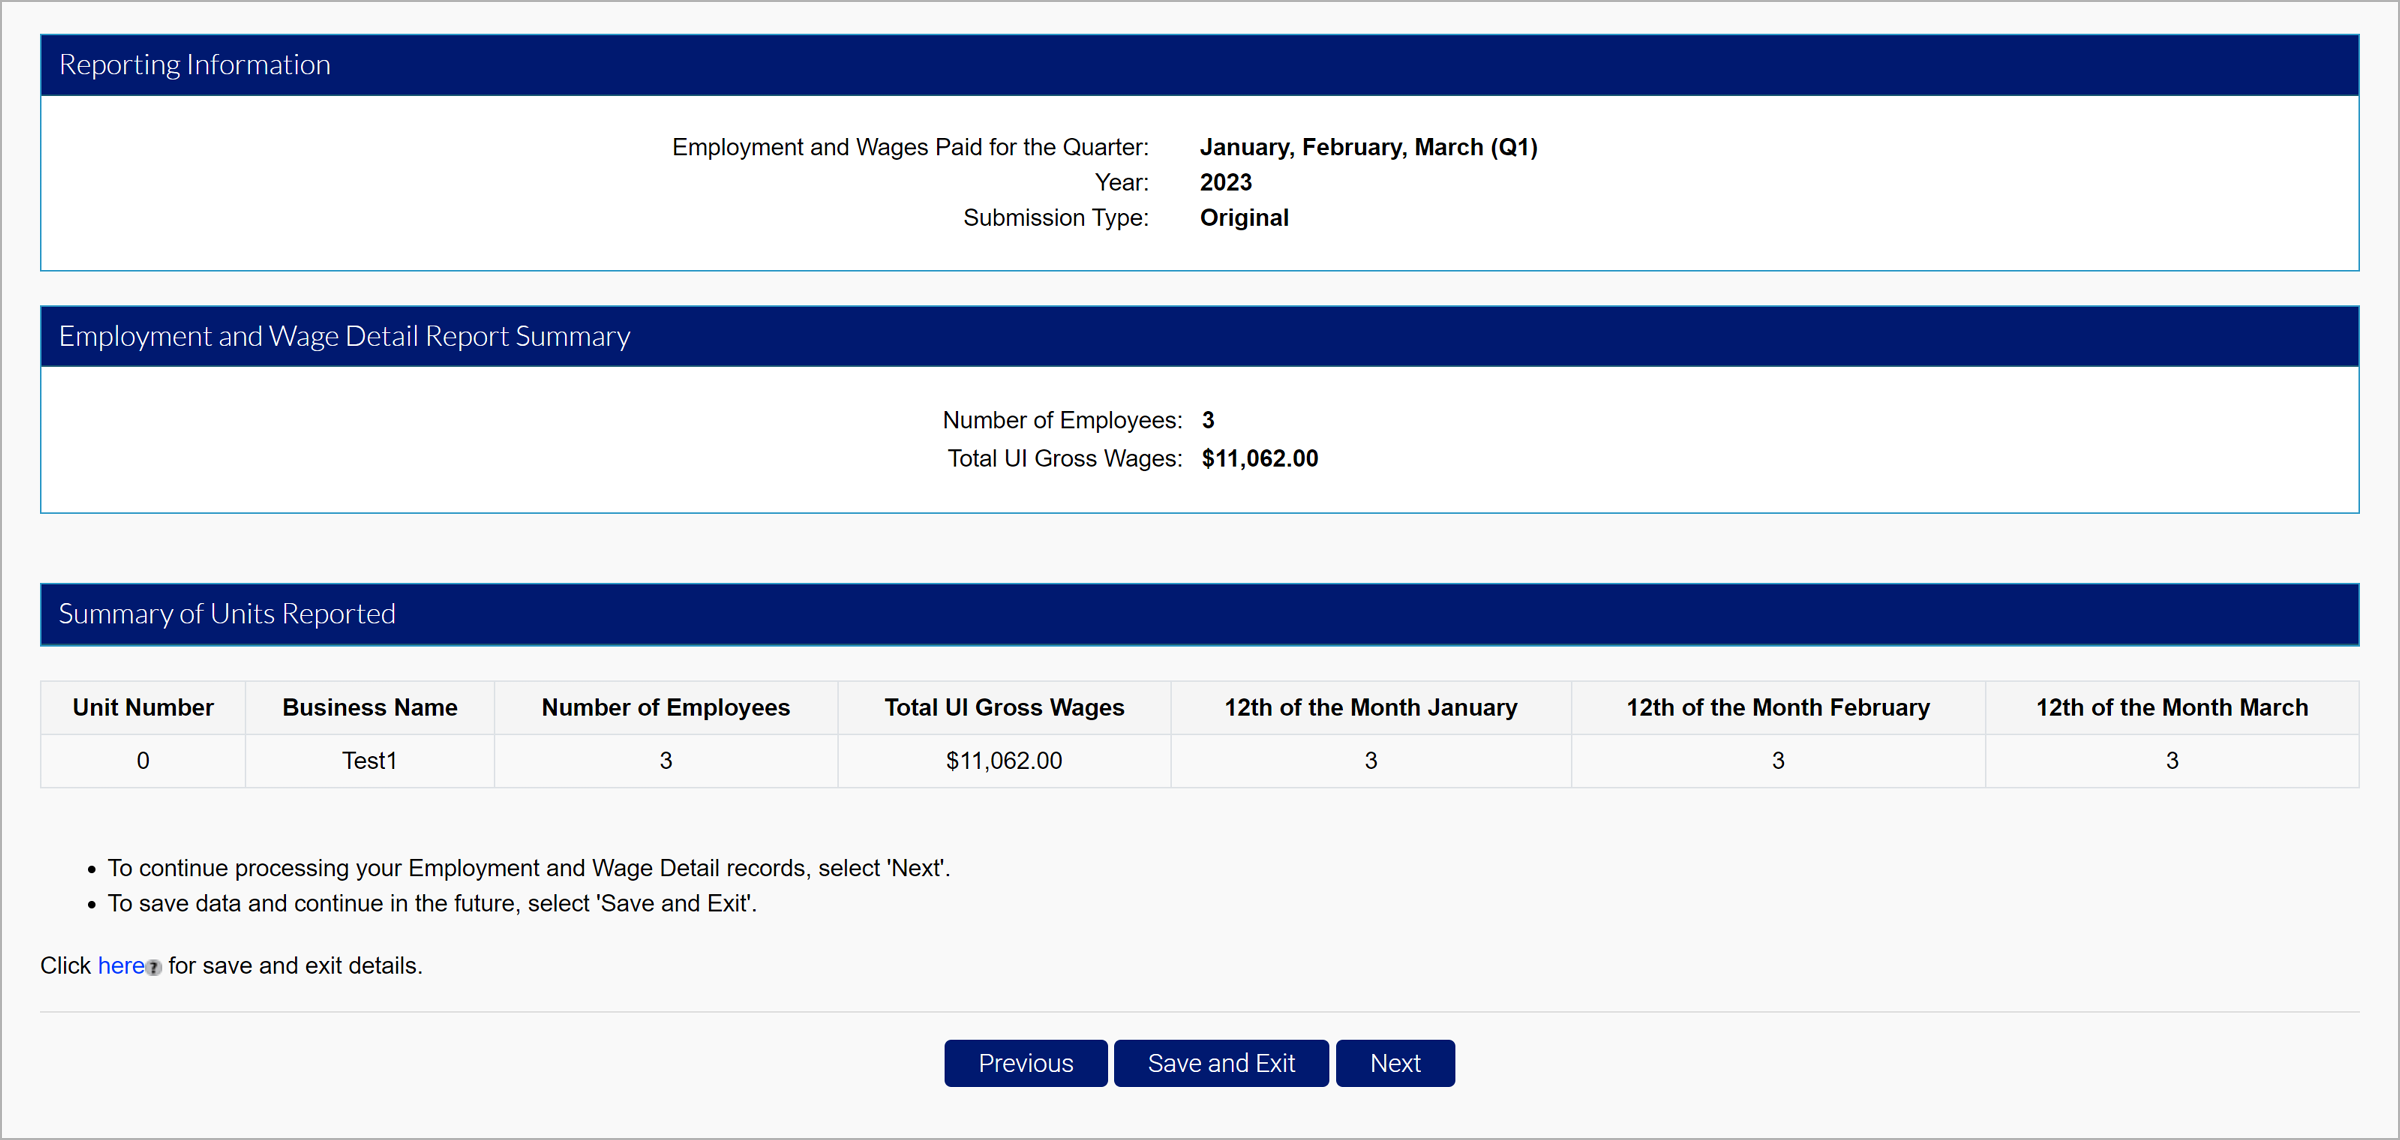
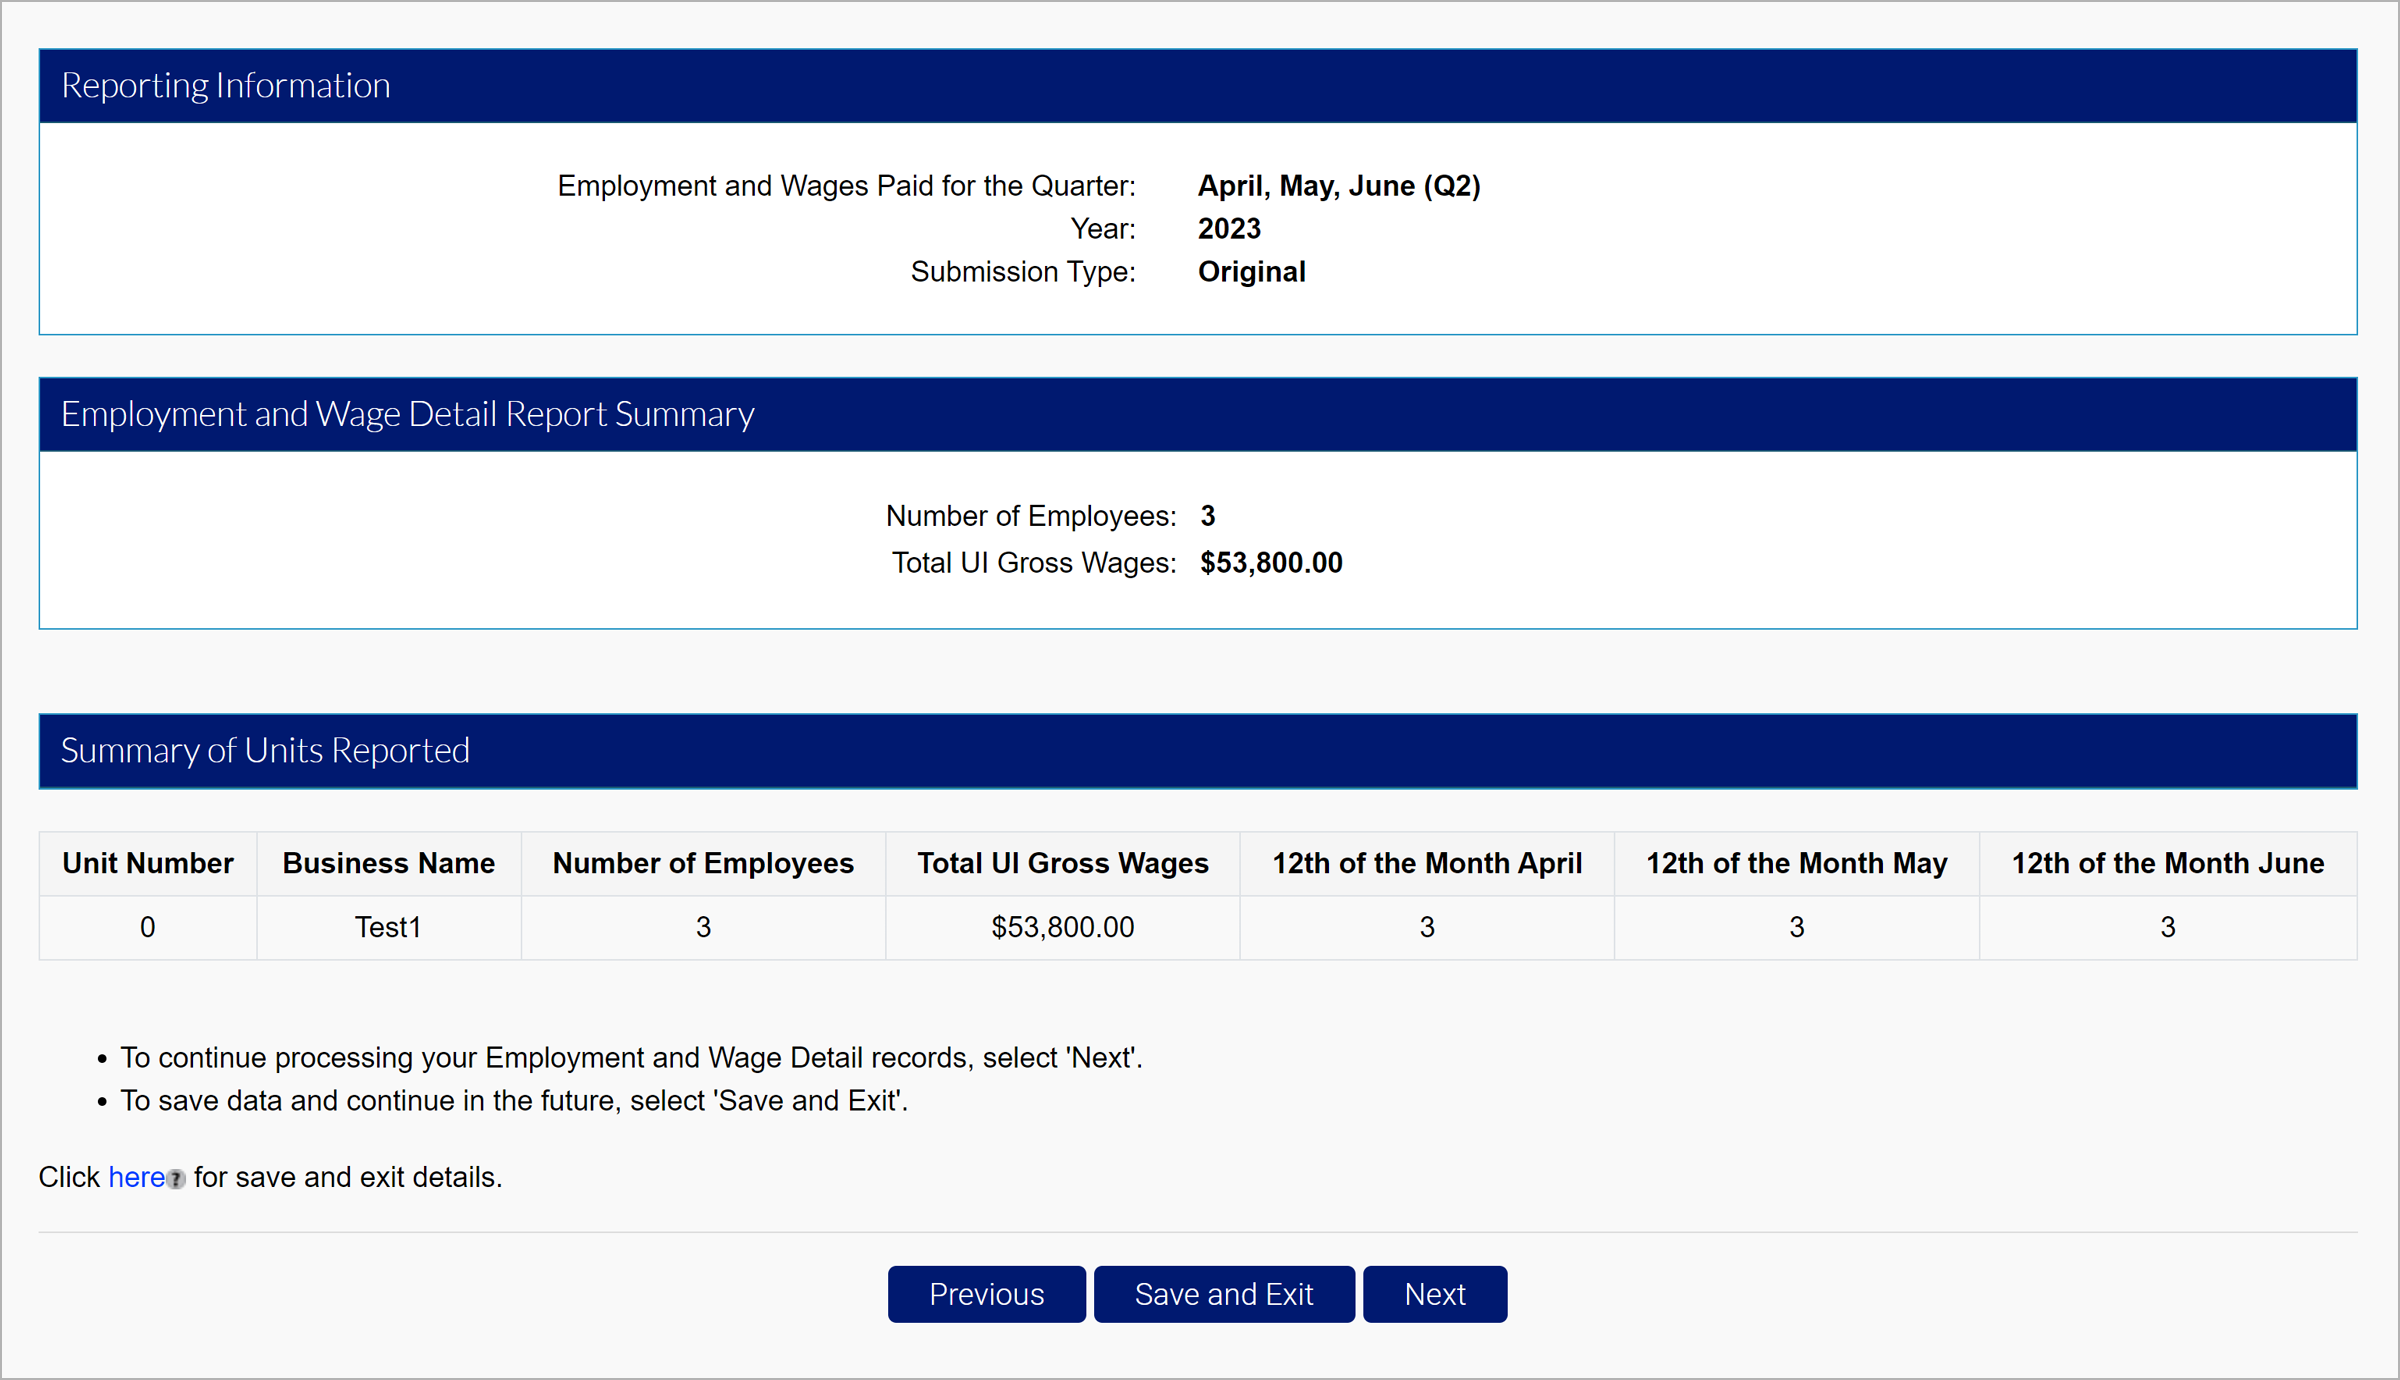
View the report summary, and click “Next” to continue to the Quarterly Calculations screen.
Select the certification checkbox, and click “Submit” to submit your wage report.

A confirmation screen will confirm the submission.
Click "Home" to return to the Employer Home page.
Click "Make Payment" to continue to the premium payment screens.

2.4 No Employment and No Wage Report
If the employer had no employees and paid no wages, submit a No Employment and No Wage report.
Click the "No Employment and No Wage Report" radio button in the Filing Methods screen.
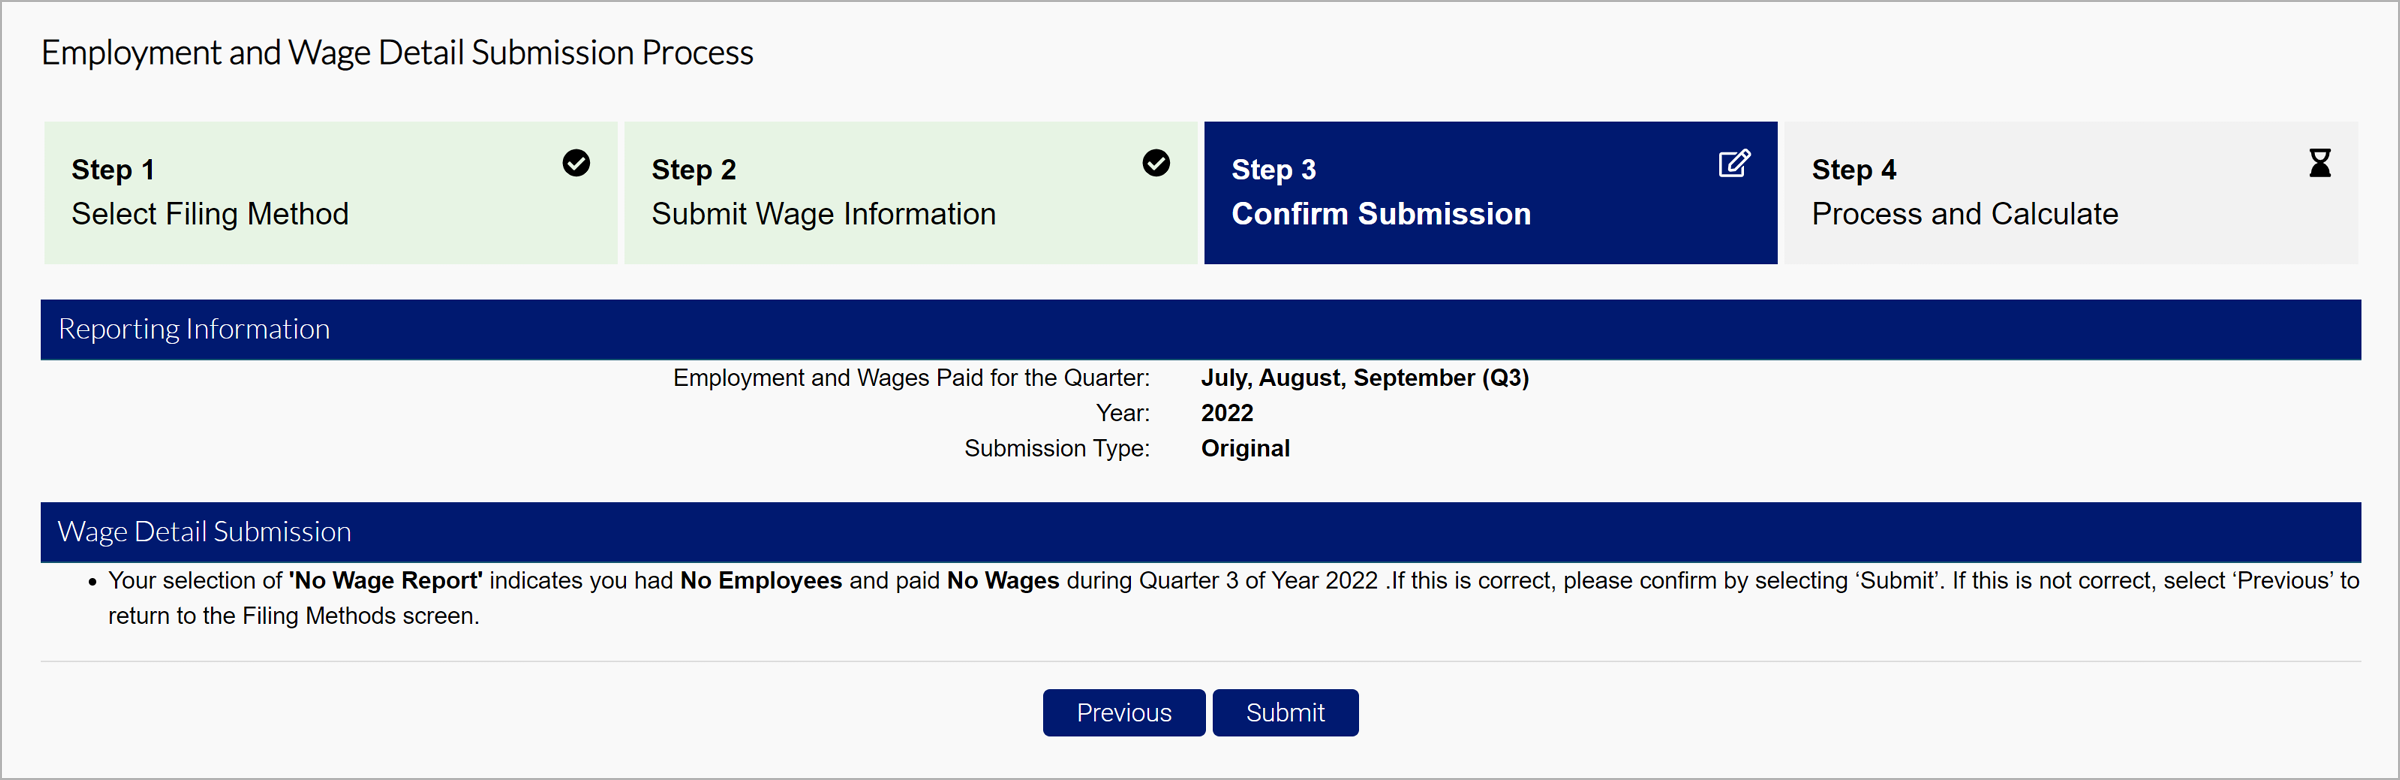
Click ‘Submit’.